Paradox J5

This is my second build and a truly scratch-built bass; I designed everything myself – the shape, the string layout, all dimensions and the complete configuration. I’ve only used a plunge router, a drill (press) and a jigsaw as power tools; the rest is done by hand. This blog is an extensive diary of my adventures as an amateur luthier.

Side dot holes

Not much of an update, but I drilled for the side dots:

I planned to glue them in too tonight, but my tube of CA was toasted, almost empty and what was left came out on all sides but out of the nozzle.

I took my time marking the positions and drilling the holes. It’s hard to line them up perfectly centered on the slightly tapered binding (due to the radius) and if they’re not aligned, it shows rather well . But my patience paid off and I got them lined up pretty nice. The first fret mark isn’t perfect, a bit shallow and a bit wider due to movement of the drill press head when reaching the depth stop, but the rest is just fine. I hope I’m able to camouflage this small imperfection when gluing in the black dots.

Finished fretting

And they’re all in!

Funny thing.. you might remember the neck bent slightly forward (cup) due to the fact that I glued the carbon rods in with very low humidity (~20%) and the fact that the maple expanded when humidity got back to a more average level. Well, after hamering in all frets, the neck bowed back a little, just enough to correct almost all forward bow. The slots weren’t tight at all, and I could’ve used a little more back bow, but all in all it’s as good as it gets I guess; the rest is up to the truss rod.

For my first build I bought a real fret cutter at a guitar parts supplier and paid over 20 dollars for it. They are supposed to cut the frets flush to the fingerboard, like the one from Stew-Mac does. But it didn’t, at all… more than two millimeters of fretwire proudly protruding the fingerboard. So I actually never used it… Yesterday, I bought a tiny end cutting plier from the hardware store, a little over five dollars.. and it’s great! Cuts the fretwire almost flush, leaving so little to file off, I could start using my fret beveling file right away!

Using these pliers it took me no more than a few minutes to cut away all the fret ends on both sides:

Here you can see my fret beveling file ‘in action’. Another relaxing task that doesn’t take long:

I filed the ends right to the point were the binding started to appear:

Here’s a close up showing the result. A little more sanding and filing and I’m ready to start carving a neck

One octave of frets

I finally started fretting today. It’s a nice job that I really enjoy doing.

My cheap modified regular nippers that now serve to undercut fretwire work great:

Hamering some more frets in:

And I stopped after exactly one half of the fingerboard:

So far, so good…!

Fingerboard finish sanding

One enjoyable evening closer to a finished bass: I’ve sanded the fingerboard up to 600 grit. And much to my surprise (still), but the quality sandpaper made this a breeze, really. 600 grit isn’t that high for a fingerboard, but I like the look and feel of real wood while still having a nice smooth surface rather than a plastic-ish shiny ‘wood print’ fingerboard.

The finished fingerboard, ready for fretting:

As you can see the fingerboard shows some mild reflections (look right below the jar):

I am really pleased with the result. The Macassar really stands out and the combination with the white binding and pearl dots makes it stand out even more. Now lets hope I don’t screw up while fretting or shaping the neck, and we should have a very nice bass neck in the end!

Cleaning out the fret slots

As I’ve mentioned earlier, I used a bit too much glue (UHU Allplast) while binding the fingerboard. The excess on top of the fingerboard and on the sides of the neck was easy to remove, but the glue that got into the fret slots seemed to be a much more daunting problem to take care of.

I bought an X-Acto-type knife and spent a little less than three hours scraping and removing excess glue from the fret slots. I first cut the little lumps loose from the sides of the slot and from the binding, removed as much as I could with the tip of the knife and then scraped the slot flush to the original depth using the back of the knife.

I noticed it widens the slots a little locally, but not so much it causes problems, I guess. And a few times the fragile tip of the knife broke (just a tiny piece), but I was able to remove those succesfully.

It’s a slow process, but it didn’t turn out as tedious as I thought it would be. You can clearly see the difference between a slot with excess glue in it and a cleaned out slot:

So, that means I’m ready to finish sand the fingerboard:

I just bought some good quality sandpaper of 180, 240 and 320 grit…. time to start sanding!

Cleaned up the binding

Where was I?

Today, suddenly, I felt like building again… after a bit of a break. One of my mottos is: when you don’t feel like building, don’t. And since ‘perfect’ is my standard, I respect that rule!

Last time I worked on the bass I glued the binding to the fingerboard and neck with UHU Allplast. So today I started with scraping off the excess binding, as close to the fingerboard as I could:

I worked on some details with a sharp knife and switched to sanding with my 20" radiused sanding block using 120 grit sandpaper afterwards:

The excess glue was easier to remove than I thought it would be, so after a few passes I ended up with this:

Lastly, I sanded all edges and transitions with 180 grit, removing any scrape and scratch marks.

And a nice detail shot:

I’m satisfied with the result thus far, although I need to touch up some spots and work it up to some higher grits, but that’s an easy job to do just before I’ll start fretting the neck.

The next, daunting task, is to remove spilled glue from the fret slots. I’ve really made a mess of my clean fret slots, and I’m not sure how I will redress those slots, but I know for sure it’s going to be one of those tasks I dislike…

See you next time!

Gluing the binding

Time to glue the binding on and no longer postpone this task (didn’t actually look forward to that). The glue I used officially has a 5 minute drying time (24 hours to cure completely), but I found out the plastic binding almost immediately melted and tacked to the wood, so it came out to be a very stressful experience. Next to that, I found it very hard to control the amount of glue applied to the joint, resulting in too much excess glue around the binding.

After attaching the binding and securing it with binding tape, I also clamped the neck between to small straight bars, ensuring the binding set in a straight line. It looks a bit overdone, but here’s the assembly while curing:

After a few hours I removed clamps and tape (it isn’t needed anymore for the glue to cure any further and I don’t like to leave tape on the wood any longer than needed), and got this:

The overall result is good, I’m satisfied by the looks of it; but the amount of cleanup needed disappoints me… most fret slots are flooded with glue (varying from a mm to almost a cm inwards). So that’s going to be the next episode (one I hadn’t planned actually).

The part I’m really pleased with is the bend around the fingerboard end. I bent it previously with a simple hair dryer and I used lots of binding tape while gluing to keep the binding fitting tight around the corners. This is the result, where you can also see I need to do a lot of cleanup:

Restoring the fret slot depth

Fulfilled the painstaking task of checking each fret slot on both sides, making sure they’re deep enough and recutting most of them to bring them to the desired depth again, without damaging the already sanded fingerboard.

Now I feel I’m ready to bind the fingerboard and continue sanding afterwards (240 grit and up).

Binding preparations

Tonight I made some good progress again, working on the neck.

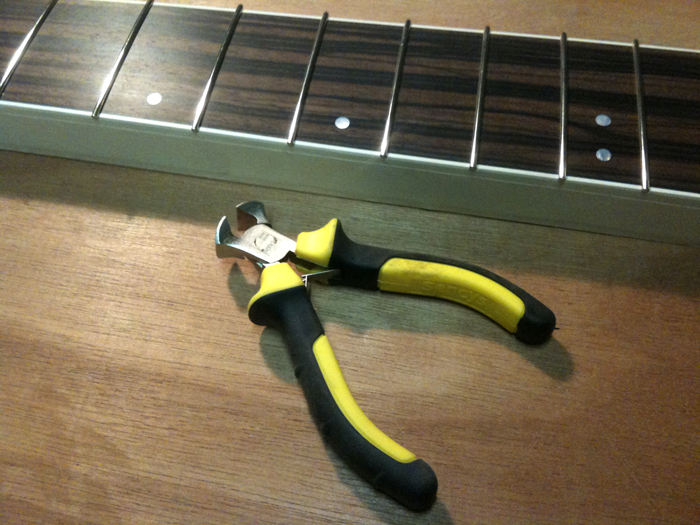
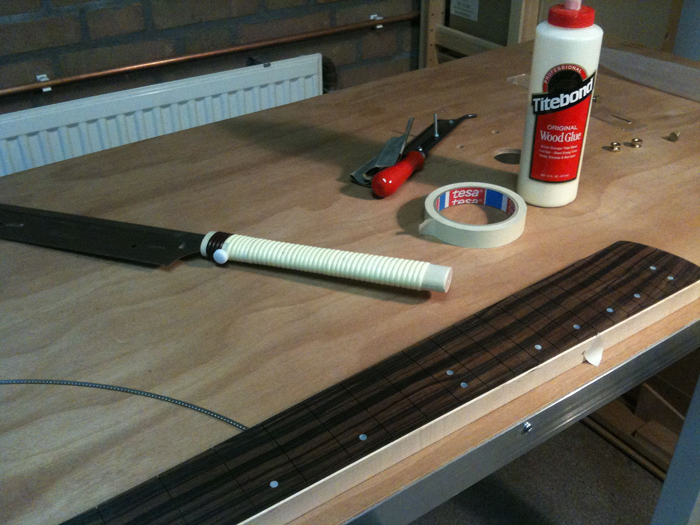
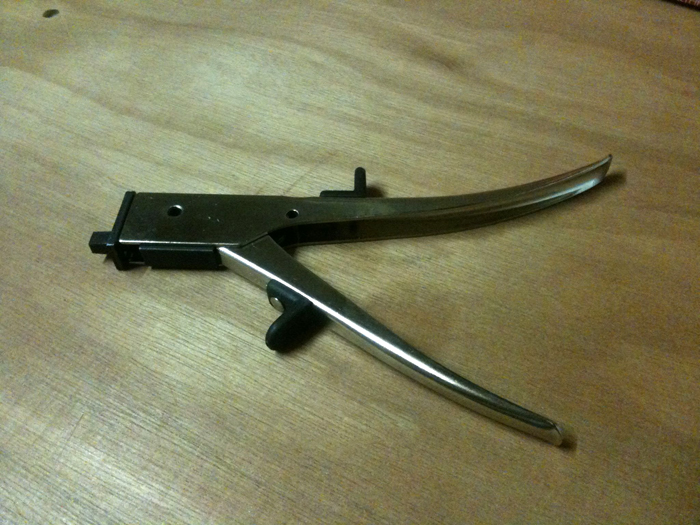
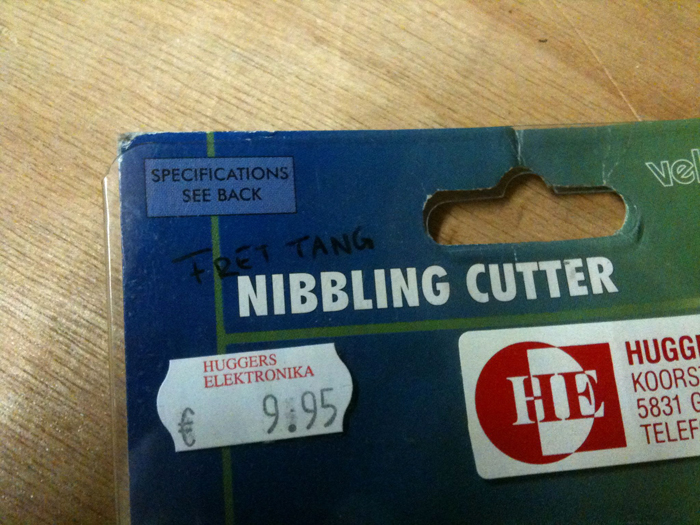
First of all, I need a fret tang nipper because I will bind the fingerboard. I looked at guitar parts shops and found out they’ll cost you over 60 dollars incl. shipping.. that’s ridiculous! So I Googled some more and found a great tip: I bought a regular nibbling cutter at a hardware store for about 10 bugs and modified it.

This is the cutter I’ve bought:

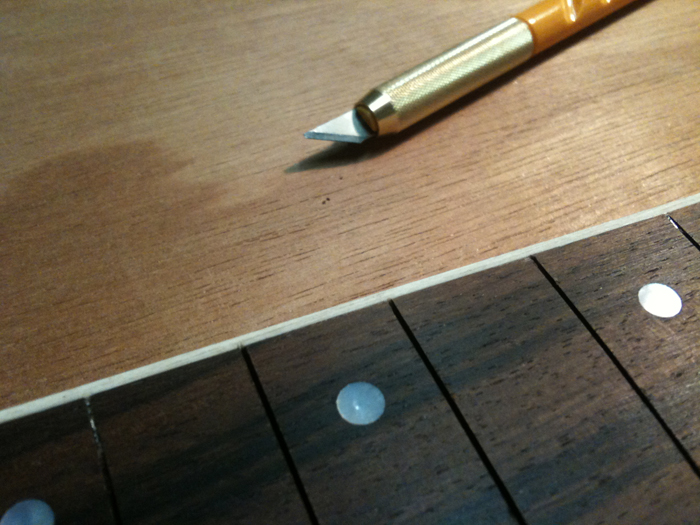
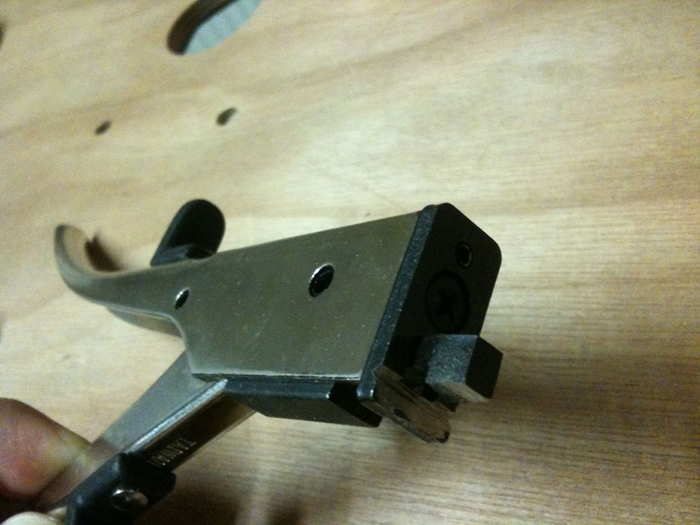
Then, I used my Dremel to grind a notch, or a groove if you like, right beneath the actual cutter, to accomodate half of the fretwire’s crown. It’s a bit hard to see on this picture, but this is what I got:

It’s my first ever metal work and completely freehanded, so not perfect, but it seemed okay. So, I did a test cut and this is the first result it produced:

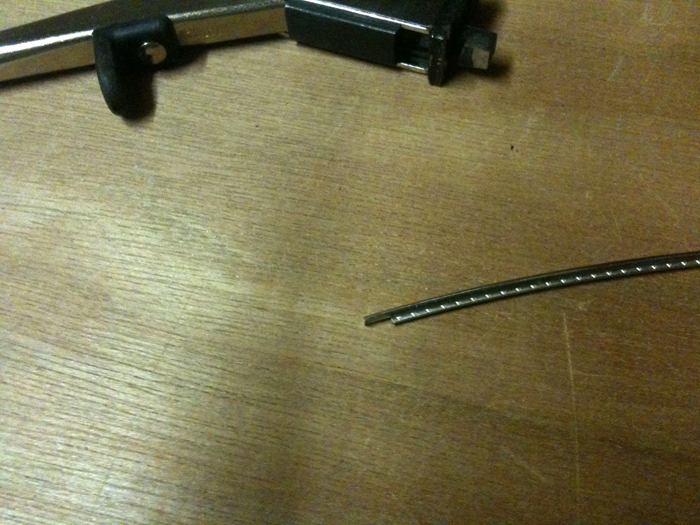
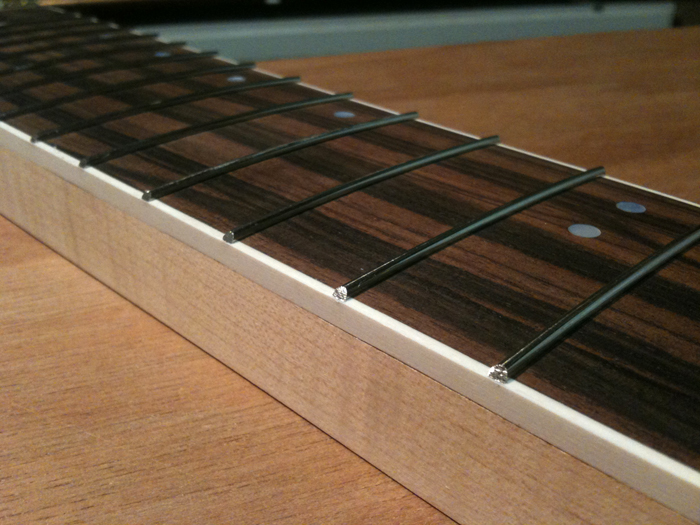
I was amazed by the smoothness of the cut and the fact that it worked right away! There was only one small problem: a scratch at the side of the crown that went in the grinded groove. So I filed the groove smooth, or as smooth as my patience allowed, and made another undercut. This time, it was perfect:

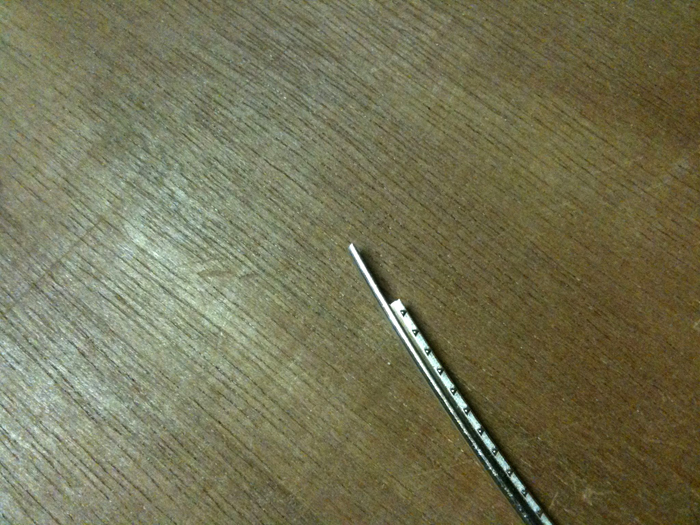
So, time for the final touch:

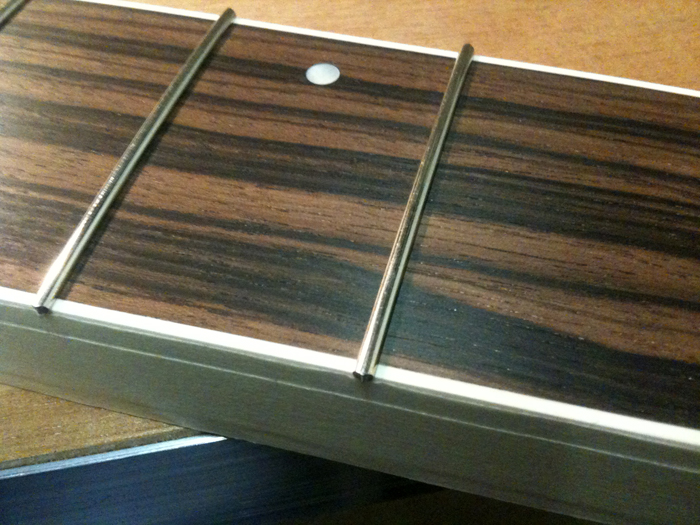
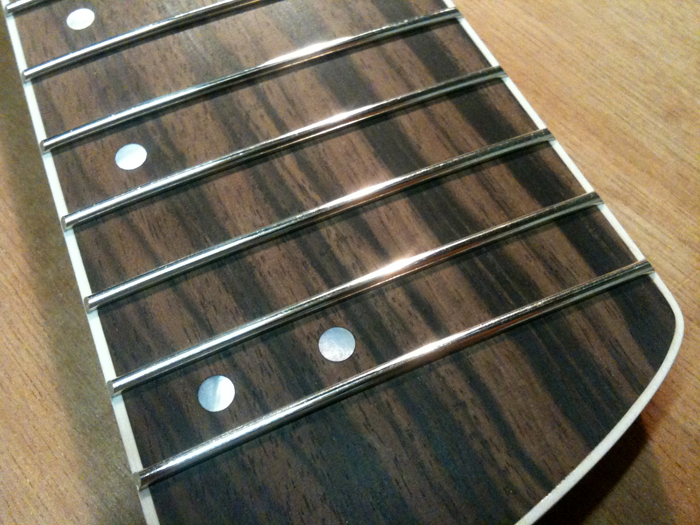
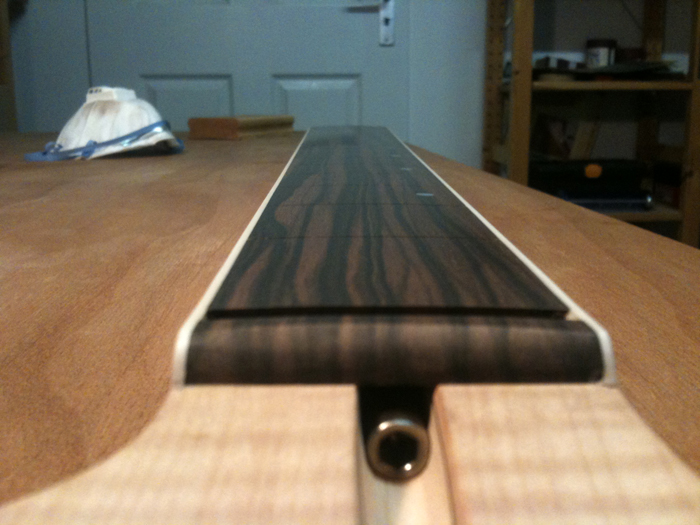
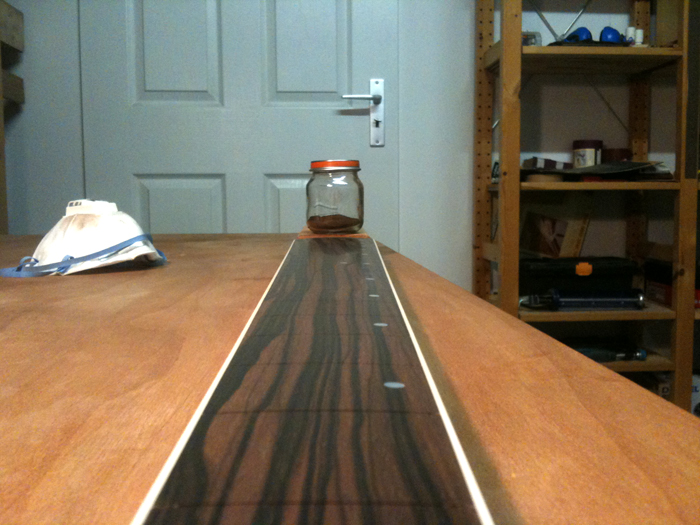
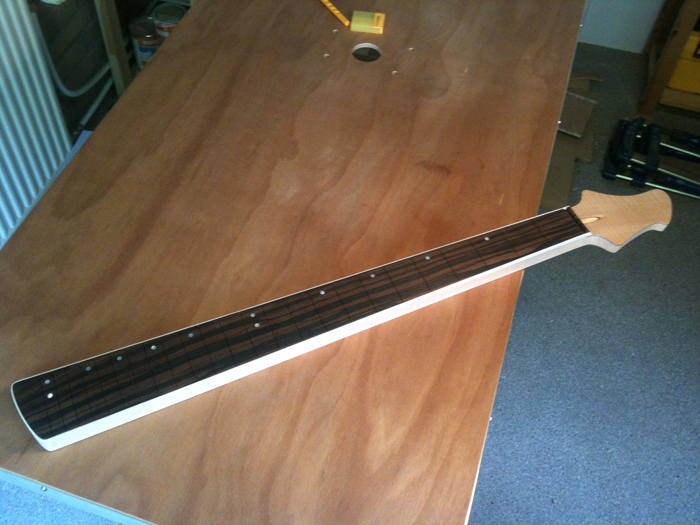
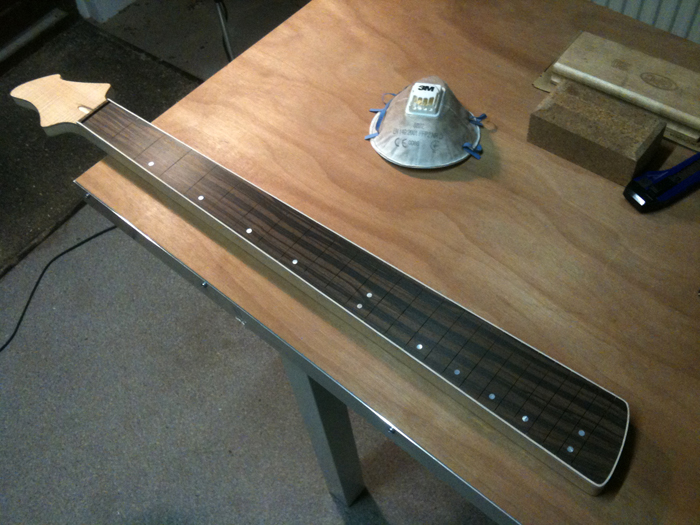
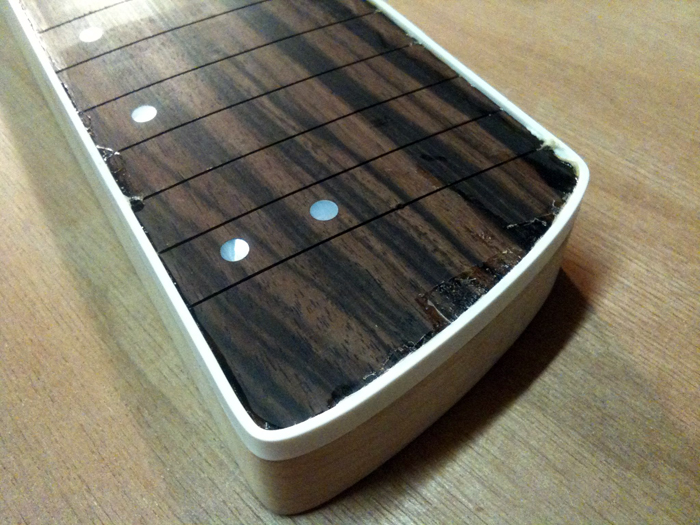
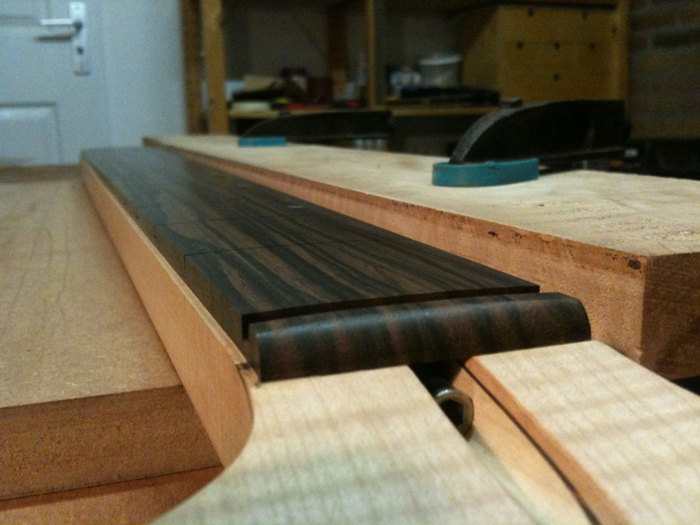
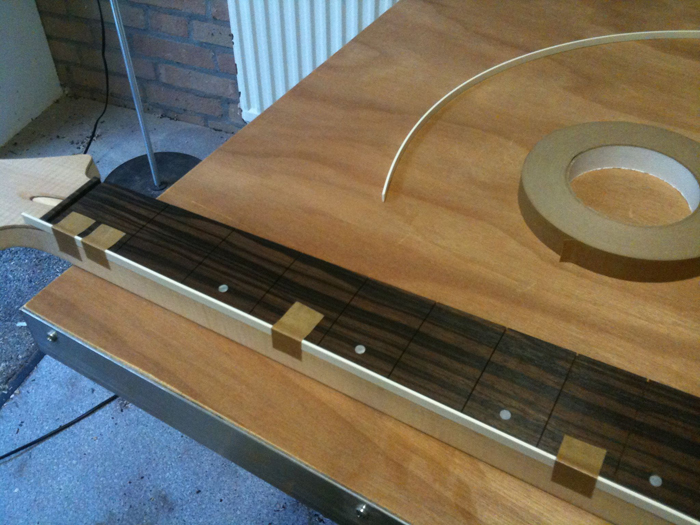
Onto the neck itself again. I decided to do a dry run on the binding. I started with binding tape and some white binding from StewMac, nice stuff! I did not use lots of tape, because it’s only a test:

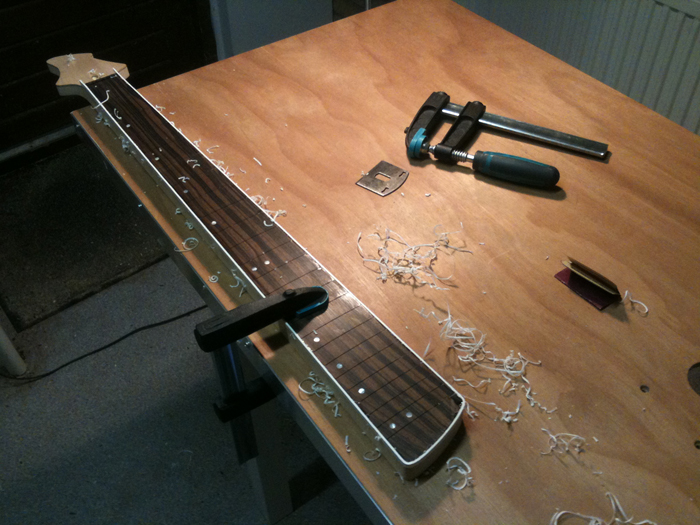
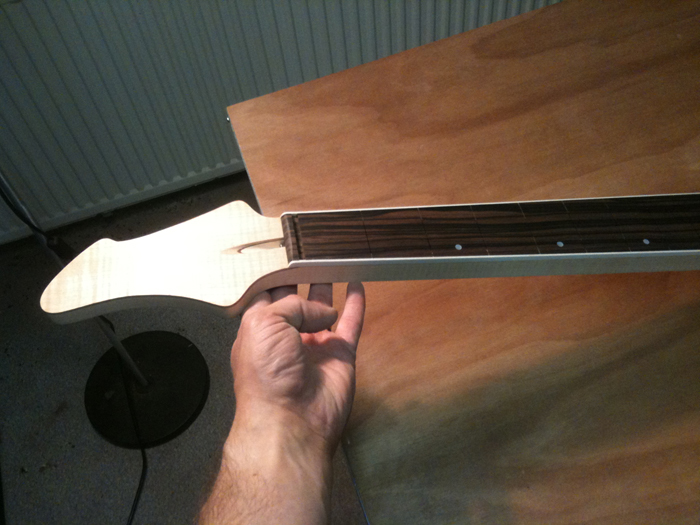
Also, this dry run was meant to shape the corners of the binding around the fingerboard. They’re pretty sharp, but not sharp enough to use separate pieces. I took out my wife’s hair dryer and heated the corners, bending them slowly. Not sure if this makes sense, but it worked for me:

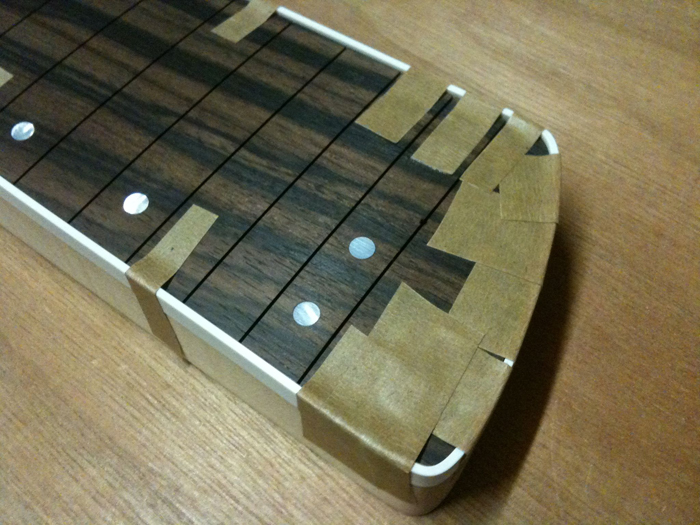
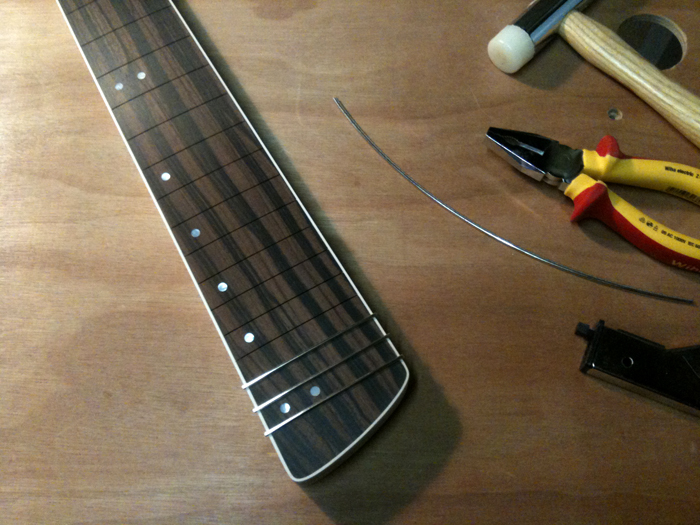
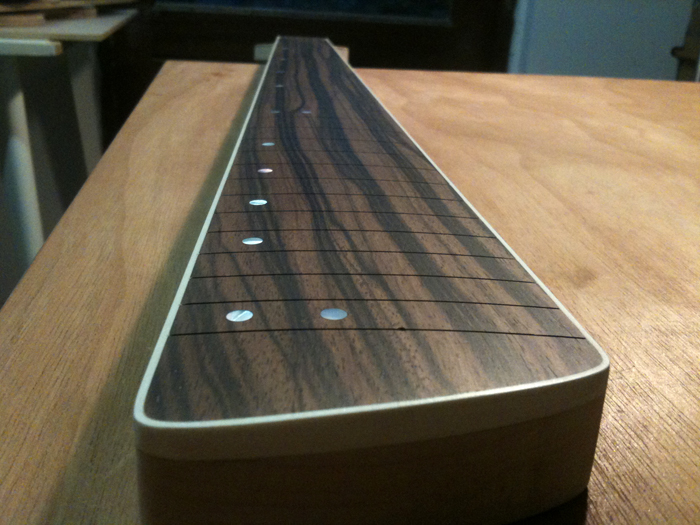
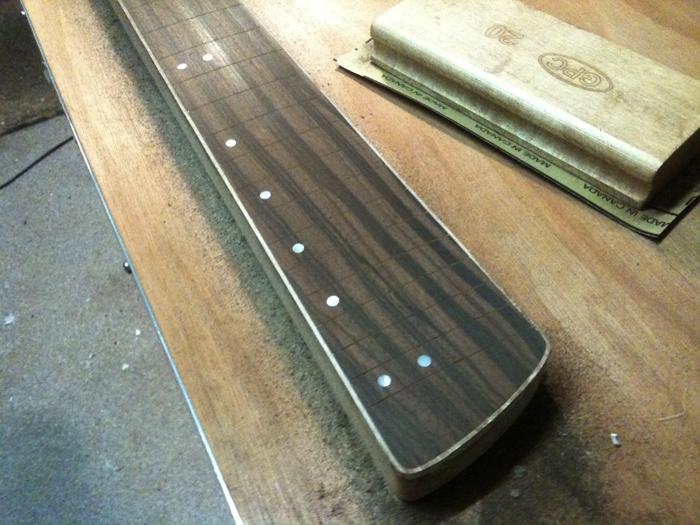
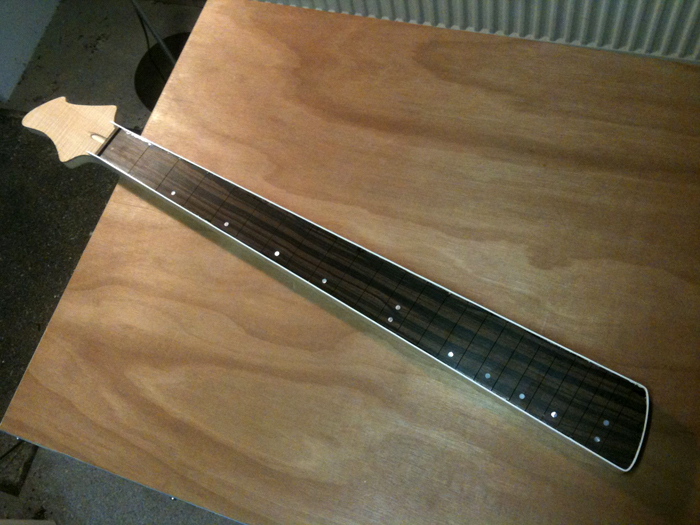
This is going to look very sexy, don’t you think?

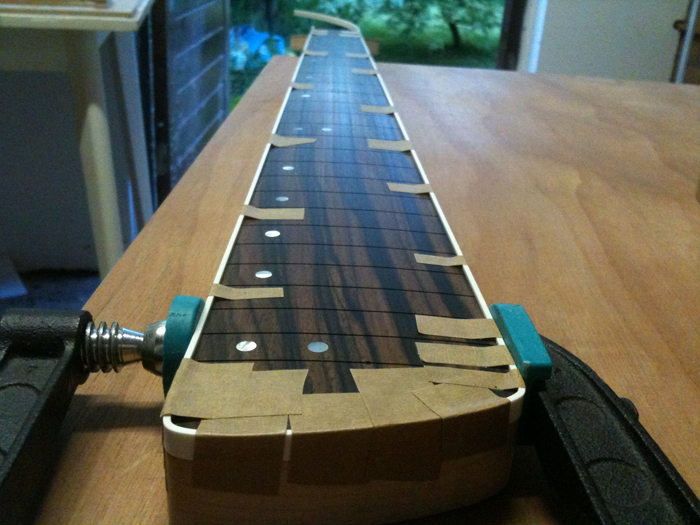
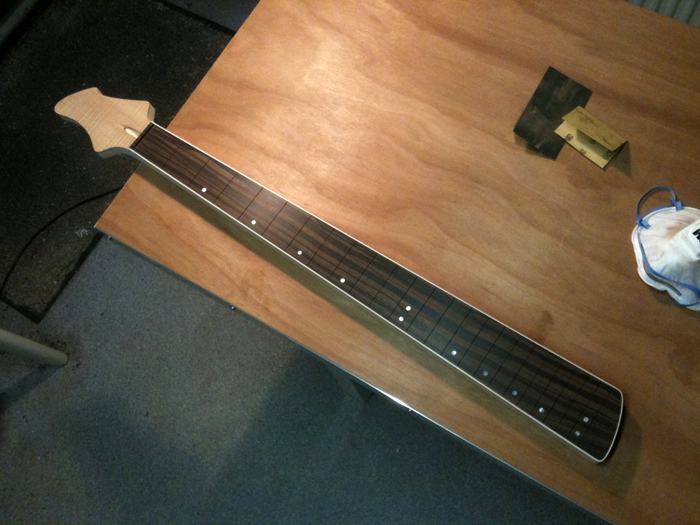
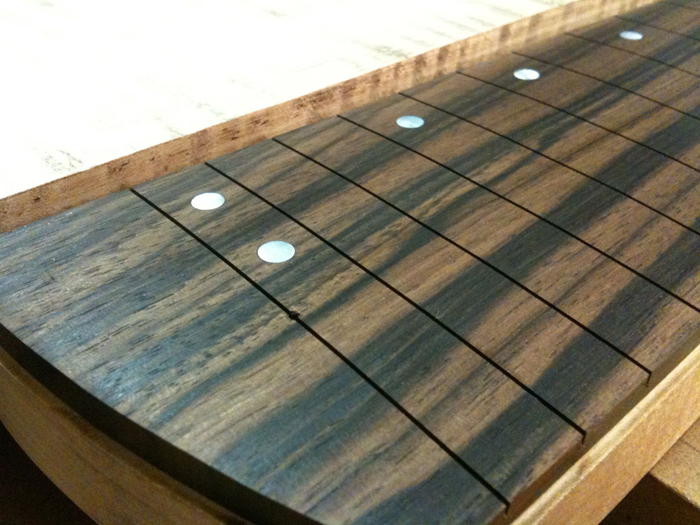
And another overview of the result:

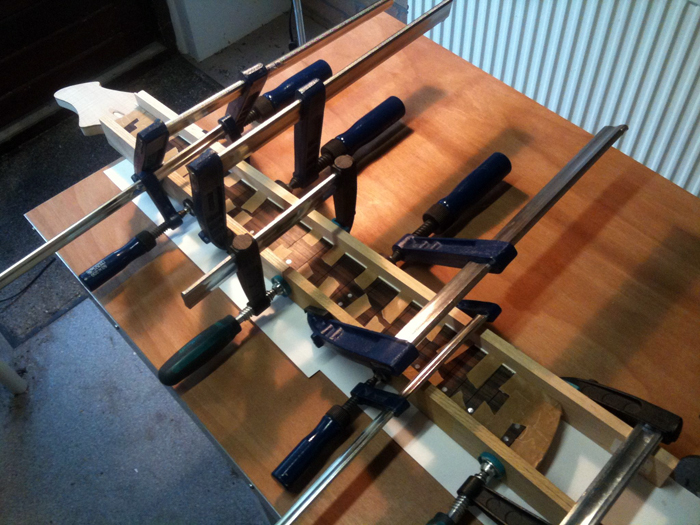
I also practiced glueing a piece of binding with binding cement to a fingerboard test piece. No rocket science, but I want to try everything I haven’t done before…

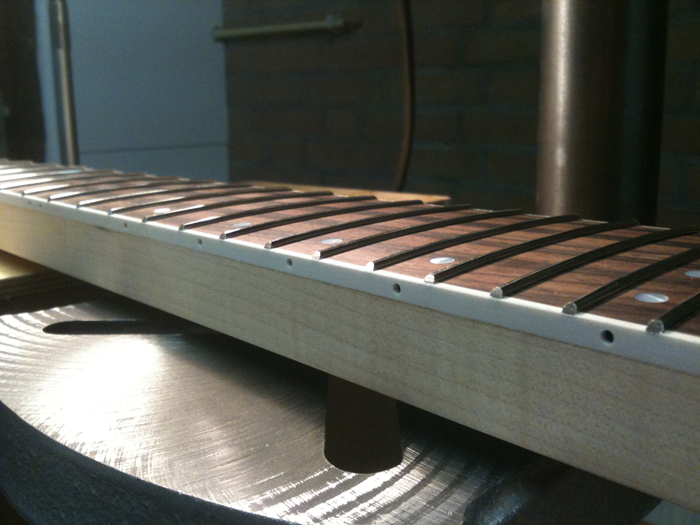
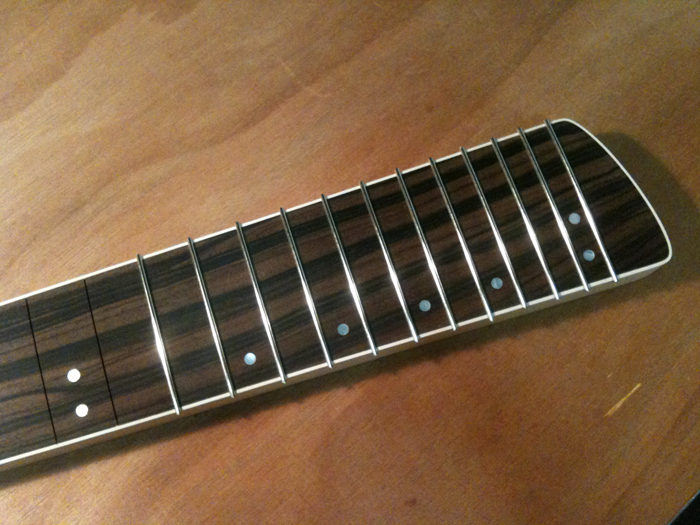
Lastly, I checked the depth of the fret slots after the radiusing, but unfortunately I need to recut some slots, as they’re not deep enough, especially on the bass side (I probably didn’t hold my saw parallel to the working table). But that’s a job for next time!

Radiusing result

Bought some high quality 120g sandpaper, amazed by the difference it makes.. too bad the 180 and 240 I had lying around still where rubish, but oh well, I’ve made it up to 240g. This is the result:

Not to bad if I say myself, but it does need a little bit of work before I can start with the binding and fretting.