This is my second build and a truly scratch-built bass; I designed everything myself – the shape, the string layout, all dimensions and the complete configuration. I’ve only used a plunge router, a drill (press) and a jigsaw as power tools; the rest is done by hand. This blog is an extensive diary of my adventures as an amateur luthier.
Category Archives: Paradox J5
Review of first bass
Yesterday I went to a local luthier to show my first bass, ask for some criticism and give me some tips to enhance playability. I needed some advice from a professional to give me enough confidence to proceed building my next bass.
Turns out he was quite positive. Said I’m on the right track. Of course, there were some improvements to make. I knew of some points, but he gave some good tips on how to solve them.
Things I need to change are:
- neck thickness is okay, but the profile could be more smooth towards the fingerboard edges
- frets are beveled okay, but still have sharp edges were the bevel meets the sides of the frets – he showed me how to fix that
- fine tuning is not perfect, distance from open string to twelfth fret sounds okay, but from open to 19th fret is off, need to correct that
- the slots in the nut are to shallow, need to be deeper to lower the strings above the first fret – this is the main reason the action is not low enough
- the lower body contour is located to the bridge side too much, causing the bass to neck dive while playing seated.. kind of design failure, saw that coming and I’ll try to avoid it on the next one, not sure the current design does, but I will have to check when the templates are done
The neck relief and straightness is good, which made me happy because I was worried that could be the problem.
So all are very solvable issues, I can make this bass a lot better with small adjustments. Except the body design, but that’s okay… I knew that and will improve my designs.
DIY Router table
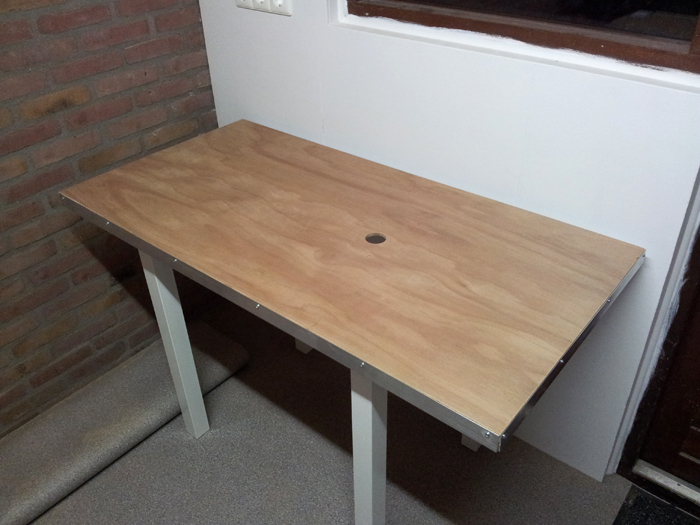
Since I’m figuring things out and mostly sourcing materials, getting price quotes and deciding on the wood, I spent the last few days making a nice flat workbench that doubles as a very basic router table.
This is the result (without the router attached). I may stain it with transparant wood stain for protection, note sure..
It’s 1.5" thick (high quality plywood and MDF sandwich) and it has aluminum profiles on the sides to keep it from bending. That’s also the reason the legs aren’t on the outer corners.. Behind the hole I routed a seat for my router, so I can basically swap the base plate of my router with this table . Not very easy to attach, but it works and the whole thing only cost me like 50 dollars.
Back to the bass:
The fingerboard probably is going to be Macassar Ebony (or maybe Pau Ferro but I think not). The body could be a two piece Swamp Ash, which is easy to drill the wiring channels before glueing the body halves together, but I’d rather buy a single piece for the looks. Furthermore I’m probably going to put an accent veneer between top and body.
I’m almost sure the headstock will be angled (13 degrees) and I almost finished the drawing of the volute.
Design considerations
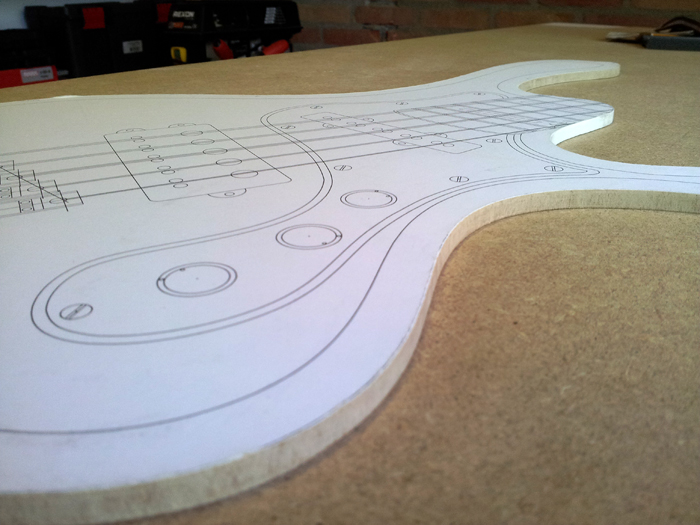
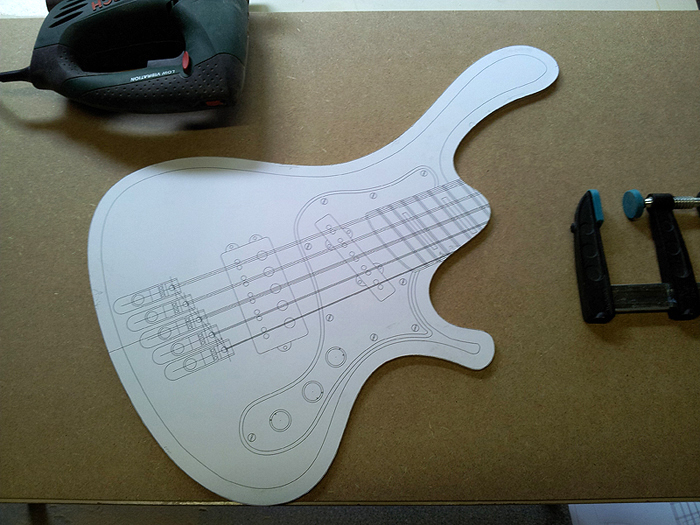
Not a very exciting update, but I finished the master template of the body. I found that MDF is better material for a template because it is a lot easier to get the sides very smooth. But I will transfer the templates to plywood for durability (and the possibility of reuse without wear).
So the sides are smooth:
What’s up next? I’m thinking of throwing together a small and simple router table from parts lying around the garage.. that’ll make routing easier. But the oak table top I had lying around isn’t perfectly flat. So more on that later.
Furthermore I’m figuring things out concerning my design:
- I have only room for three knobs but the Delano Sonar 2 has four. So I emailed Delano if it’s possible to stack the tone knobs (tone / bass), but after more than a week and two emails still no reply. I found someone else on the forum with the same problem but no report of success.
- I’m still in doubt about the headstock construction. Angled back or flat? How to shape the volute? Et cetera. I’m currently drawing things out but no satisfying result yet.
- I am waiting for an offer from an exotic wood supplier.
- I’m pondering over a way to ground those individual bridges. I’m thinking of routing a channel in the body, covering it with a wooden strip (so the glue doesn’t get in) and then glueing the top on. When installing the bridges (and pups) I can drill into these channels from above and put the wiring in there.
Cutting the master templates
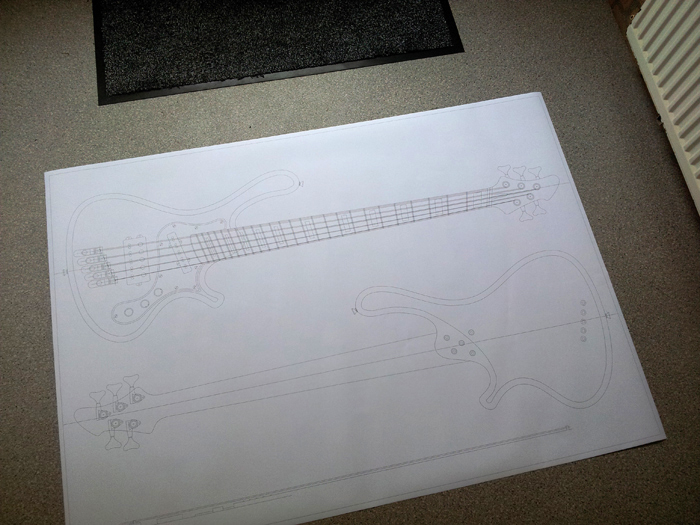
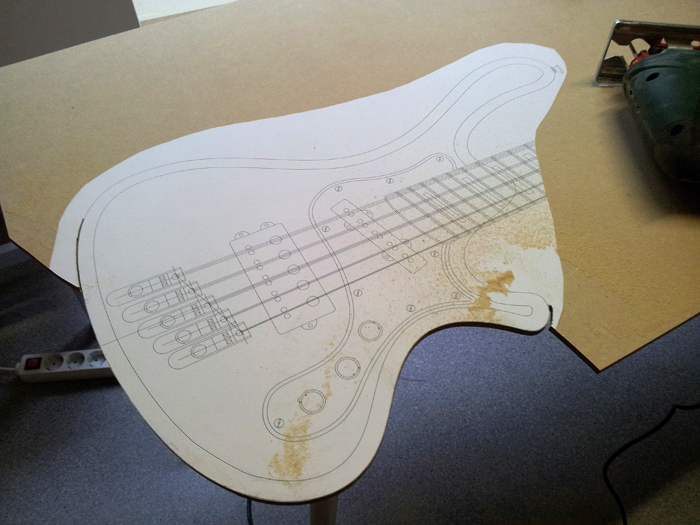
Yesterday I received the A0 copy of the plans I’ve ordered. Quality is very good, no deviation on both axes. Nice to see my bass in the actual size for the first time. Little doubt about the body size, it still is a small body, but I think I’ll proceed and see how it looks when I have the templates (and maybe MDF prototype):
Last time I transfered my drawing to the wood by cutting it out and tracing its contours. But I figured that would be less precise, so having a good copy of the CAD plans, I cut them out and glued them to 6 mm MDF and started cutting. Works like a charm!
This will be my master template. Because it is thinner, and softer than plywood, I can shape it better and it’s easier to get things smooth:
When this master template is okay, I will transfer its shape to a 9 mm piece of plywood, being the actual template.
Paper template
This week I made a new paper template for the body by printing out the CAD drawing on a bunch of letter-sized sheets and taping them together. I added straight lines on the drawing to check alignment and size.
Despite the fact that this second try came out much more precise (I already cut it out and almost started cutting the wooden template…), I am not satisfied: I discovered my printer has a deviation of approx. 0.5% on one axis. So 10" comes out as 9.95".
So today I ordered an A0-size plotted printout of my drawing online and I expect to receive it tomorrow! I’m curious if it is spot on and if so, I will build from those plans. Otherwise I will adjust all my drawings before printing them.
Finally started building
I finally started with the build of this beauty! It will be a slow build due to the limited amount of time I have, but since I’ve just finished my workshop and I am really looking forward to building again, I decided to start anyway, no matter how long it takes.
I just made a few prints and tried to start with the body template, but the results were not good enough, so I will start over.
I am also pondering over the multi-angle scarf joint I have to make… one big question mark as for now. I also have the option of doing a Fender-style headstock, but that’s really not my preferred option.
A new bass design
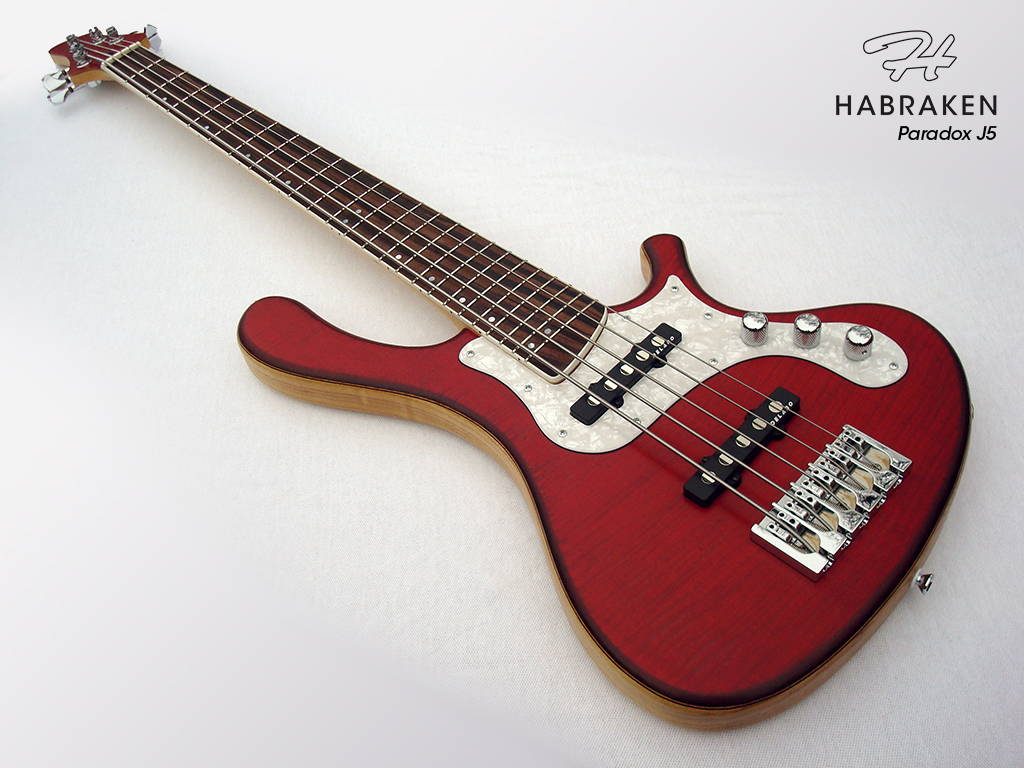
I’ve finished my new design! Again, it came out to be a lot of work to create a good looking and practical design. But I think I did it! I like this design a lot better than the previous one. It’s unique, funky and a good one too. Special features are completely straight string paths, a multi-scale fretboard with exact fret distances for all strings and individual skewed string bridges that do not change the angle of the strings (and thus fret positions) when fine-tuning the bass. Also, the string distribution at the nut is an equal string-to-string spacing instead of center-to-center, providing a more balanced string distribution.
Paradox is a 5-string bass with a scale length ranging from 34.5" for the low B to 33" for the G string. String spacing at the nut is like a classic Jazz Bass, while string spacing at the bridge is somewhat smaller with only 18.5 mm between the string’s centers. The bass is especially designed for a DR MM125 string set. Pickups are from Delano: The Hybrid 5 combined with the JC 5 AL-H Jazz Bass neck pickup.
For my second bass, I will probably use almost the same woods as the first time, but with a higher grade. Only difference is the body will be swamp ash instead of mahogany. I plan to dye the wood red with a transparent finish. The mother of pearl block inlays and pickguard combined with an ivory fretboard binding complete the classic and funky look of this design.
It will probably take another month or two before I can start building this bass, but I will keep you posted. This bass sure is gonna rock!

