Just wanted to let you know I’m still very much looking forward to continuing my Fokker build, but I was occupied with some work for the past year or so… we ran into a nice new house, bought it, moved, did quite some renovation, and I have to build a new workshop from scratch in our new garage. I hoped I would be back to building within one year, but that turned out to be a bit optimistic. But as you can see, I’m making good progress now, and I will end up with a bigger and better place to work on my planes.
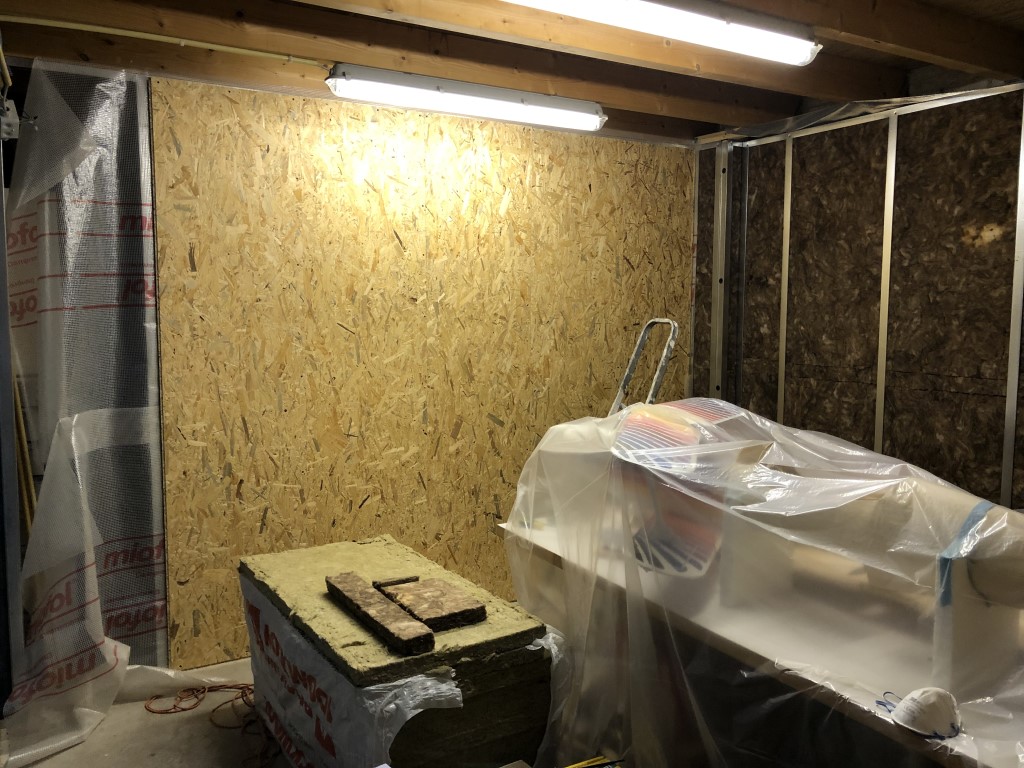
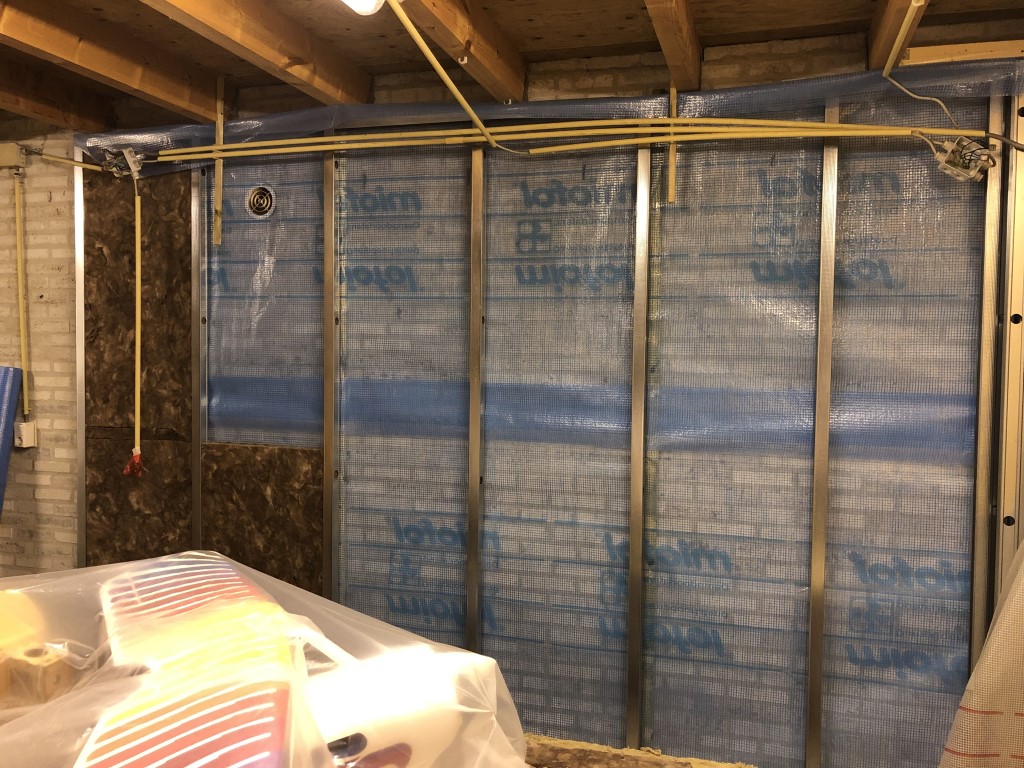
The new workshop roughly measures 360 x 360 cm. I’m building it inside my uninsulated garage. Air cavity, vapor barrier foil, insulation, vapor proof foil and OSB.
The electric installation is temporary in this picture, just to have light and power during rebuilding. Will end up tucked away neatly inside the walls.
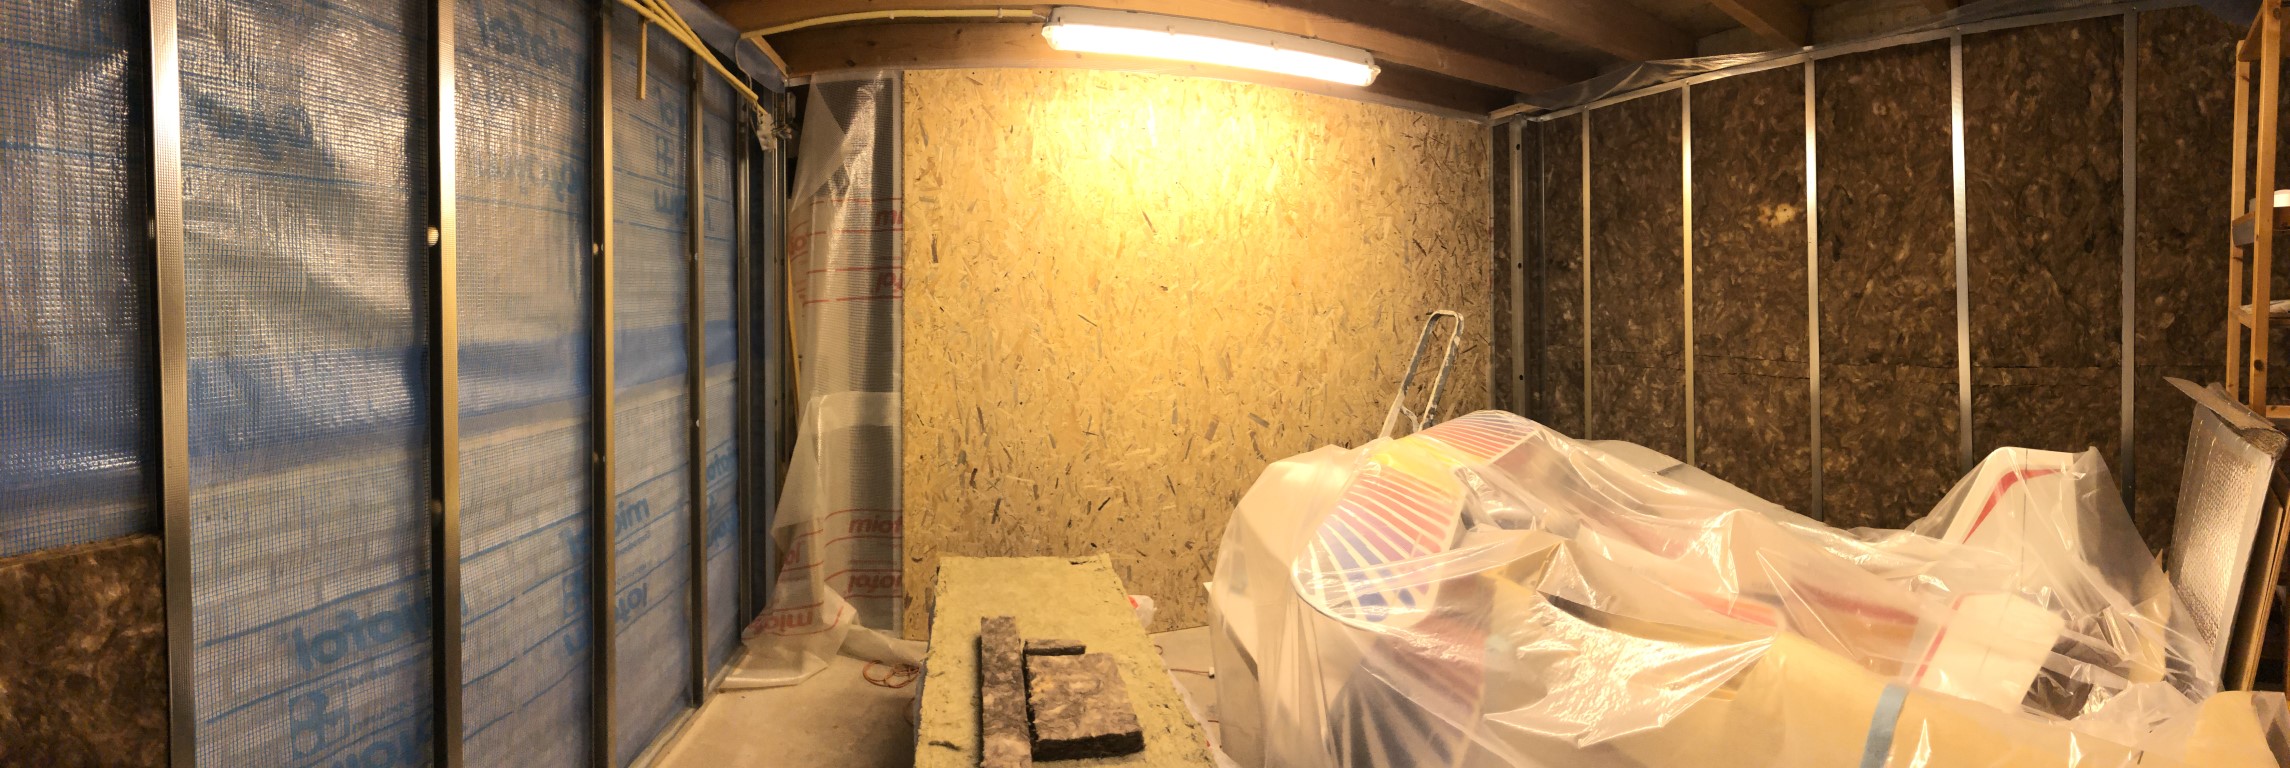
A panoramic overview to get an idea of my new space. Still relatively small, but happy to have a little more space than I used to. It will certainly suffice for building some nice new airframes!
Today I received the newly laser cut parts, thanks Ramses! Last week, I also received the last missing parts of inch stock. The Tufnol rudder horns and the routed cockpit dash are finished too. This means that my Fokker V.23 kit is finally complete!
Due to the extended delivery times, I’m currently busy with some other stuff, but when I do have time again for this build, I can start right away!
Unfortunately, this build will be on hold for a little longer. I hope it won’t be for too long though. As I mentioned, a few parts turned out too small, others too thick. I checked everything and the parts that didn’t fit will be cut again! I must say it’s not an error in the design of the kit, but partly due to inch to mm conversion and partly due to the laser cutting of the thicker balsa, which burned away more of the perimeter of the parts than anticipated. But the solution is found and in progress!
Furthermore, I just received the other stock wood in imperial sizes (balsa, spruce, stringers and sheets), but this turned out to be incomplete and partly cut wrong (off by 1/2″ to 1″ !). So I have to wait for the correct sized stock wood a little longer too.
Until everything is complete, I’ll spend my time preparing, doing some research on cockpit and engine, and waiting impatiently ;) …
Small update. Still busy with the Fokker on a daily basis, but currently puzzling on some minor issues in the prototype together with Ramses. The design is perfect, but some wooden parts seem to be slightly over- or undersized, both in thickness as in circumference due to inch-conversion and / or the laser cutting. When I solved those, I hope the rest of the wood arrives and I can make some more progress.
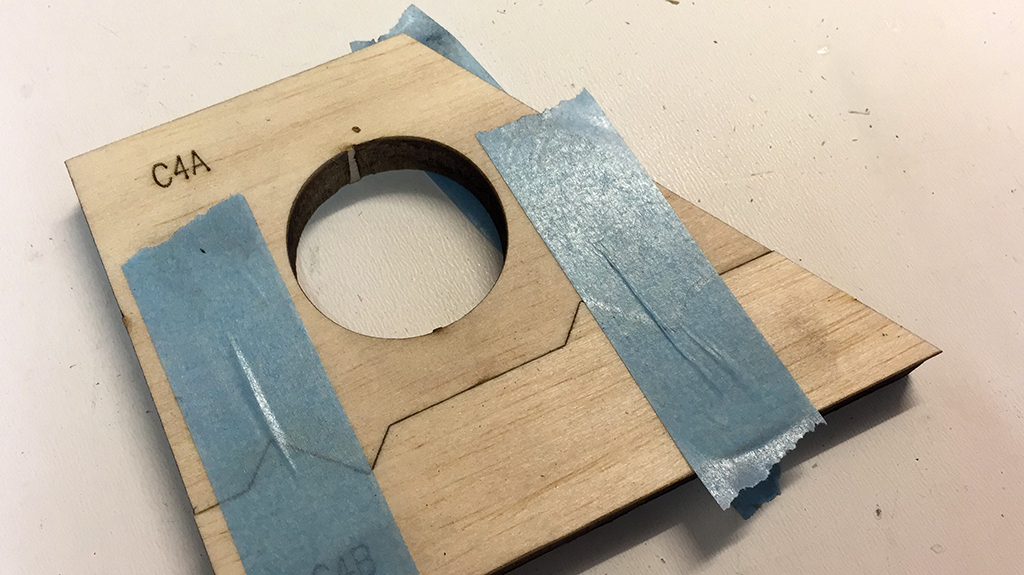
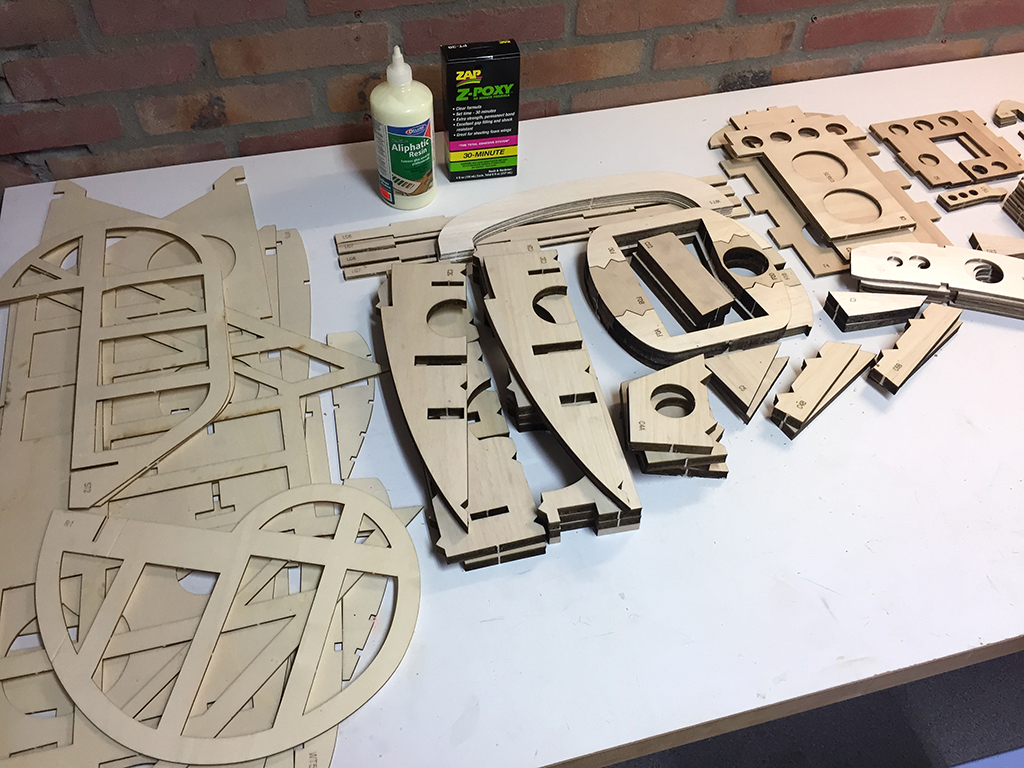
For now, I’m assembling some parts and sanding all the balsa parts. The toothed connection for divided parts works wonderfully and is easy to glue (I used white Aliphatic glue for this):
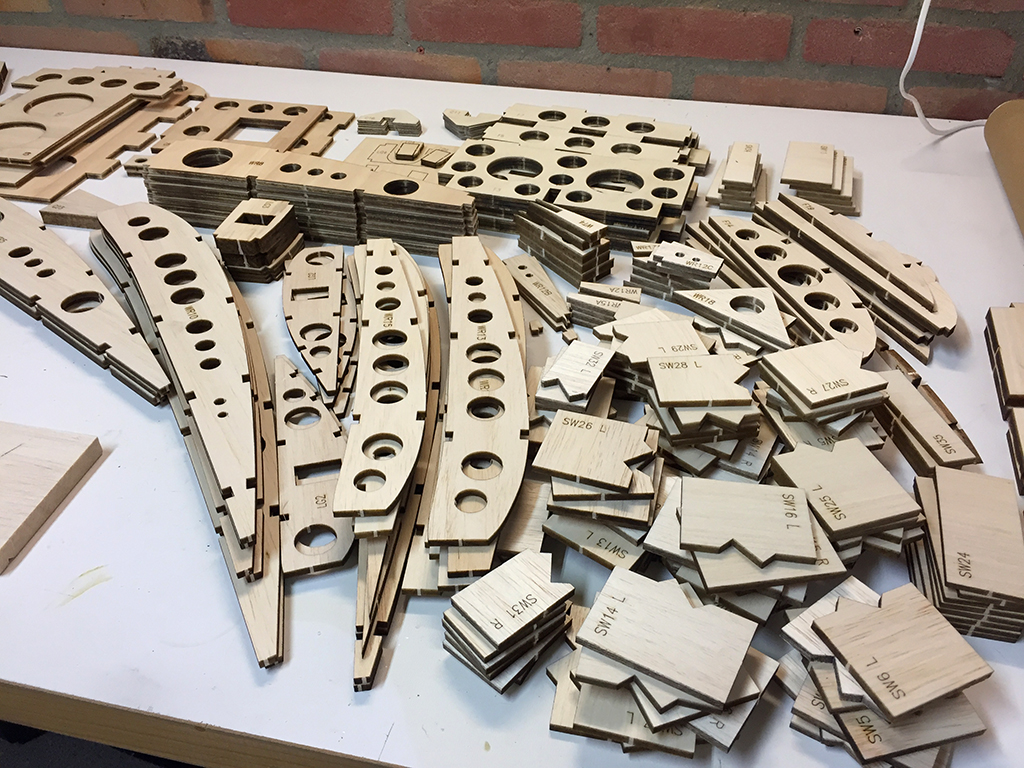
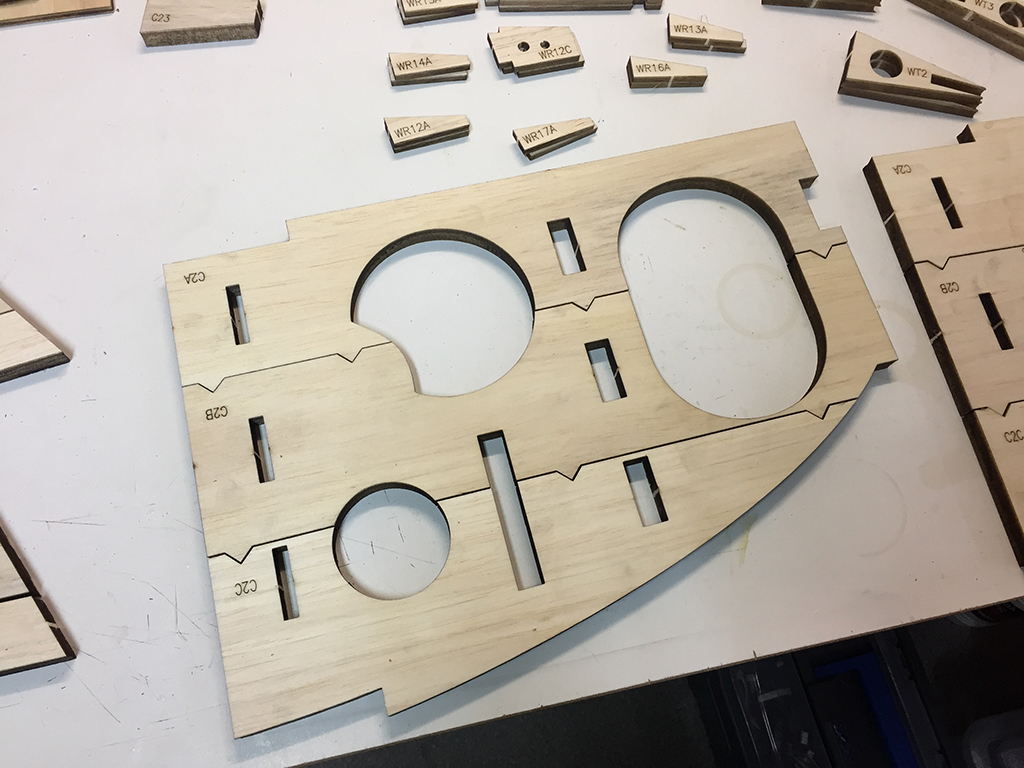
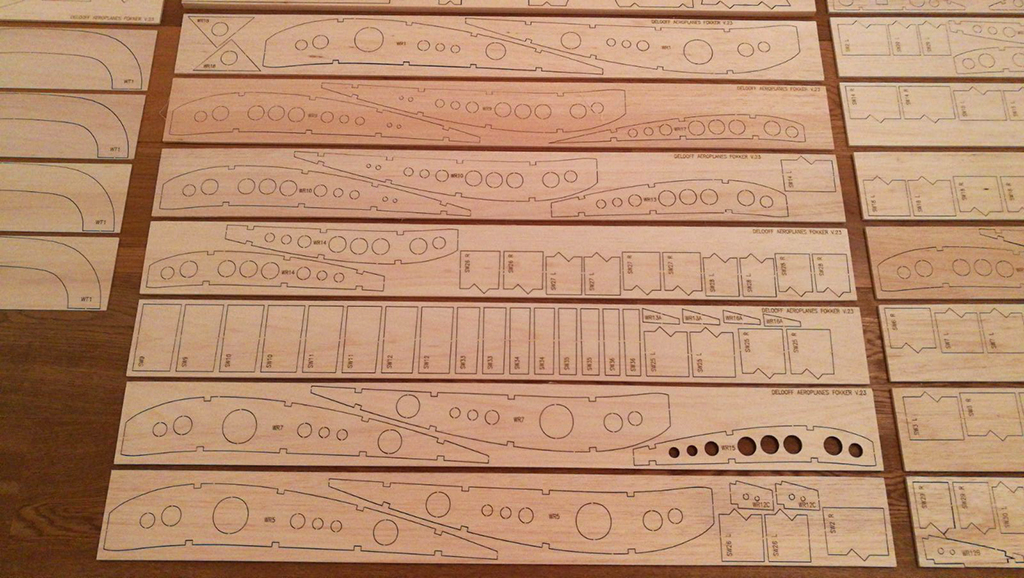
I’m ready cutting out all parts, but did not yet sand everything. That’ll be my next step. The part count is impressive, but then again not too crazy for its size. Most of the formers, ribs and shear webs:
And the thin ply and thick balsa formers and fuselage sides:
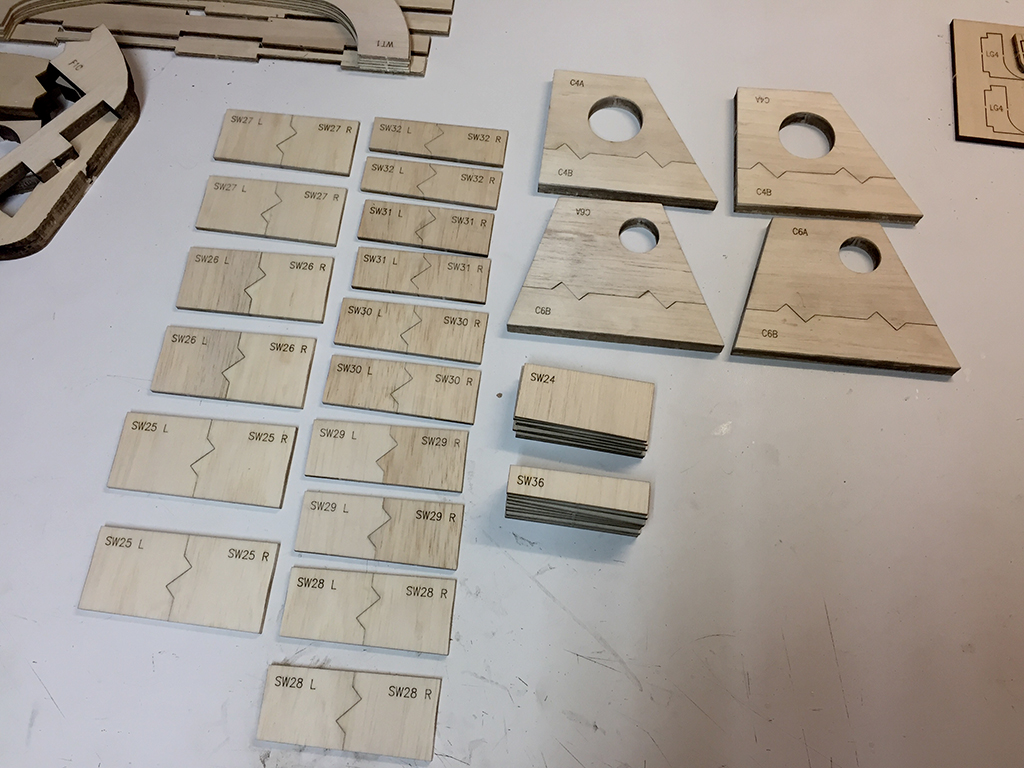
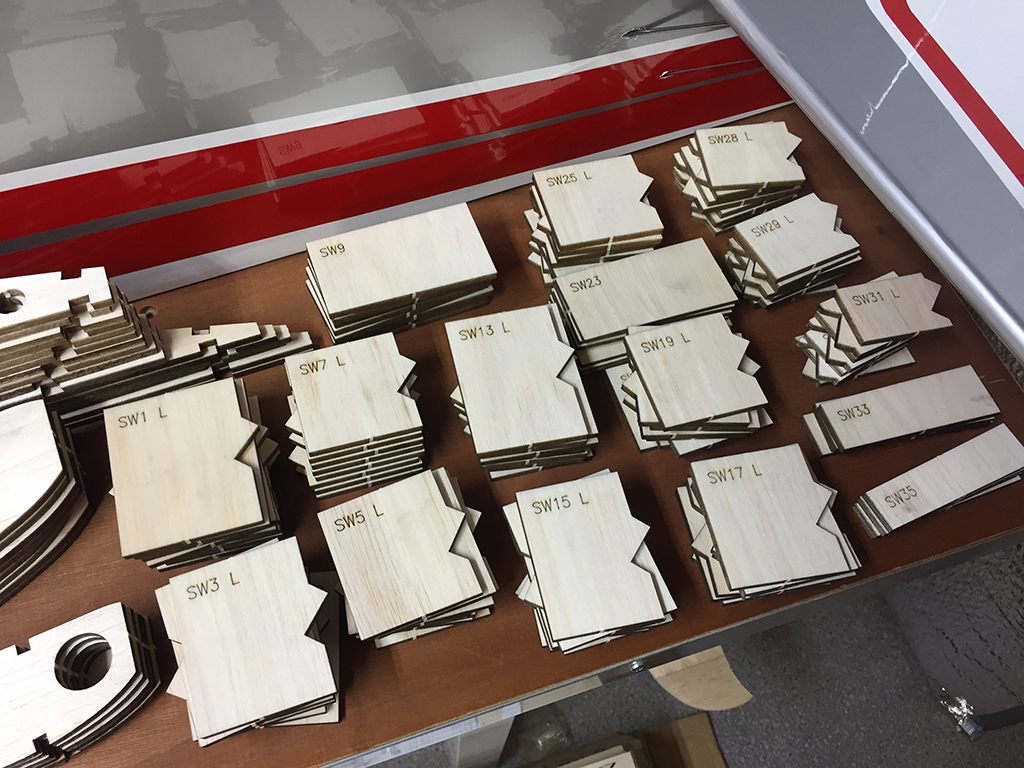
Sorted all the shear webs. Sooo happy Ramses included those in the kit, cutting those to size myself would’ve took me ages:
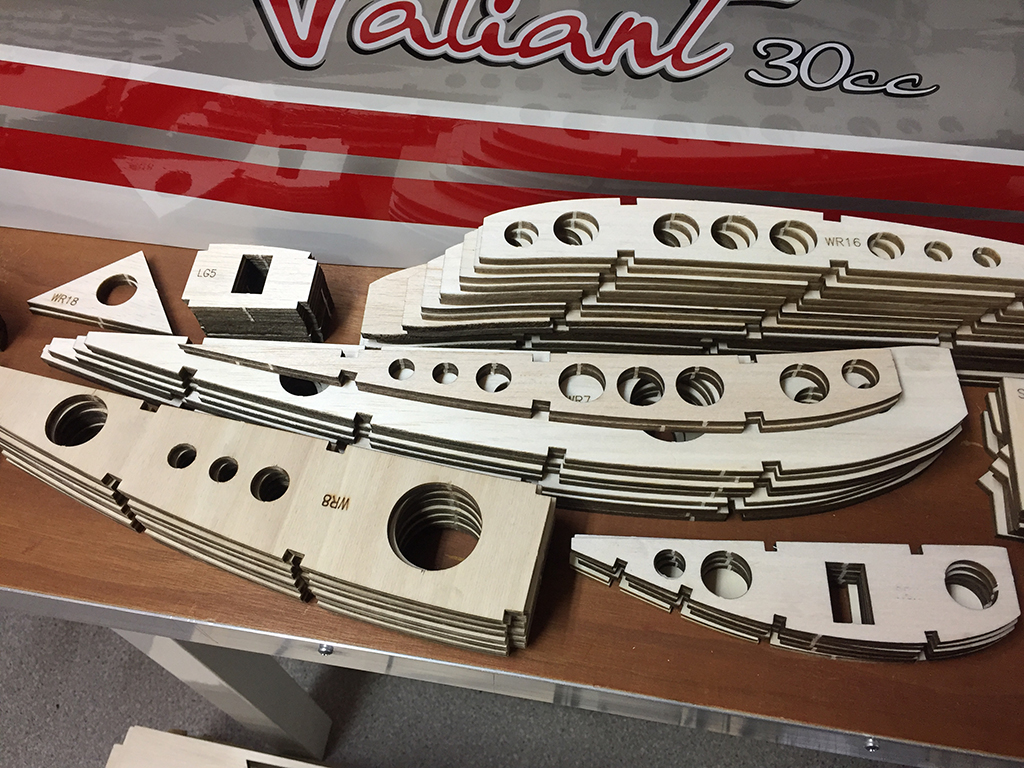
And the ribs sorted. Parts are now sharing a table with my Valiant, bit of a space issue going on, but I’ll manage it:
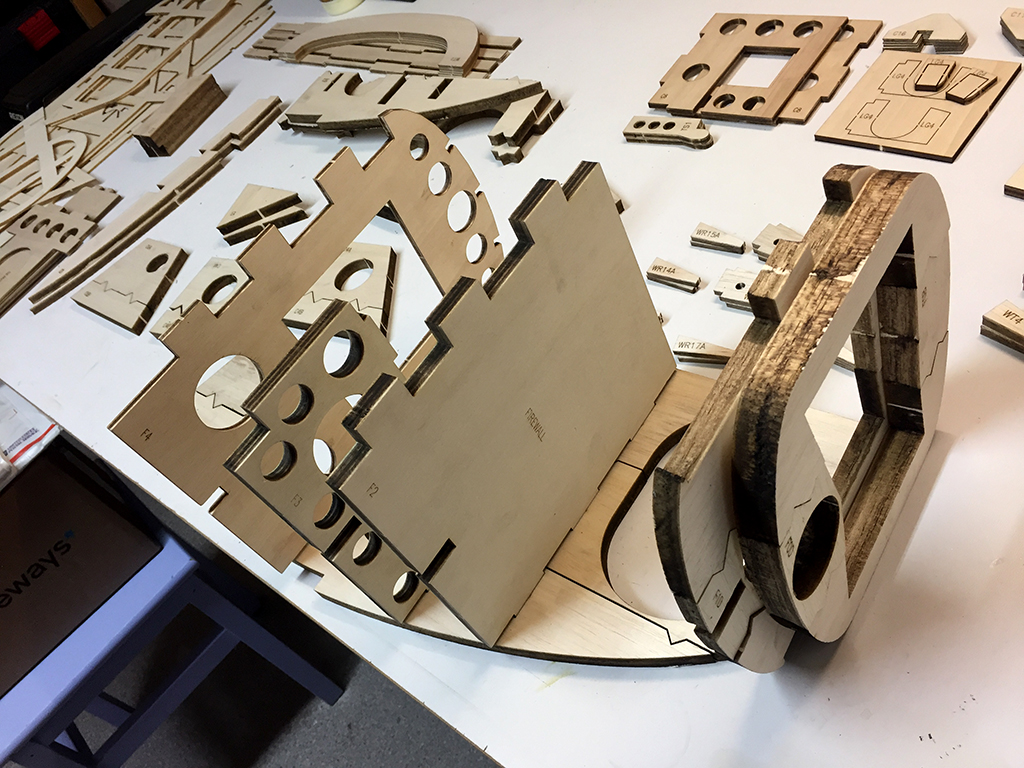
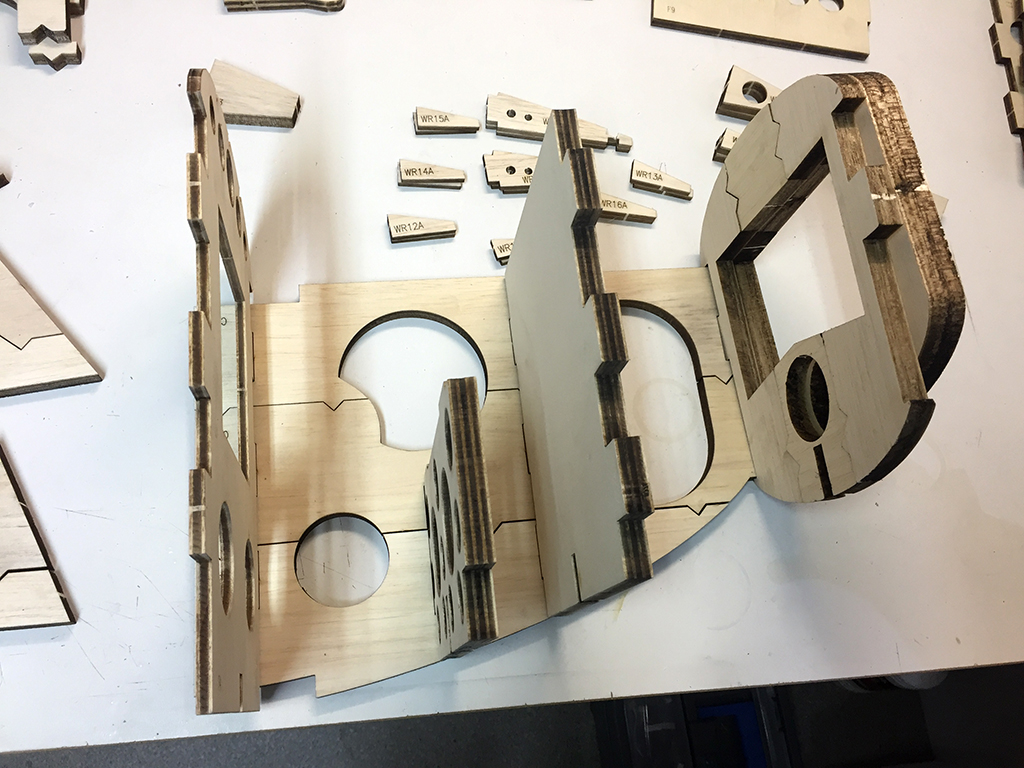
Couldn’t resist mocking up the front of the fuselage. The design is quite self-explanatory; you don’t need the plans to see how the cut parts go together, also due to the clear part numbers:
Add some formers, and you’ll see it taking shape:
As you can see, everything is taken care of really well with this kit. I only found a few minor errors, but being a prototype, it really is astonishing how well this is designed.
Next step will be sanding the cut out parts, and gluing together all parts that are built up from multiple sub-parts. After that, I hope the rest of the wood will arrive, so I can start assembly!
Spent some more time cutting the tabs of the laser cut plywood parts in preparation to the build:
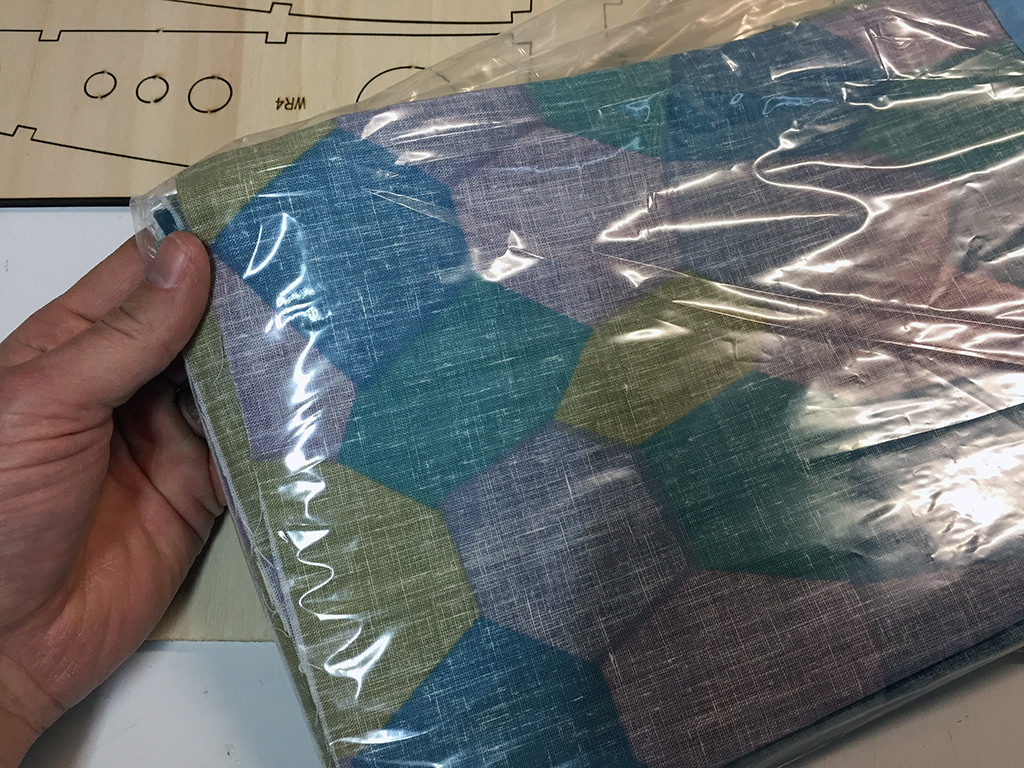
And then, the linen lozenge fabric from GTM in 1/3 scale arrived!! What a nice material that is! It’ll have to stay in plastic for quite some time though, won’t be any time soon I need this…
After three evenings of cutting and sanding, all the plywood parts are cut free, sanded and completely clean, ready for assembly. Now I can move on to the balsa, which is even more, but I think will be quicker still.
Next to that I also spent a lot of time figuring out what the cockpit should look like. Most say it’ll probably resemble that of a D.VII most, but I think there are a few import differences: the altimeter on a D.VII is placed on a strut, which the V.23 obviously doesn’t have, and I suspect the tacho isn’t in the same spot and the instruments are place further towards the pilot, because the V.23 clearly doesn’t have the open space between the Spandau guns, and if placed as far back and low as in the D.VII, the fuselage edge would block your view. That’s why I think the instruments are in the oval shaped panel (on the top) in front of the pilot. And the magneto switch could be on the left side of the pilot, as seen in the D.VIII and Dr.1. I need to do some more research on this.
Furthermore I think I found my pilot and Spandau kits, but I first need to be sure about the cockpit layout before I continue ordering stuff.
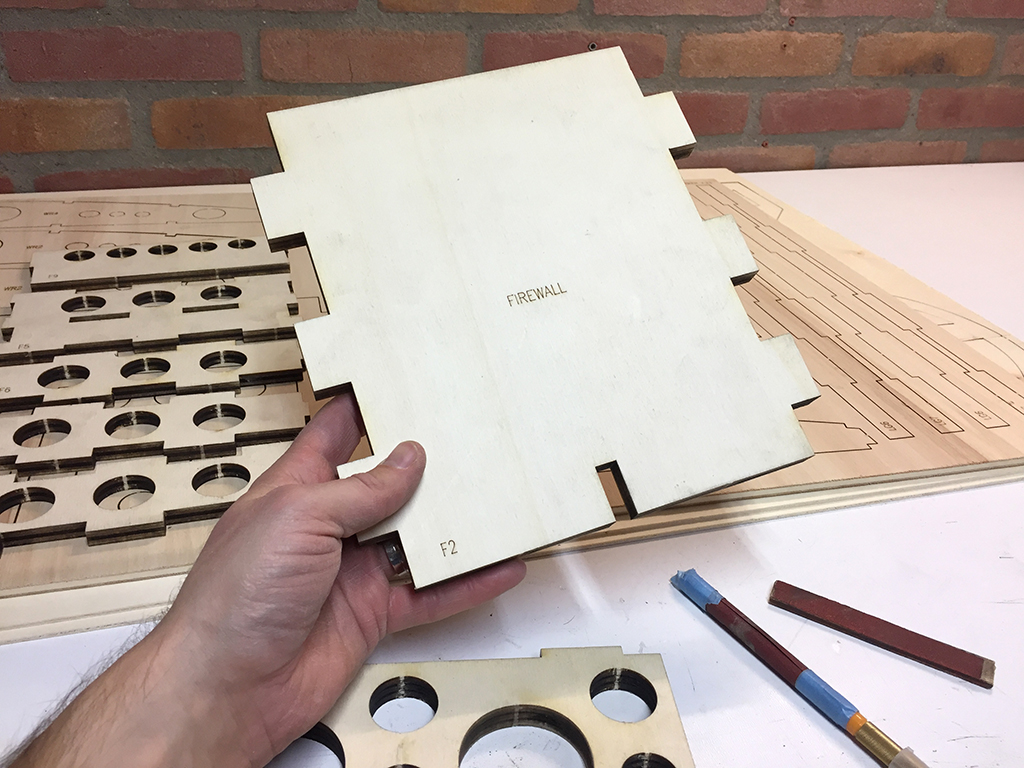
Small update, couldn’t resist sharing my excitement! I started cutting the laser cut parts free and cleaning up the edges. Only did the two thickest boards yesterday, but sanding the sides to clean up the burned wood for the glue later on took quite some time already.
The firewall is huge, isn’t it?
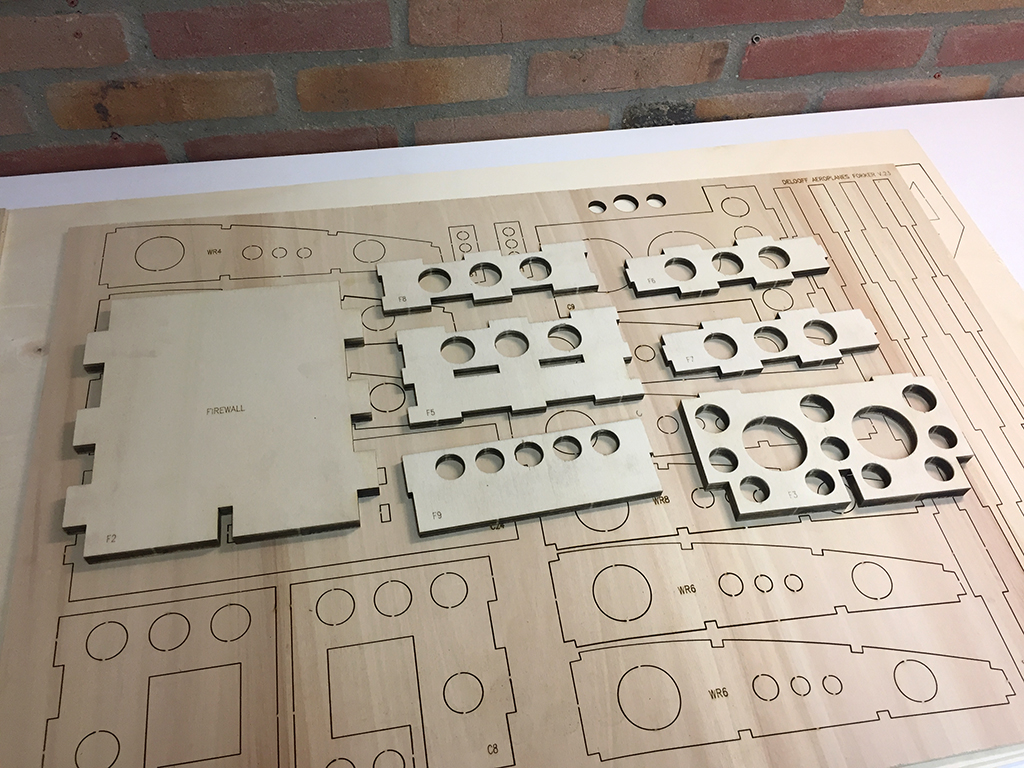
The first set of fuselage formers is ready. I think I’ll cut out everything and order the parts so I can easily find them and speed up the building when the rest of the wood has arrived:
The quality of both the wood and the cutting is very high, nice work Ramses and Berry!
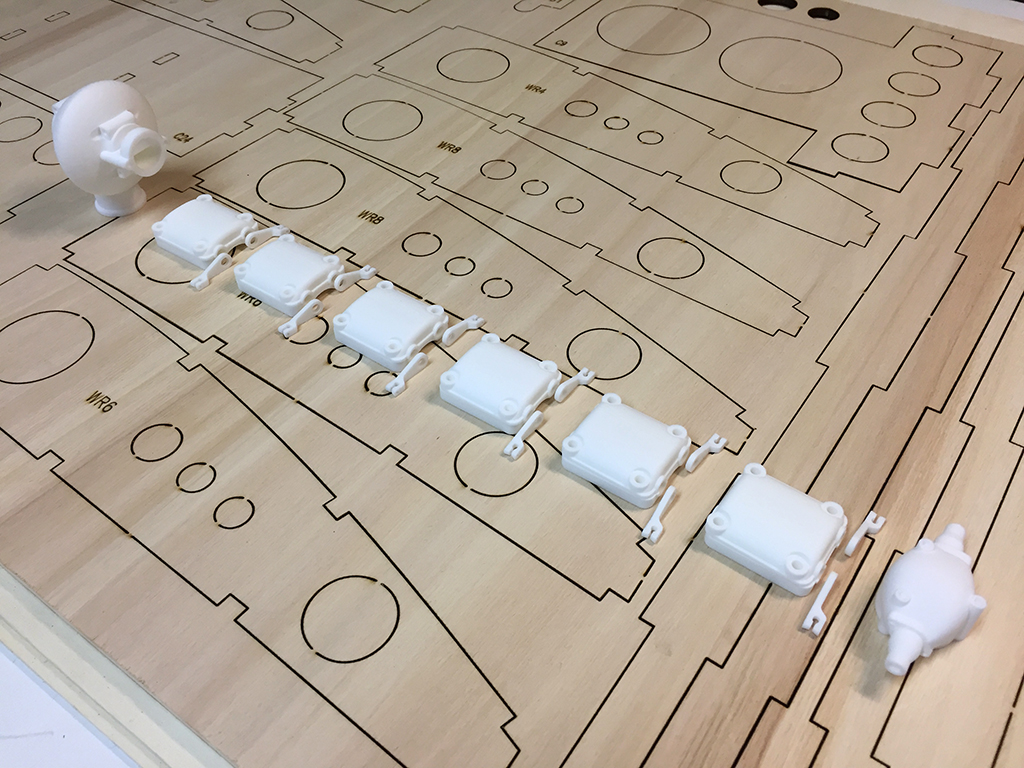
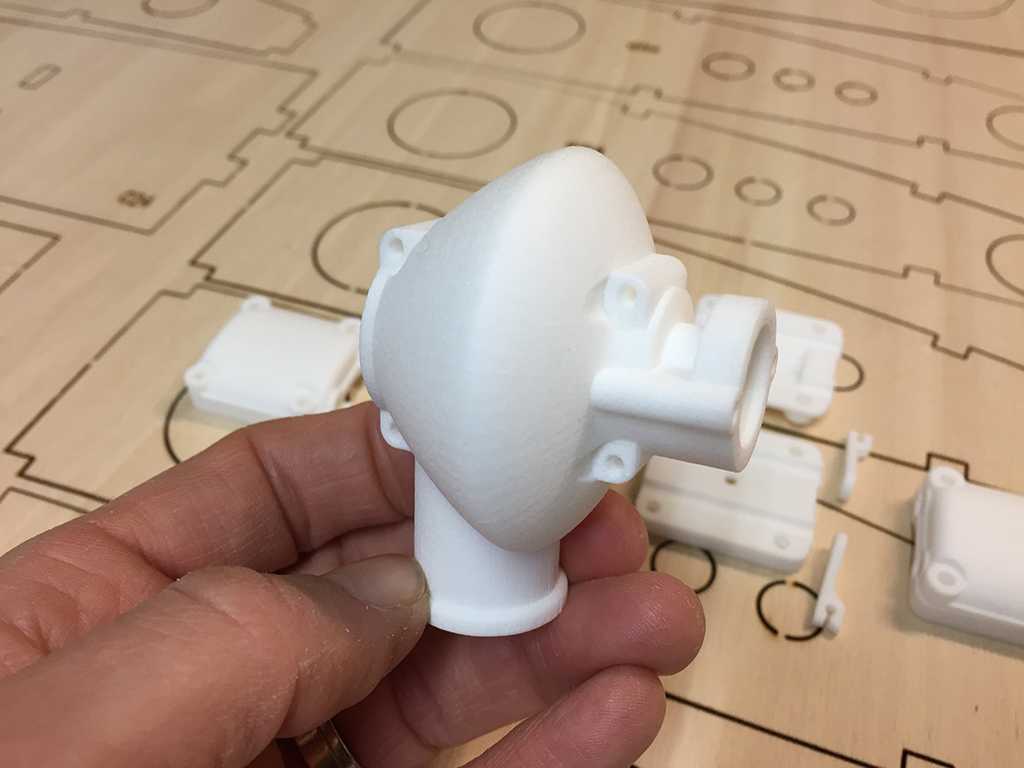
And….! Christmas came early this year!! My 3D printed dummy engine parts arrived: (I know the rear cast housing is facing the wrong way and some rocker arms are upside down, it’s just a quick impression of what I ordered)
The parts came out superb. Highly detailed, high quality and very light! It’s polished SLS printed plastic by Shapeways. Not cheap, but a huge help in getting a nicely detailed dummy engine, which is an important part of the plane after all.
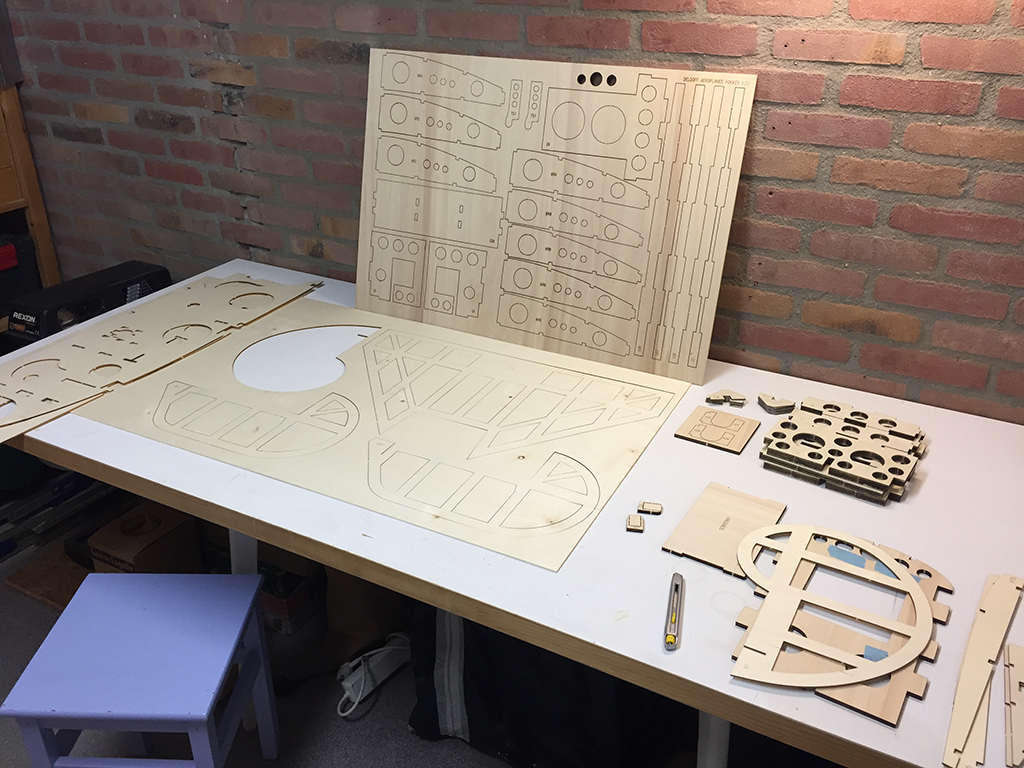
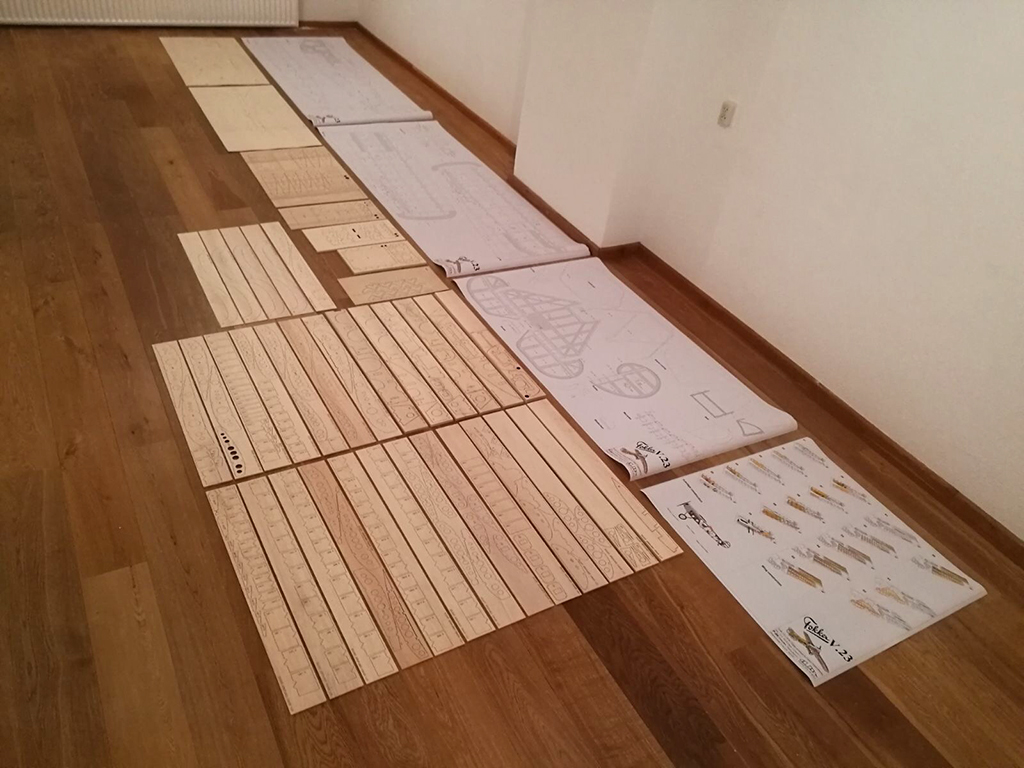
Today I received some very good news from Ramses! The plans and laser cut wood are ready!! All laid out it’s quite an impressive stack of wood and paper. Here’s a video by Ramses showing the full kit:
And a nice overview of all the contents as well, together with some close ups:
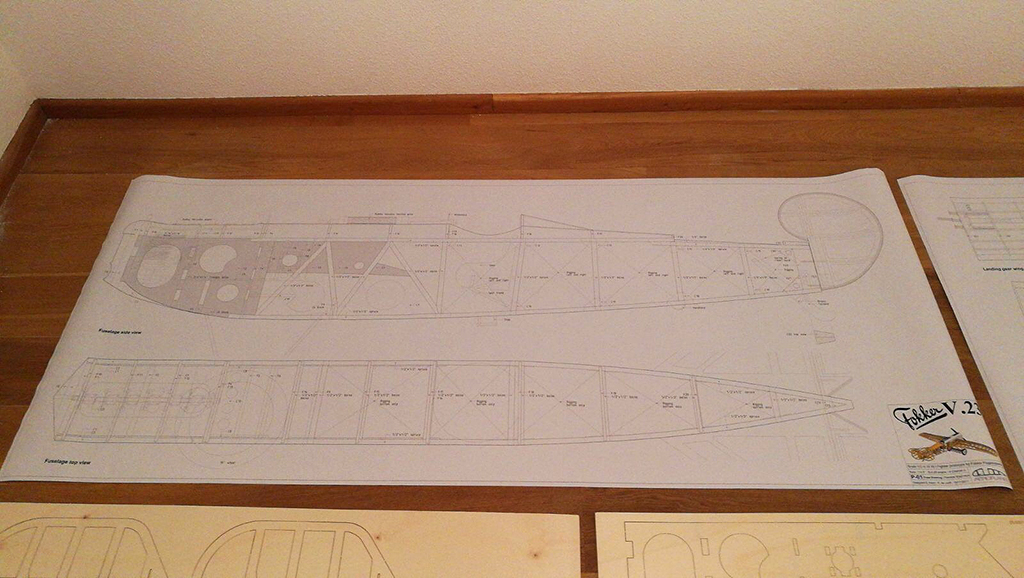
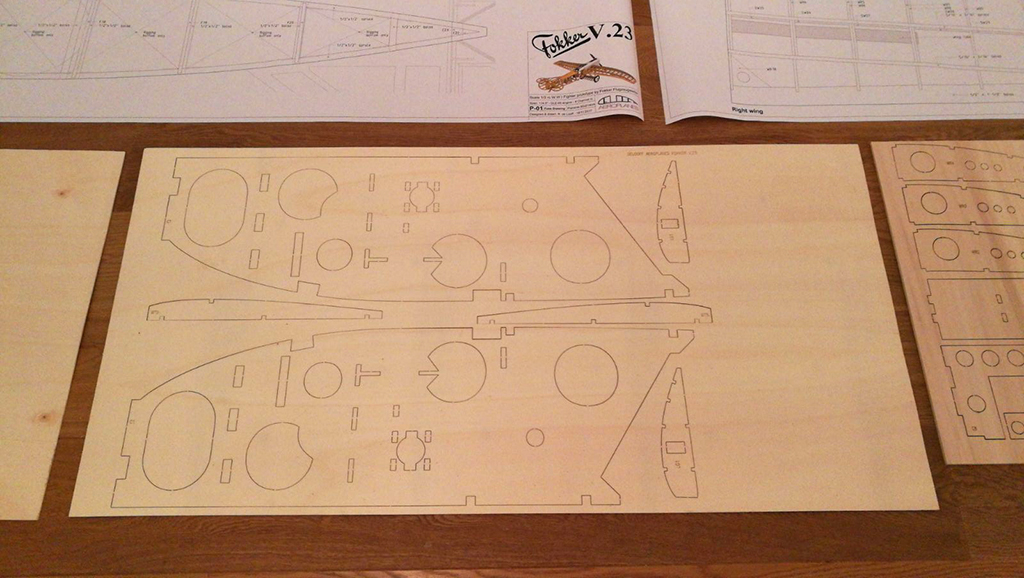
The fuselage plans:
One of the largest cut parts, the front fuselage sides. Both looking awesome and reassuring that this kit could possible go together quite fast with all this guidance:
And a nice picture of some ribs… when built up this wing will be a pity to cover in balsa skin I reckon’:
Concluding with an overview of the design and intended building process by Ramses, which gives a nice impression of the plane and its construction:
Meanwhile I’ve ordered the wood, the GTM Lozenge fabric for the fuselage and some parts for the dummy engine. Currently looking for a suitable pilot and the rounding up the research for the real engine for this plane. Almost time to start building!
I’m almost starting my new scale project! I was looking for a large and unique WWI scale subject when I remembered a thread Ramses started a few years back.. I contacted him and after some mails and a nice meetup we agreed I can start building the 1/3 scale version!! It goes without saying I’m thrilled with this honour!
The Fokker V.23 is a fighter plane from 1918 with a modern cantilever mid-wing. Only one has been built with a minimum of information still being available. I think it’s a beautiful plane. It has been modelled a few times to date, but to my knowledge not yet at the level of detail and accuracy Ramses designed it.
It’s going to be my first gas engine. A long time ago I flew some small two stroke OS engines, but since my re-introduction into the hobby I’m flying electric power only. I already chose the engine for the Fokker: it’s going to be a four stroke 70cc Valach! I hope this engine will marry beautifully with the Fokker.
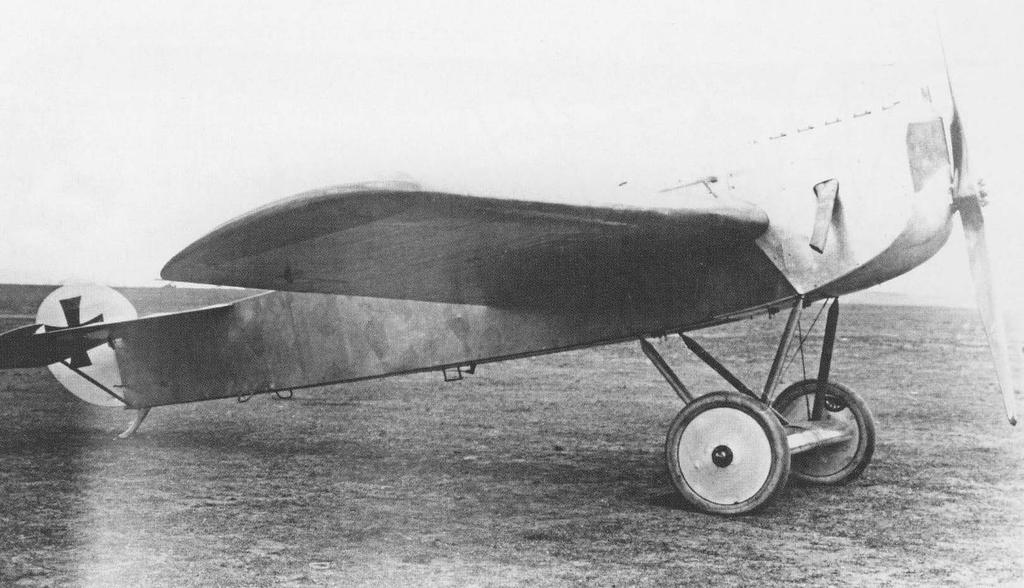
Here’s two of the three images left of the V.23:
On this photograph you can just see the lozenge covering of the fuselage. The typical location and orientation of the exhaust is one of the remarkable scale features I aim to replicate:
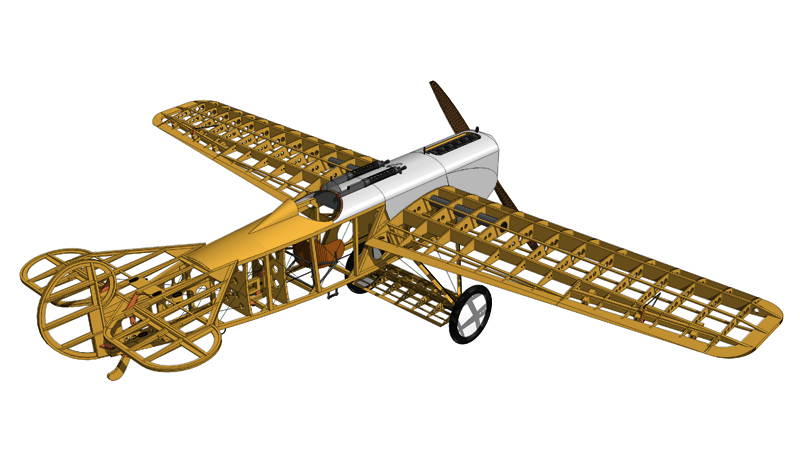
One of Ramses’ beautiful renderings showing off the construction of his design:
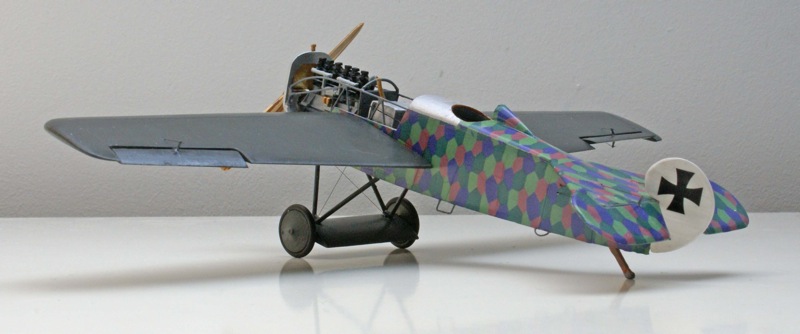
I want to stick as close as possible to the original and I think this static model does a wonderful job on the colours. On multiple forums and via Google you’ll find some V.23 models with D.VII liveries, but they actually did never exist. Considering the limited information available, it’ll be difficult to get accurate proof of the colours, but this will fit the bill for me:
There’s one debatable feature: were the wings dark green as with multiple Fokker models from that period, or were they finished with clear lacquer? On the pictures above it is hard to tell, but at least you can see the panel lines very well, which could indicate the wings have a clear finish. So this is something I did not yet decide on.
Currently, a fellow club member of Ramses is lasering the parts:
Once I have all the wood, I will continue to blog about my progress!