On hold for a while

Since I’m currently making my way down a rather impressive list of home improvement tasks, the build has been put on hold for a few more months. However, this week I got some time to finish my motor mount design and I came up with this:

It’s a strong interlocking design of 3.6 mm ply, doubled on front and back sides. I will add triangular stock around the base where it attaches to the firewall too. If necessary, I may glass the whole assembly but I think it’s strong enough as it is. There’s a one degree down thrust embedded in the mount but no right thrust, since the required right thrust is already built in the firewall by design.

I’ll keep you posted, maybe I’ll be able to show the finished mount in a little while.

Awaiting the motor

While waiting for the motor to arrive, I’m fixing a lot of small things… some sanding, working out details of the battery hatch latch and designing the bombs and drop tanks…

In the meantime I also picked my servo’s:

  • Controls (rudder, elevator and two for the ailerons): Futaba S3151
    To get a more precise control, I want to use digital servo’s for all control surfaces.
  • Flaps: Futaba S3003
    For the flaps I would like to use analog servo’s, because I think digital ones would be overkill here and flaps need to stay in a certain position during landing and that would cause digital servo’s to continuously draw some current, where analog servo’s wouldn’t.
  • Because I will use ‘servoless’ retracts, the retracts also use servo’s – doesn’t make sense, does it? I’m not yet sure if I will go with E-flite or LADO retracts, but this will be irrelevant while choosing my servo’s for the airplane anyway.

The BEC on the ESC I’ve chosen should be able to handle those 8 servo’s well (a Hacker MasterSPIN 80 Pro).

I’m not 100% sure, but I guess this will be my setup.

Wrapping up the fuse

Last week I’ve sheeted the fuse bottom, here I’m halfway:

When the fuse was sheeted I shot this picture, showing the size of the fuse in my workshop, quite cool I think:

Last thing to be done on the fuse is carving the aft fuse block that creates the transition between the lower fuse sheeting and the rudder. I took my time to get it right, here you’ll see carving works very well on balsa (much more pleasant than sanding….):

When roughly carved in the right shape I taped it on to check the outline:

After a few more iterations it was glued in place and sanded smooth with the surrounding sheeting:

What’s left on the fuse is mounting the engine, but since I do not yet have my brushless motor, I’ll have to wait with that. But before I start building the wing I might first tackle some issues on the fuse that are not mentioned in the manual (like the latch mechanism for my battery hatch).

When I came home from work I was in for a little surprise, my varioProp arrived! A very nice quality product, can’t wait to see how it looks when mounted, the tips being painted yellow. It already looks the part though:

Catching up

I’ve picked up building again, now the flying season is coming to an end.

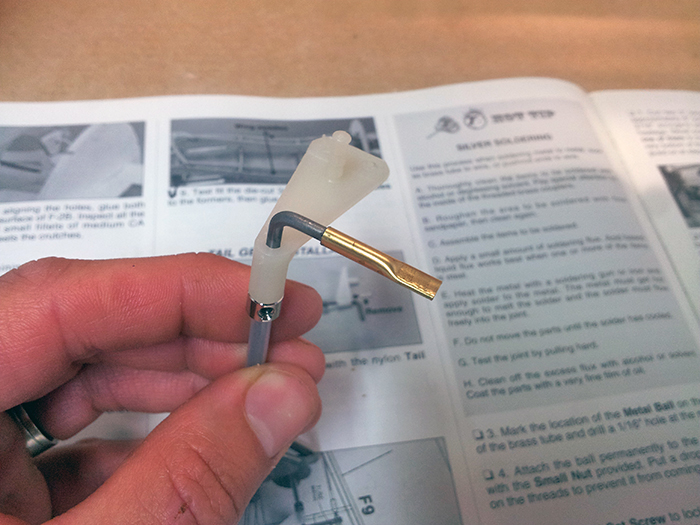
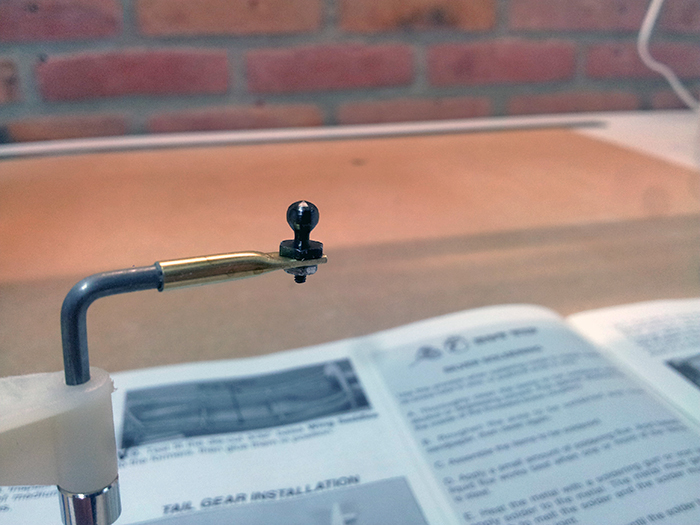
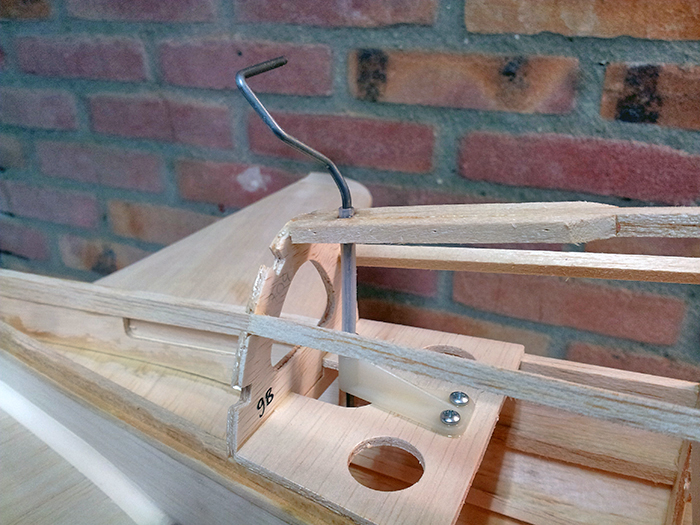
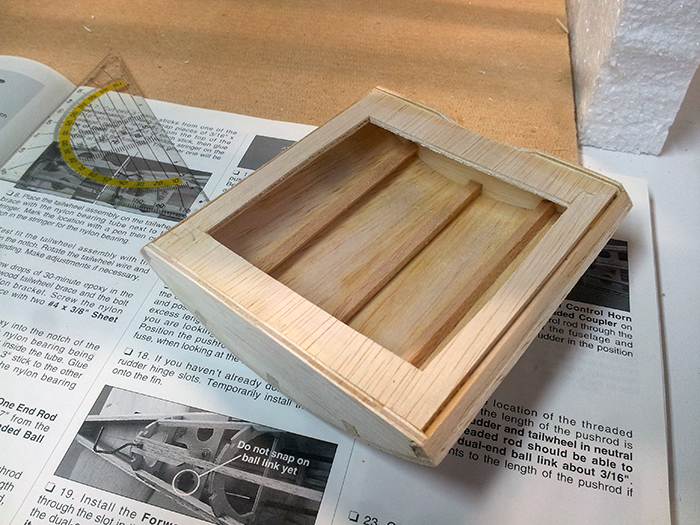
Before completing the lower structure of the fuse I had to install the pushrod tubes and the rudder pushrud. The rudder pushrod is connected to the tailwheel assembly with a ball link, so it needs to be installed right now:

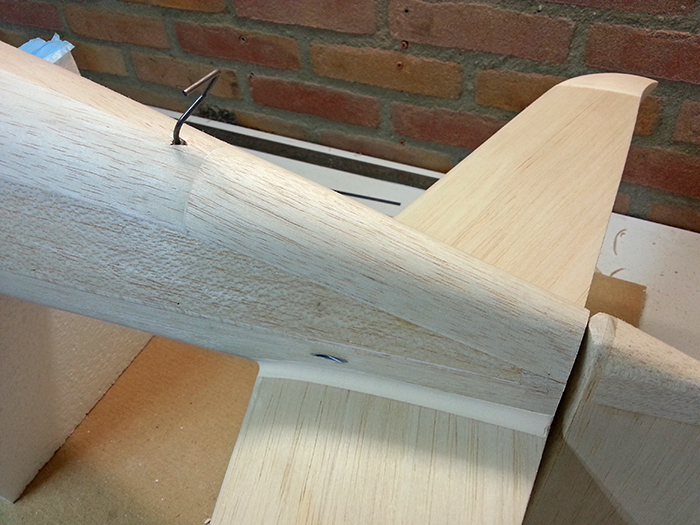
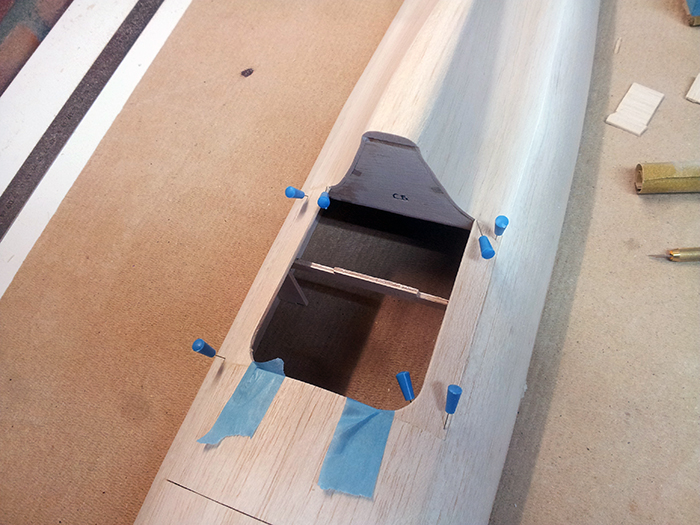
And finished! The tailwheel steering works, the rudder pushrod has the correct length and the pushrod exits are made flush with the fuselage in the right angle:

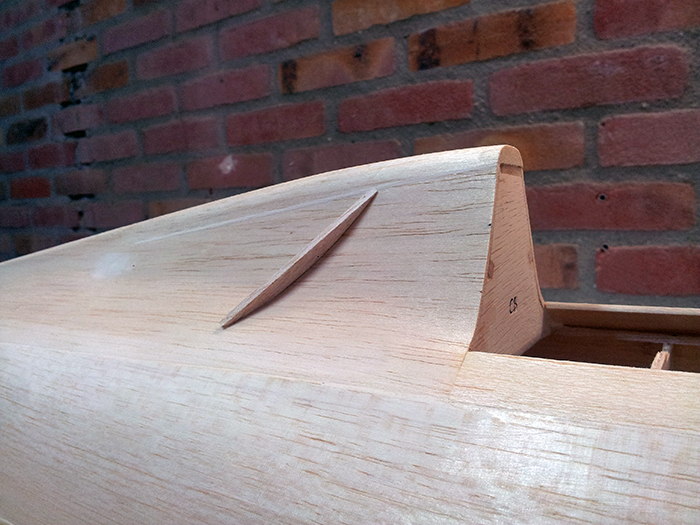
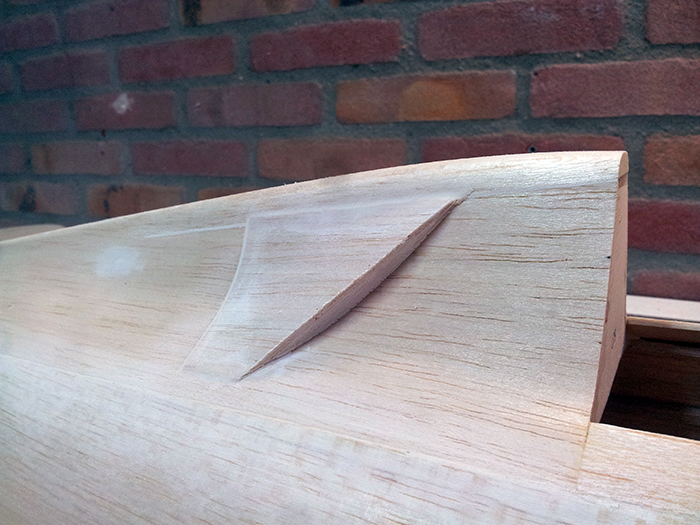
The intercooler air exists (aft of the wings on the fuse) are cut free. As far as I can see the manual doesn’t mention anything about cutting the actual openings, but I think I will do so, to make them an actual air exit (not only ornamental), which will help with the cooling of the internal components like the battery:

Need to cut some stringers before the sheeting goes on to be able to fit the intercooler exits later on:

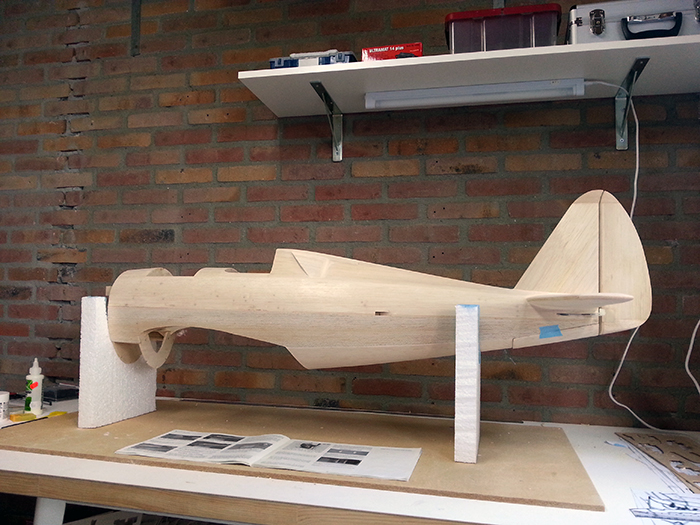
Time to finish up the lower fuse structure:

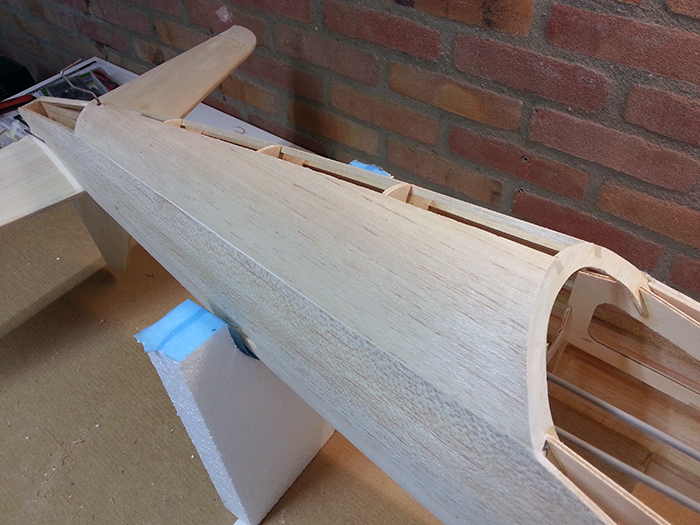
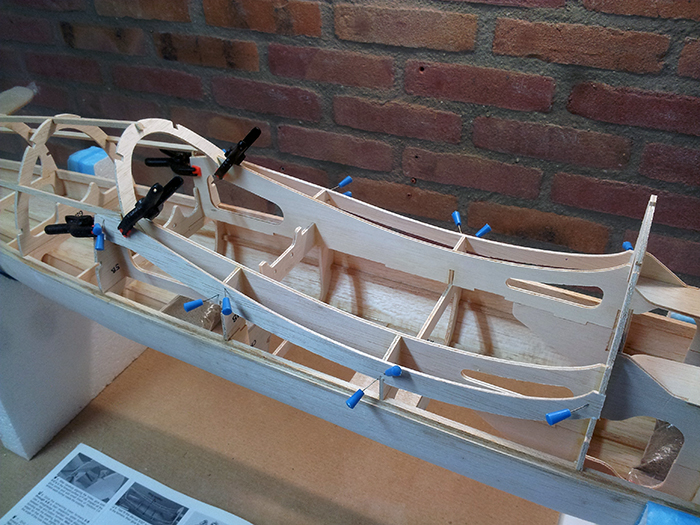
The shaping of the sheeting works great with the technique I have acquired during the first part of the build. I wet the complete sheet on both sides with water mixed with a dash of ammonia. After a few minutes wait the sheet feels flexible and strong (not brittle anymore) and you can just pin it on the structure:

Here you can see the compound curve of the sheet, absolutely no problem in this state (there’s no tension in the sheet, so it stays in position very well). It’s also a nice perspective of the build I think:

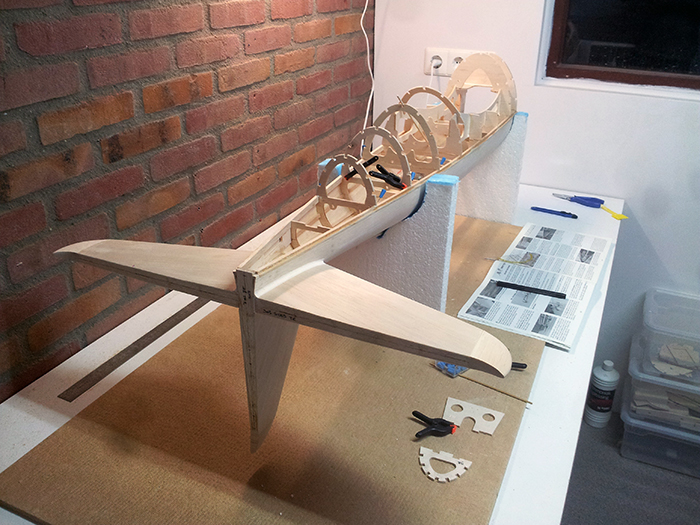
When dry, I remove the sheeting, apply contact glue (Bison Tix) to both the structure and the sheeting and just roll it in place. After a little sanding, the result is just great:

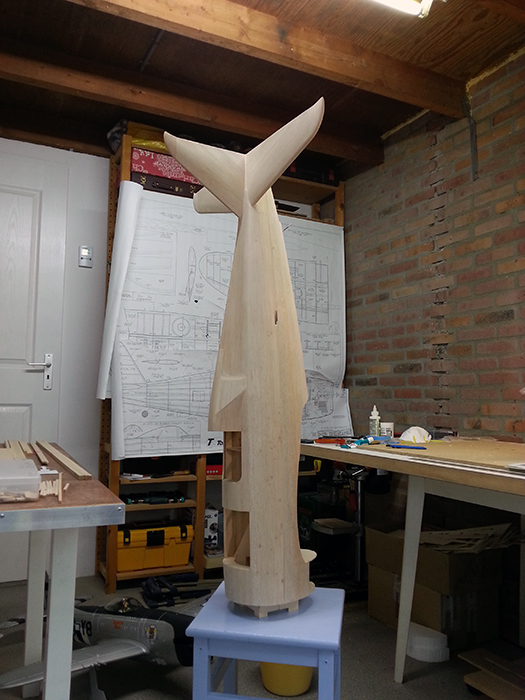
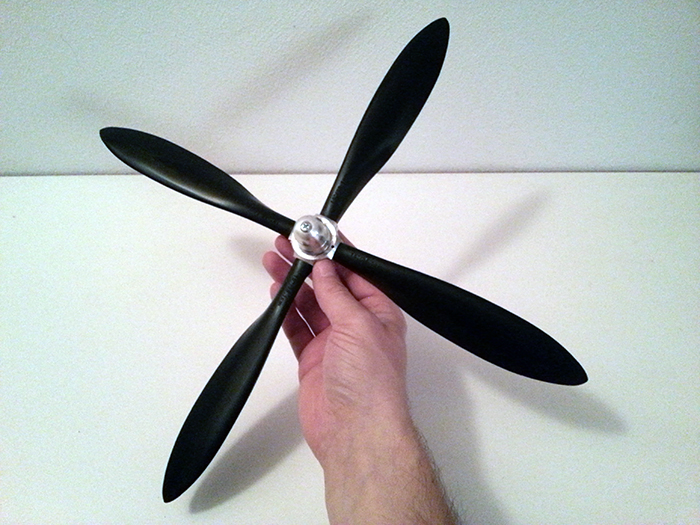
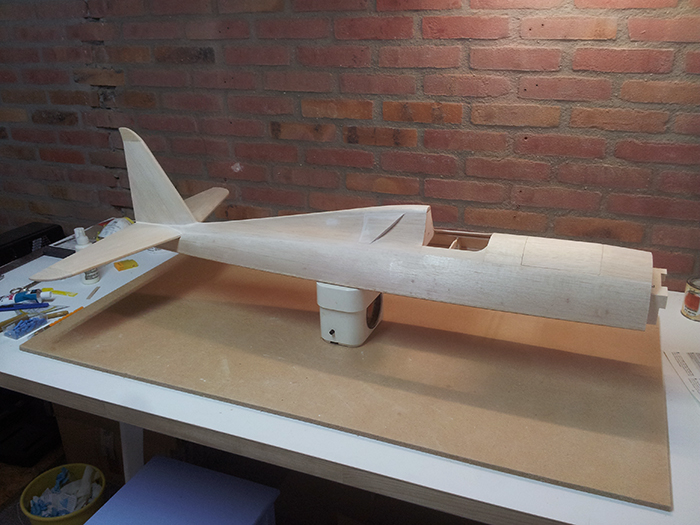
This is where I’m now. I only need to sheet the very bottom of the fuse and add the aft fuse block. The installation of the engine and firewall’s next, so I’m busy selecting the motor right now (as well as the prop, esc and battery):

Tailwheel assembly

After a short holiday break I picked up building again. I’ve installed the brass tube that had to be flattened on one side. The manual suggests silver soldering this tube in place, but the presence of a pre-installed plastic support very close to the joint made me hesitant to use a flame for soldering. I found a suitable alternative in Bison Epoxy Metal, which worked like a charm:

Then I mounted the metal ball for the ball link in the rudder pushrod, of which the nut is fixed in place with a drop of regular epoxy:

Came out nice, so time to install the tailwheel assembly into the fuselage:

Currently I’m working on the pushrods for both rudder and elevator. These will be installed before sheeting the bottom of the fuselage.

Training aircraft

I wouldn’t want to use my current build as a training aircraft for a low wing tail dragger setup, using flaps and retracts for the first time. So to acquire some routine and practise flying a Thunderbolt, I found a willing test pilot:

It took me only one night to assemble this warbird from Parkzone – full option, thus with flaps and retracts. I must say it’s a beautiful plane and I can’t wait for the maiden flight:

Small update

Just a small update on the lower fuse frame. I’ve added the stringers to the lower aft part of the fuse and added another layer of balsa filler to blend the bottom of the elevator with the fuse:

Glued the wing saddles in place too:

And a quick shot of how she looks right now:

Upside down

After finishing some details on the upper fuse half, it’s time to turn the fuse over. I’ve made a ‘stand’ from thick insulation styrofoam board, which works pretty well. The structure builds up quick, as usual:

Here you can see the stand and the fuselage’s position a bit better. I traced the intersections of F1 and F6 on the plans, cut them with a fret saw out of styrofoam and covered the upper faces with masking tape for further protection:

Meanwhile, I’ve started blending the underside of the stabilizer with the fuse, initially with a bead of epoxy, to finish it off with balsa filler:

I also made the underside of the battery hatch. Still not sure how it’ll be fitted, but this makes it stronger and also adds the capability of using magnets later on:

It’s all in the details

Tonight I’ve added the cockpit sides. The manual is a bit vague about this part and you have to cut your own parts for this, but it ain’t difficult:

Adding the cockpit sides makes a lot of difference. The canopy fits well, looking way better right now:

Until now, there’s only one thing I wasn’t happy with: the rudder hinge line. In an attempt to approximate the scale hinge line, I carved it in an arc instead of in a straight line, as the manual suggests. But the arc was too sharp and it just didn’t look right, so I glued on a piece of 3/32 balsa sheeting and carved a new hinge line (you can clearly see the difference between the new and the old line):

Then, I sanded the rudder to fit the new shape of the fin trailing edge; this made all the difference!

The next step was to glue on the cockpit fairings. I made the fairing formers and the fairings themselves yesterday (as you have to cut and shape these parts from scrap balsa yourself) and after two takes I got a nice pair of well fitting formers:

Lastly, I glued on the fairings and started blending them with the upper fuse sheeting. It still needs some more filler, but I’m almost there:

Couldn’t resist weighing the result so far… it feels quite light and although this number doesn’t say anything at all right now, it’s nice to see such a big assembly is only weighing 340 grams as per now:

Completing the upper fuse half

After a few more hours I’ve almost completed the upper fuse half. I only need to do the cockpit fairings, the cockpit sides and some filling with epoxy and balsa filler to blend in the tail, to finish this part of the build!

First, I’ve roughly shaped the fuse top block:

.. and sheeted the forward fuse top. The hatch fits in really well, I only need to do some blending in and figure out how to attach (and remove) the hatch. I could use magnets, but due to the shape you wouldn’t be able to get it out anymore (not enough grip). I’m thinking about insert a little bolt underneath the surface, so I could screw in a small handle to get it out. Updates on this will follow. But anyhow, the top’s nicely sheeted right now:

Then I shaped the fuse top block to it’s final shape. The spine still needs a little sanding by the way. Maybe I’d tweak it a bit more, but it’s already looking good:

I also cut out the canopy:

As far as I consider, it’s already starting to look like a Thunderbolt! The cockpit sides and the blending of the forward fuse top will finish it off I guess: