Tail fitted

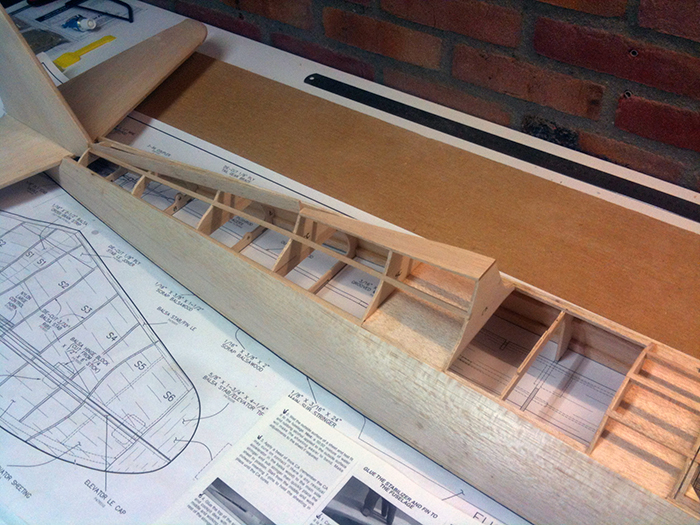
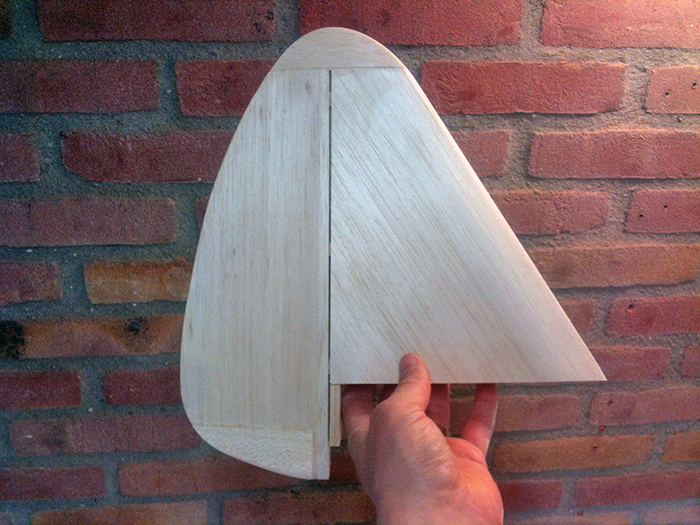
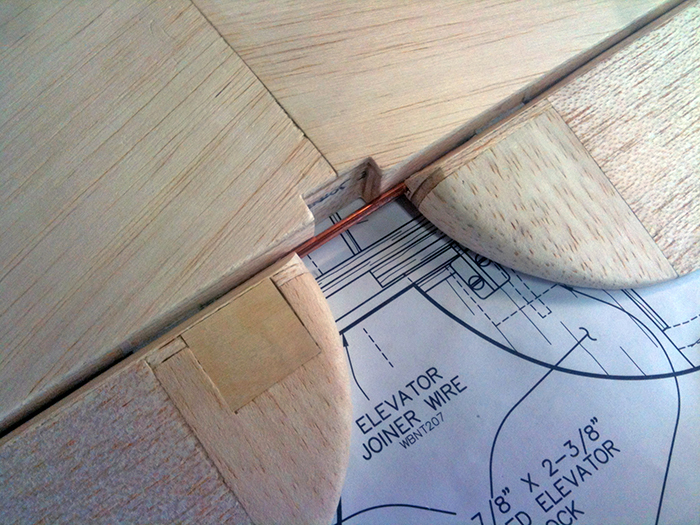
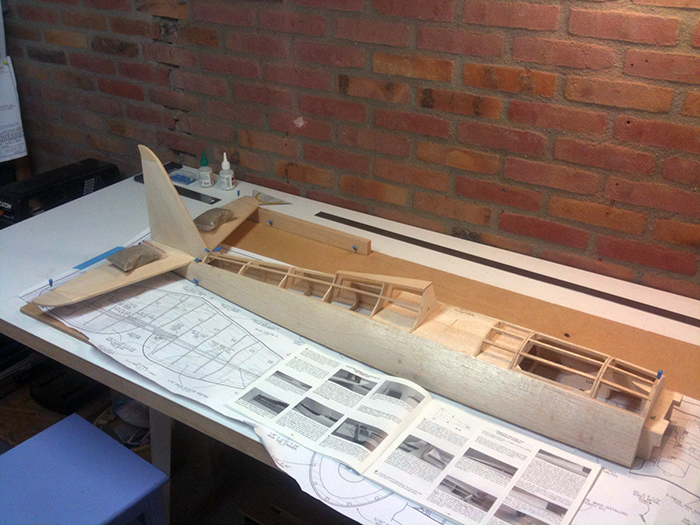
I’ve spent the last few evenings fitting the tail. Not much to talk about, just a lot of measuring, checking alignment, adjusting the saddle and sheeting and such. When I was satisfied, I glued everything in place with 30 minute epoxy.

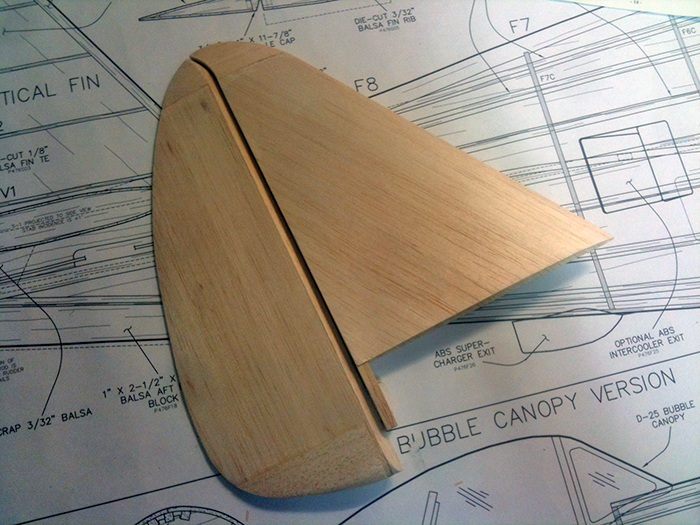
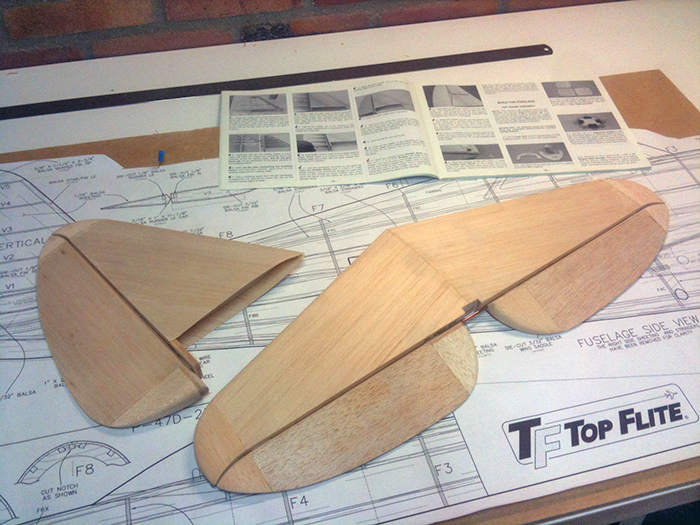
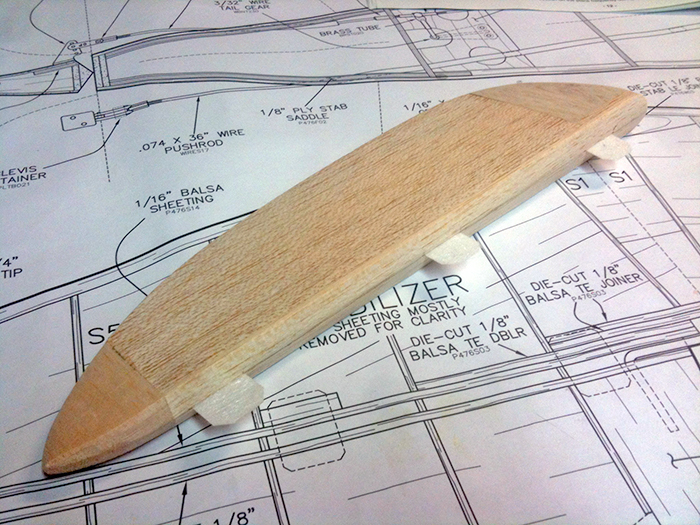
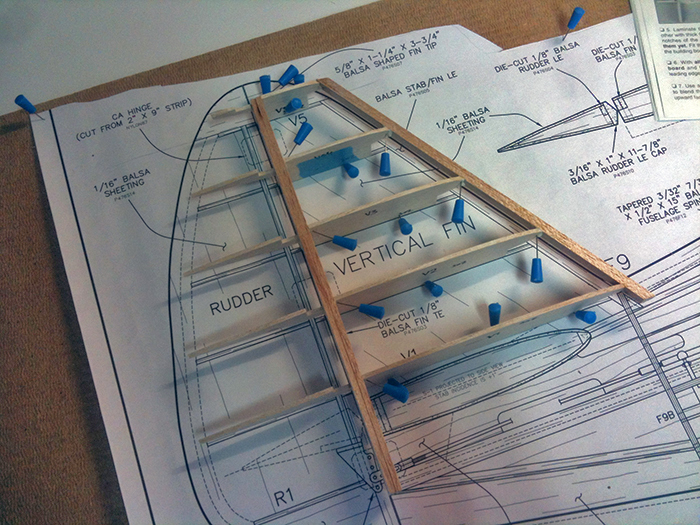
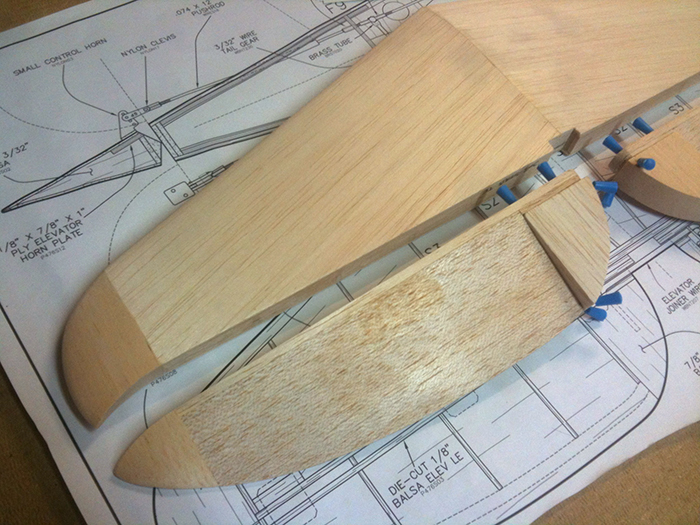
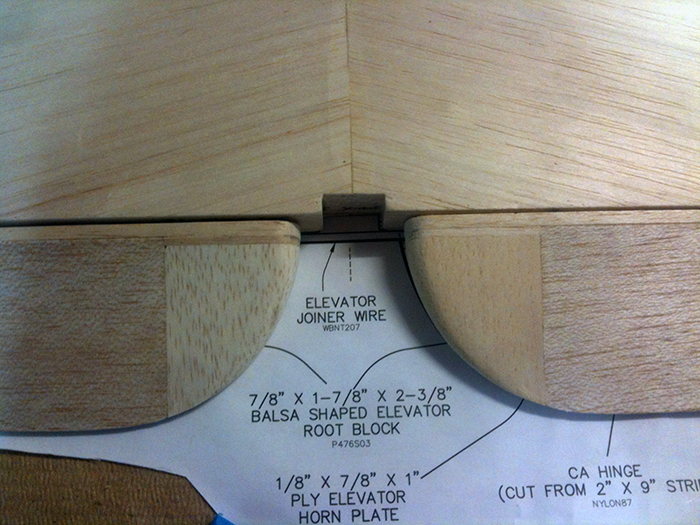
Fitting and aligning each of the tail feathers separately, then together:

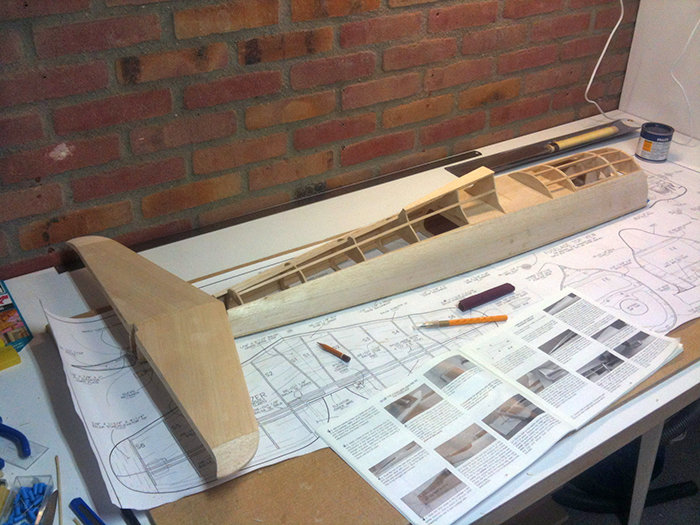
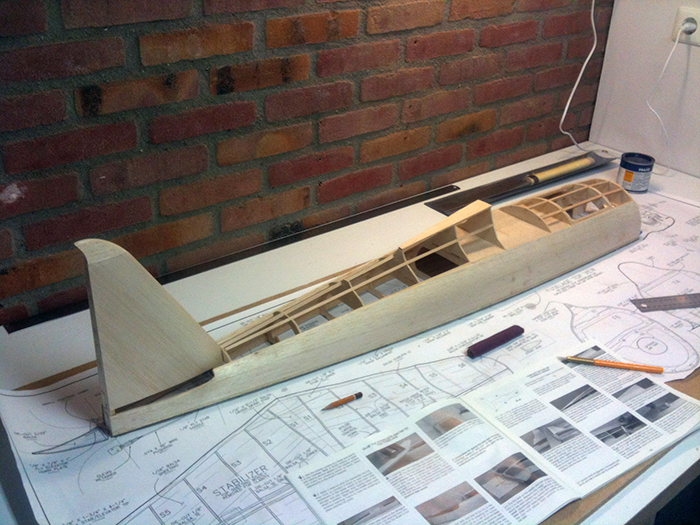
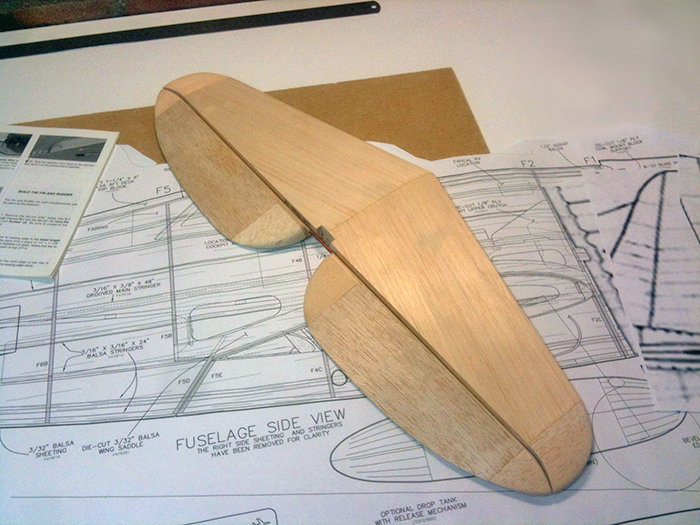
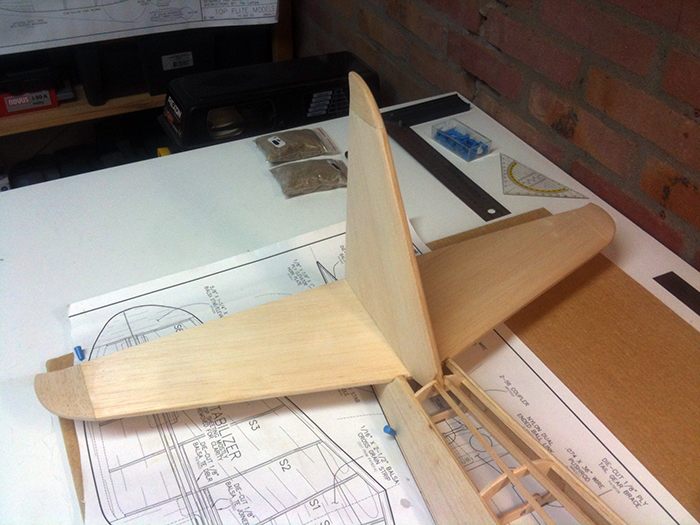
When everything fitted well, I glued the tail in place. I used bags with wet sand as weights to keep the stab down and some wire (not really visible on the picture) to check the distance from the nose to both stab ends. Straightness of the fin was checked with a square:

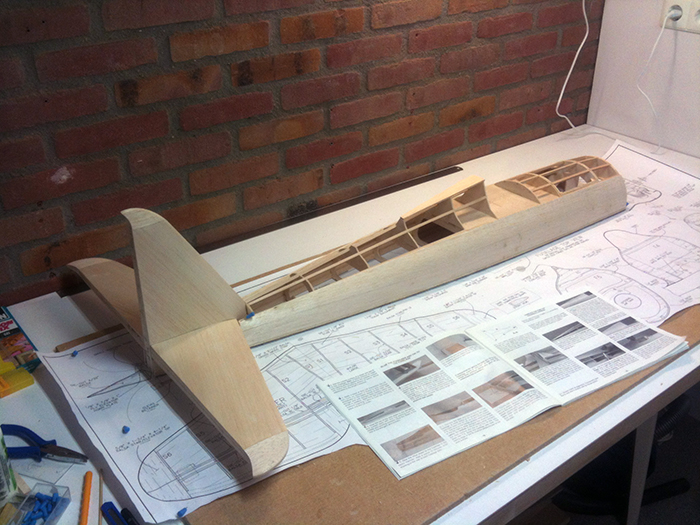
And the result, looks pretty good!

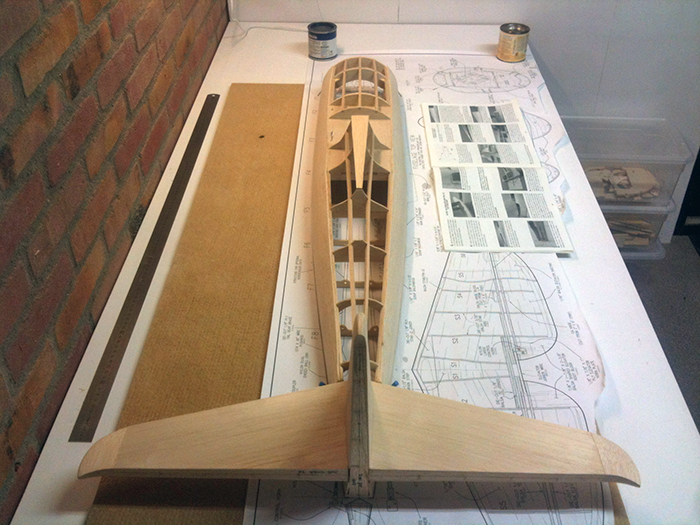
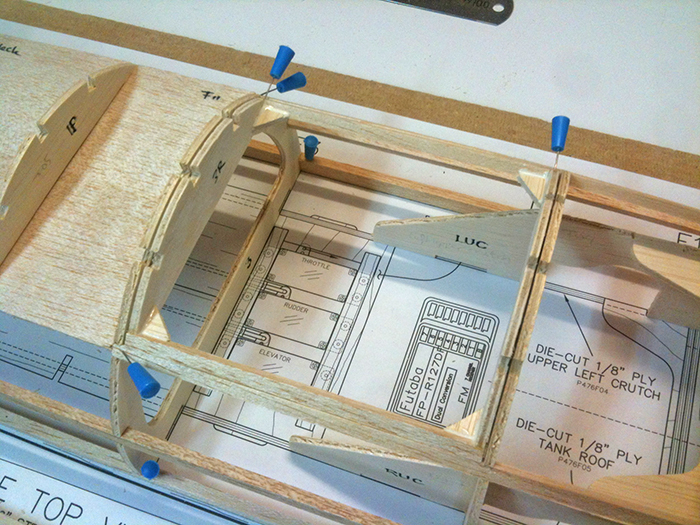
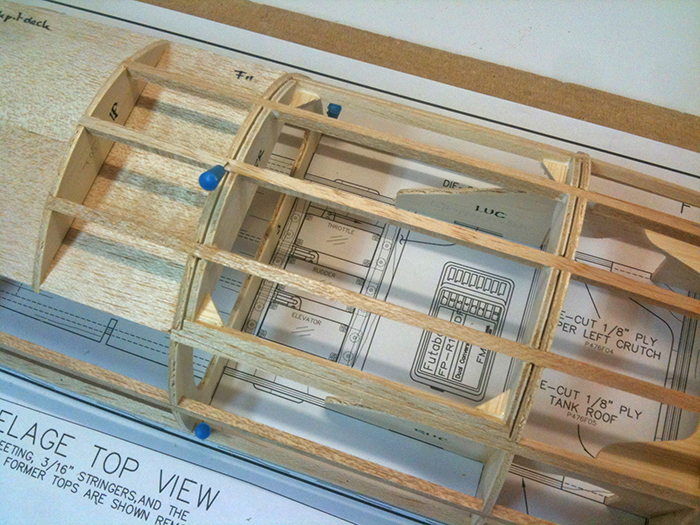
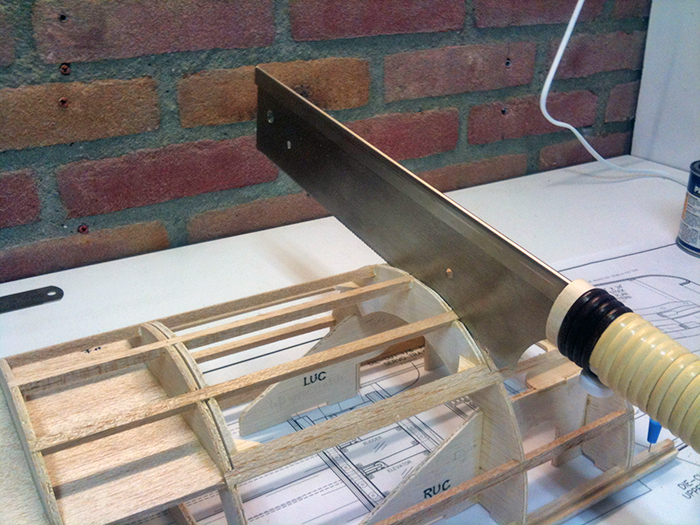
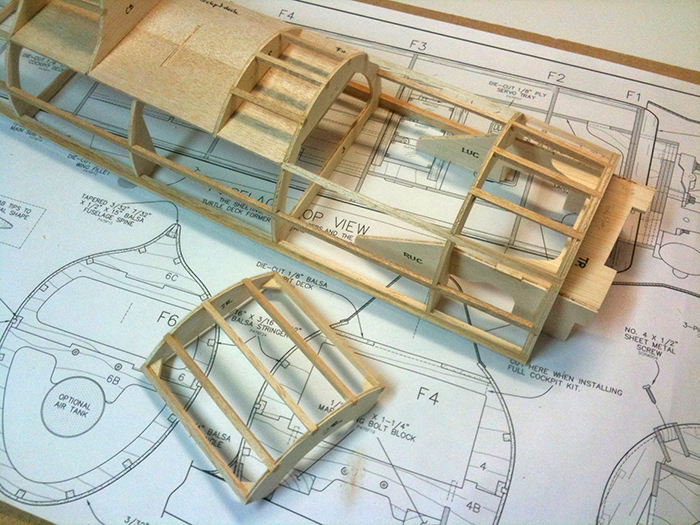
Before I can continue sheeting the fuse top, I needed to cut away the cockpit deck for the full cockpit kit I’m going to install, and I needed to install the fuselage spine:

Side sheeting stress

Tonight I sheeted the fuselage sides. It’s not all that hard, but it ain’t easy either… it’s my first sheeted fuselage, the size of the sheeting being fairly large and thick too (3/32″), so it came out to be a bit of a stressful exercise, but I’m very happy with the result nonetheless.

By the way, I did not follow the instructions of using a bead of thick CA on the main stringers, working your way up the fuselage from the center out to attach the sheeting with thin CA to the rest of the stringers and formers. I try to omit the usage of CA whenever I can and using Bison Tix (contact glue) proved to be much easier anyhow. So I did a test fit of the sheeting (wetting the outside), marked the locations of formers and stringers on the inside, removed the sheeting, applied glue on both the fuselage structure and the sheeting and waited for 10 minutes. Finally, I rested the sheeting on the main stringer and rolled it against the fuselage. After the sheeting was attached I put some beads of white glue on the inside of the cockpit deck for more strength in this relatively weak area.

The fuse now looks like this, waiting for the stab to be attached:

Battery hatch

Yesterday I finished the battery hatch modification. First, I glued in the stringers next to the hatch, followed by two small extra stringers that will become the sides of the hatch, resting against the side stringers. You can see I’ve also glued in some ply reinforcement triangles in the corners:

Then I’ve glued in the top stringers of the forward fuselage part:

When the glue cured, I used my very thin Japanese saw to cut through the stringers in between the formers:

And it’s ready (apart from the sheeting, that is):

I used a small knife to wiggle in between the formers, breaking the tack glued tabs and releasing the hatch from the fuselage:

I’m very happy with how it turned out. It’s large enough and very sturdy.

This was the last step before sheeting the upper half of the fuselage, so the structure’s ready:

Fuselage fun

I started working on the fuselage this weekend, which is quite a fun part of the build. I started with pinning the main stringers on the plan and assembling the upper part of the tank box and the first two formers. I also had to glue some other parts (like the firewall). The tank box will probably become the battery box of the plane:

Then I placed the formers on the main stringers, ensuring they’re square to the building board:

Since I will convert the plane to electric power, I need to make a battery hatch in the fuselage. I will build this hatch into the structure so I can cut it loose after applying the skins. First, I’ve made two former doublers, one for F2 and one for F3. Those former doublers will become the front and aft sides of the hatch:

A bit further with the fuselage structure, installed all formers, the cockpit floor and started gluing in the stringers:

As you can see, I tack glued the former doublers for the battery hatch to the formers using some very thin ply tabs, so I can cut it loose later on by cutting the stringers inbetween the former and the doubler. I will also add stringer doublers to the outer edges of the hatch:

And with some more stringers installed, it’s starting to look like a razorback:

Fin and rudder finished

Yesterday I finished the fin and rudder assembly. I added root and tip blocks (temporarily joined the fin and rudder) and shaped them:

Removed some material for the rudder horn ply block:

Then I cut the slots for the hinges and V-shaped the rudder LE. The hinge line isn’t straight, as per scale, but I am not really satisfied. The original hinge line starts to bend backwards way earlier (lower) in the rudder, but due to the structure provided by the kit, this wasn’t possible. It looks okay from a distance and it’s better than a straight hinge line, but it’s not resembling the scale hinge line very well:

But all in all, I do have a nice set of tail feathers now!

Time to take a look at the fuselage plans…

Sheeting fin and rudder

In order to prepare for the sheeting, I sanded the ribs equal to the TE and LE of the fin, glued in the rudder LE and installed the last rib of the rudder. Then, the right side of the fin’s sheeted:

The following step is to prepare the sheeting for the other side of the fin, as well as both the rudder skins. The latter can’t be cut from one strip of balsa sheeting (too wide), so I had to join multiple pieces of sheeting, but with some tape and the great aliphatic glue I have it’s a breeze and it only takes 10 minutes before I can proceed. This is the result, where the rudder skins are cut following the templates on the plans:

I really enjoy the building process and it surprises me how much easier (and better) the fin and rudder go together, opposed to the stab. The experience gathered really pays off and I think it’s a pity I can’t redo the stab and make it even better.. or should I consider another build after this? ;)

Here’s the rudder sheeted:

Stabilizer finished

Got some more work done on the tail. Installed hinges on the elevators and sanded their leading edges to a V-shape:

I also installed the elevator joiner wire and the plywood elevator horn block:

This means I’m ready with the horizontal tail feathers!

I’m happy with the result, but still in doubt about the fake scale hinges and trim tabs. Those would certainly look cool, but won’t add anything functional to the plane and I don’t want to add more weight to the far end of the tail, certainly if it’s not necessary. We’ll see, I guess this means I am still undecided between a sport scale and a semi-scale build.

Anyhow, time to proceed with the fin! The structure is already finished:

Stab almost finished

Got some more work down on the stab and elevators. I finished the shaping of the tips and, after lots of pondering, I decided to deviate from the plans and cut the elevators in a more scale-like fashion. The plans show a simplified hinge line (straight without visible hinges), but it’s very easy to approach the scale hing line without any extra work. I’m still contemplating whether I’ll incorporate fake scale hinges though. Here’s the freshly cut tip with the elevator root blocks glued on:

Shaped these root blocks yesterday, which is quite a fun process. Came out great:

The whole stabilizer and elevator assembly is rather laborious (especially compared to the stick built flat tail feathers of all my previous builds), but the result is very pleasing:

Next up are the hinges, shaping the elevator LE’s and connecting the elevators using the elevator joiner wire.

Shaping the stab tips

The stabilizer and elevators slowly come together. I hope the fin and rudder take a little less time to complete, so I can start with the fuselage in a week or two.

It doesn’t look like a lot of progress, but since the last post I’ve sheeted the underside of the stab, cut the elevators from the stab and cleaned up the remnants of the ribs, glued the leading edge caps to the elevators, tack glued the elevators back to the stab, glued the tip blocks on the trued up outside edges of the stab and shaped those blocks to roughly the desired shape:

One week in

Still working on the horizontal tail surfaces, takes a lot of steps, but all goes well. Got a fantastic tip from a fellow club member regarding sheeting: use Bison Tix! It’s a contact glue, applied on both sides and you can just press the sheets on after a 10 minute wait. No clamping, no curing time. It really works like a charm, way better than other glue types! Especially since it can be difficult to clamp the sheets in place to hold them while the glue cures when using Aliphatic Resin (my preferred glue for all other purposes when working with balsa). You could use CA, but I absolutely hate it.. doesn’t really grab well on the porous balsa sheets, while it does an excellent job gluing my fingers to my workpiece all the f***ing time.

Here’s the top of the stabilizer sheeted:

Prepared some more sheeting for the tail surfaces (including fin):

…and with the elevators sheeted too it’s starting to look pretty nice. Funny fact: with its 60 cm span it’s as big as the main wing of the smallest plane I’ve flown: