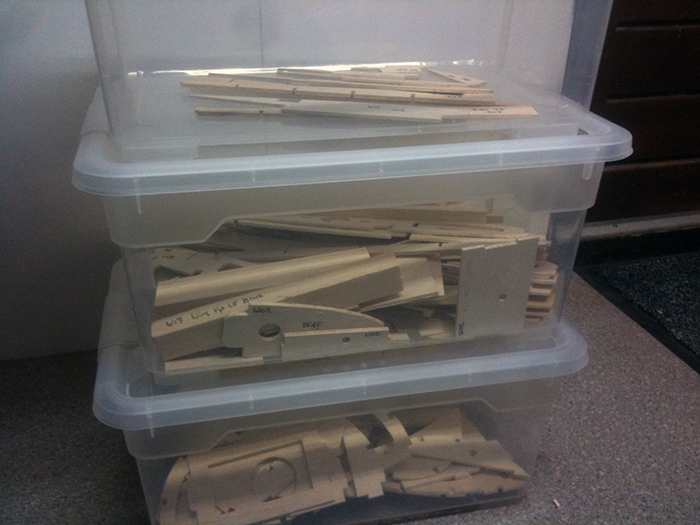
After a few more nights searching and labeling I’m ready with all 304 items that came out of the box. Having everything neatly organised, I do not have to search anymore while building:
Couldn’t resist making a little kick start on this project:

After a few more nights searching and labeling I’m ready with all 304 items that came out of the box. Having everything neatly organised, I do not have to search anymore while building:
Couldn’t resist making a little kick start on this project:
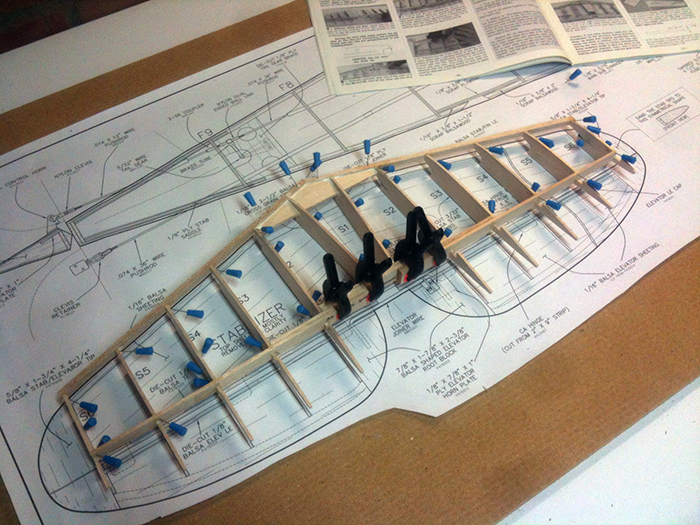
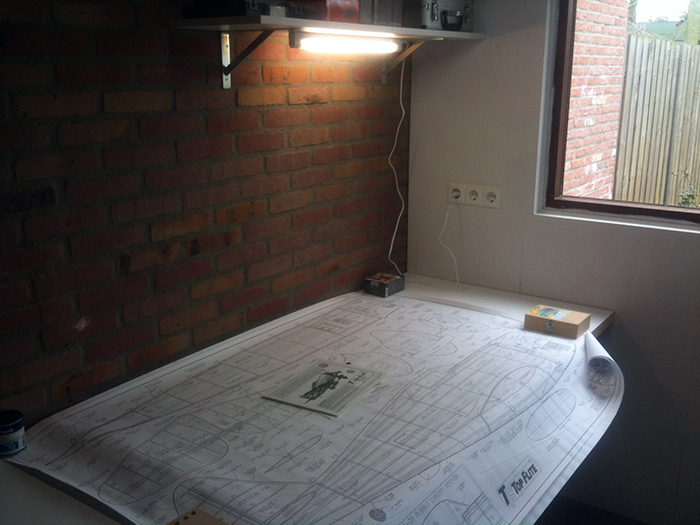
This weekend I converted my workshop so I could start building the Thunderbolt! I created a worktable from a completely flat interior door (easy, cheap and large), added extra light sources and cleaned up the mess from the Paradox build. This is my new worktable with the plans unfolded (still too large for my table):
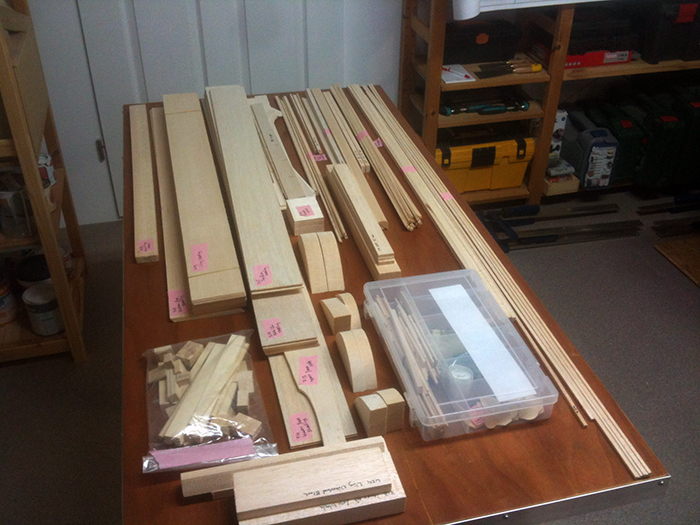
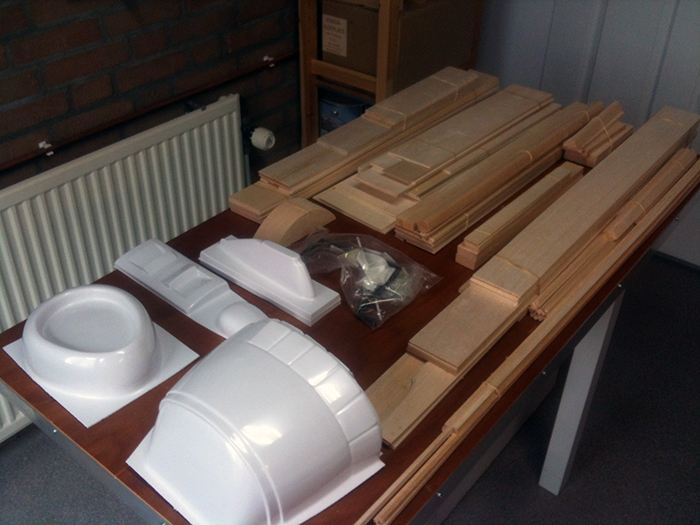
Then, I unboxed all parts.. a pretty impressive stack of balsa I must say. The cowl (yes that’s only one half of it) also gives away the size of the plane:
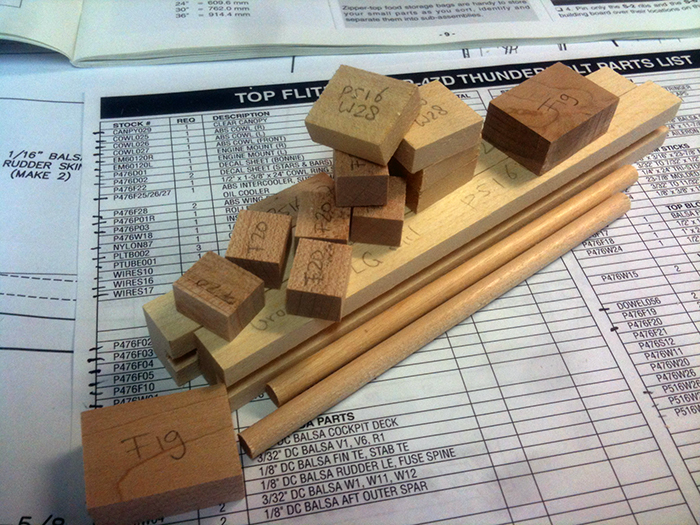
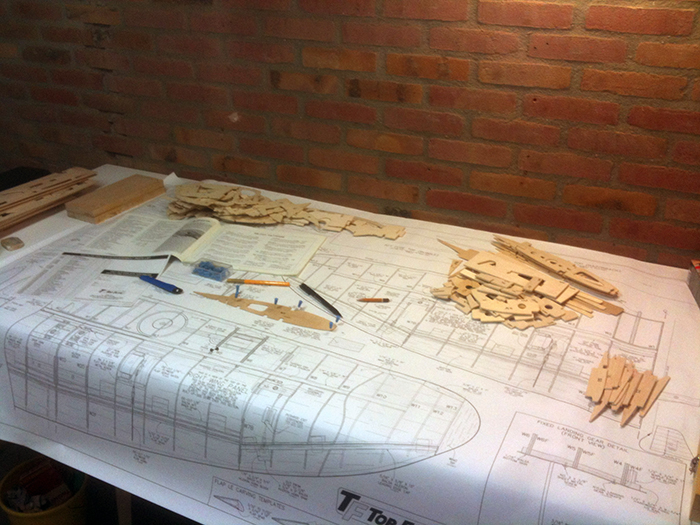
I already spent one evening removing die-cut parts from the balsa and ply sheets, finding out where they go, marking them with the source sheet number and part names and finally removing them, sorting them in different stacks for the fuselage, stabilizer, fin, wings and cowl:
I think I need one or two nights more to figure everything out, before I’m ready to actually start building.
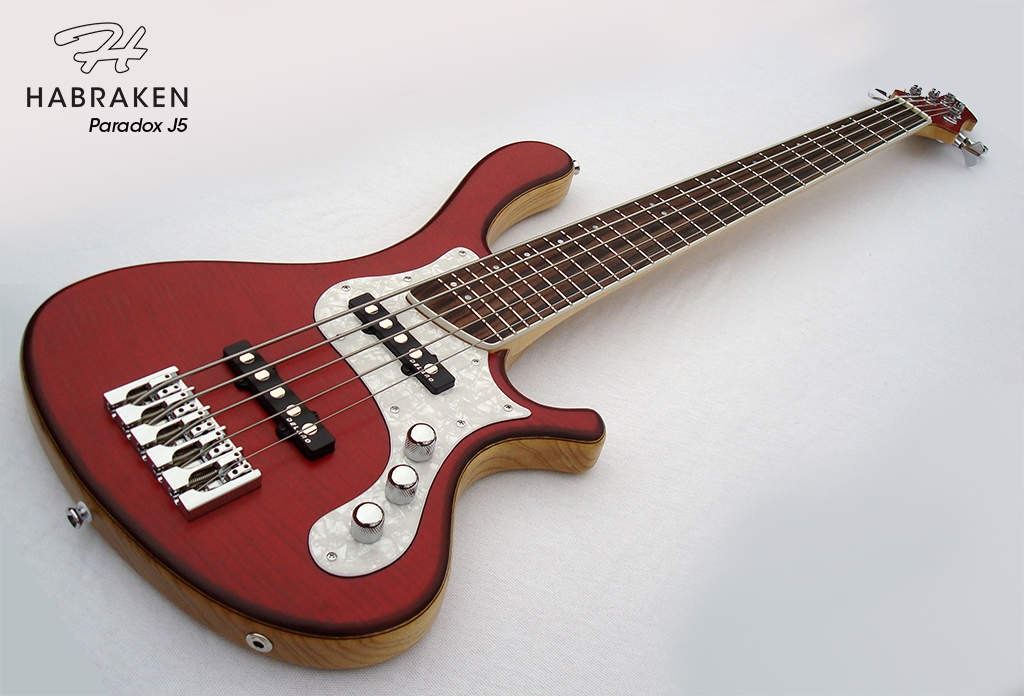
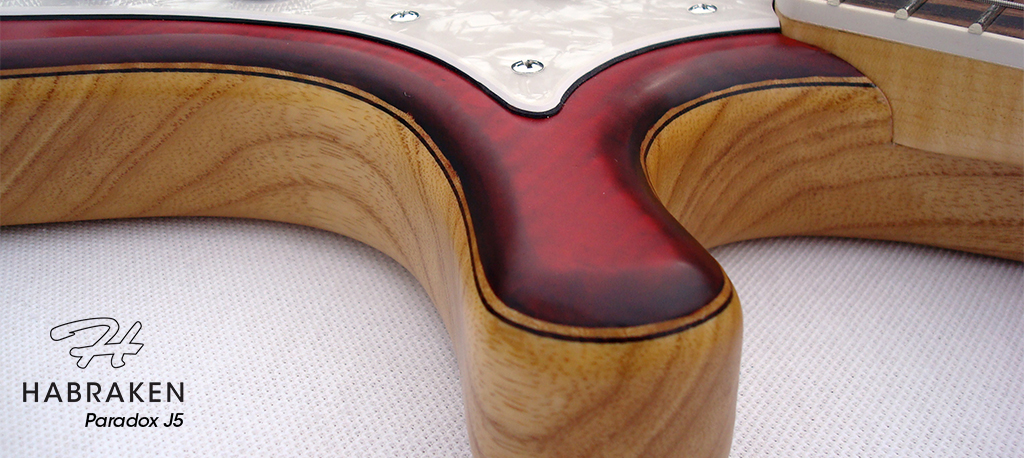
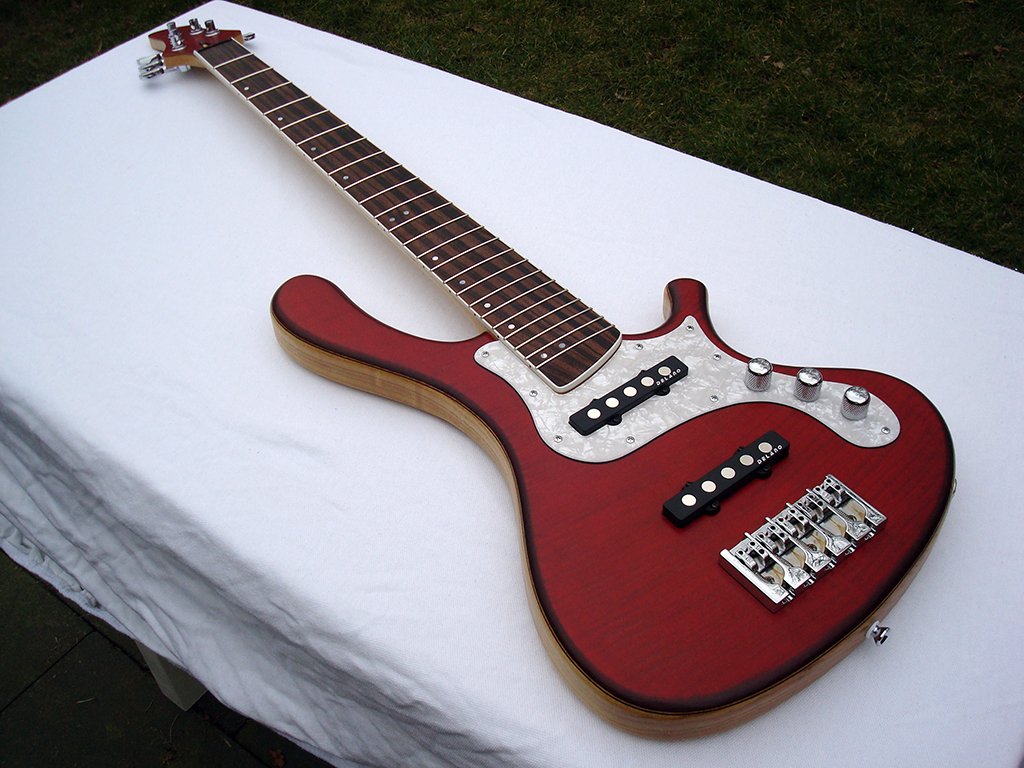
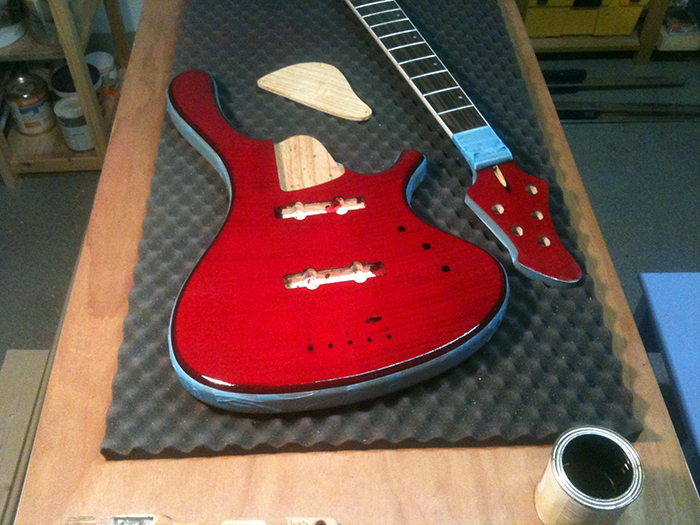
Finally, after a little over one and a half year, my Paradox J5 is finished! It looks the part and it plays like butter… I’m very pleased with my new dream bass!
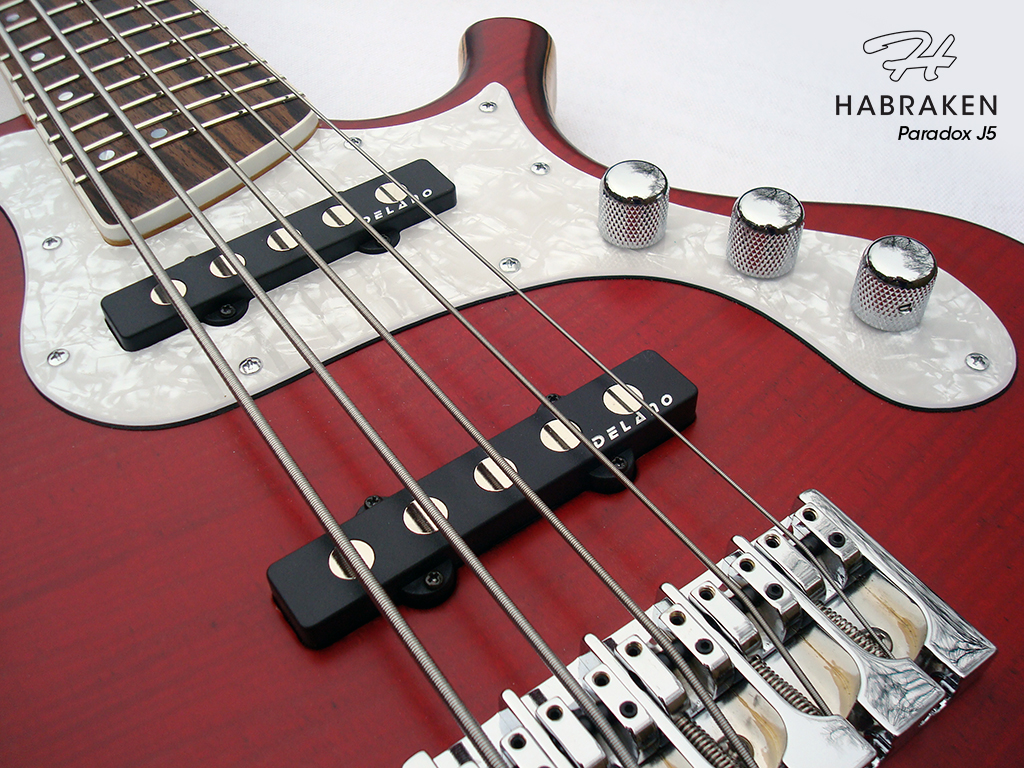
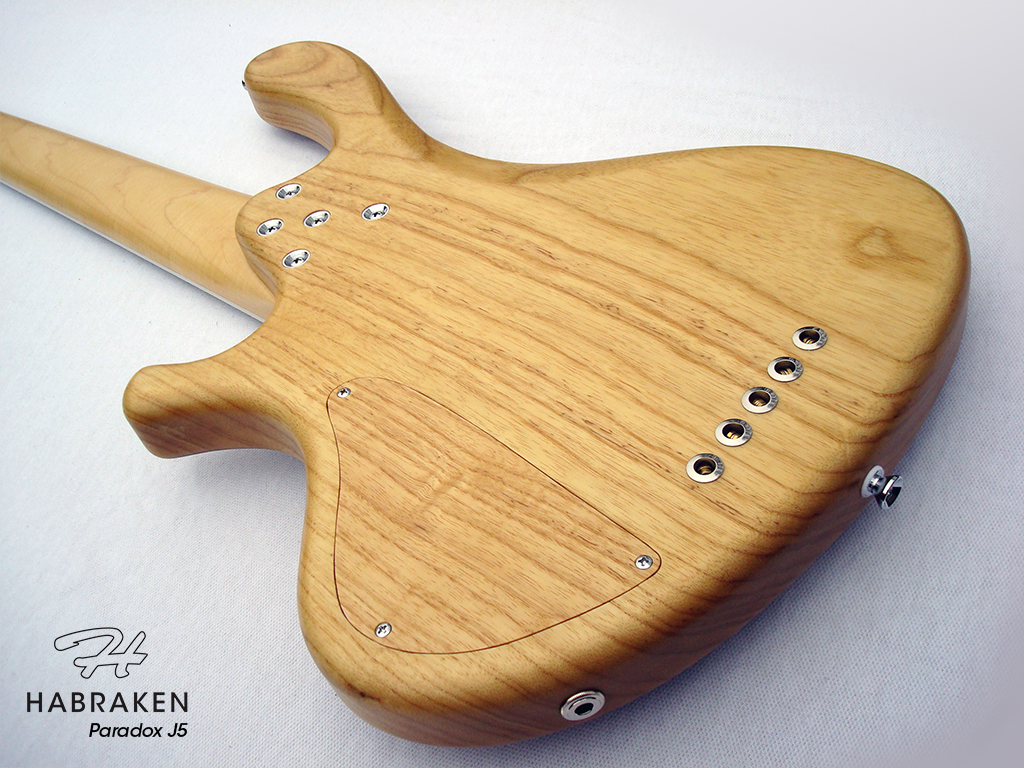
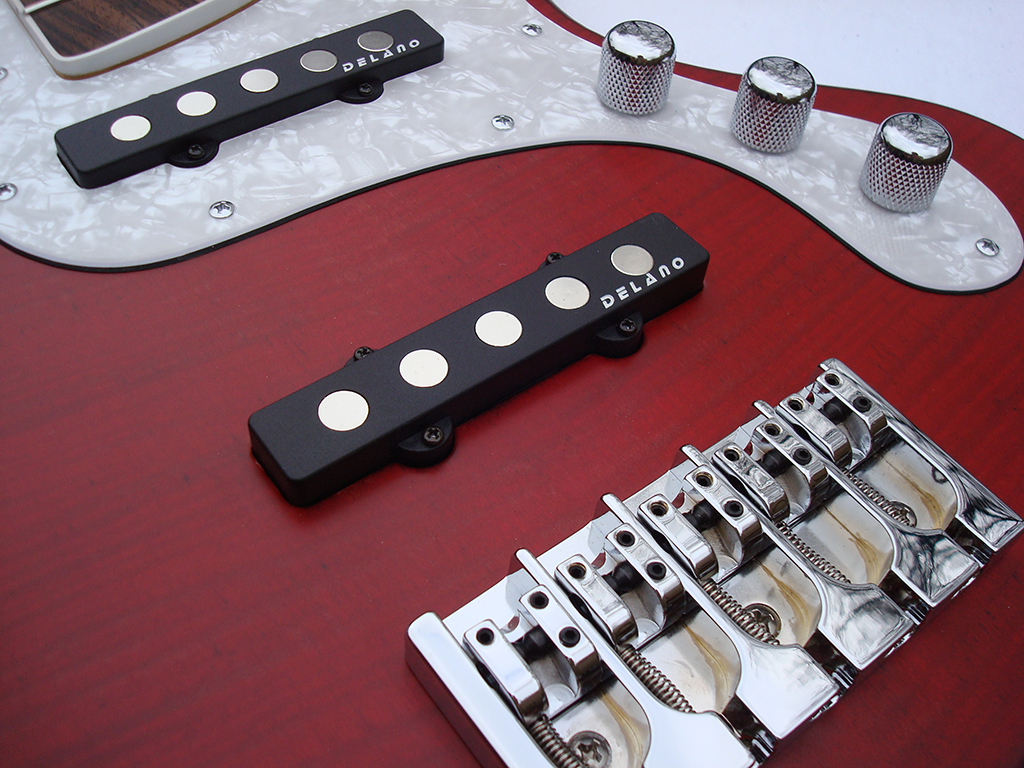
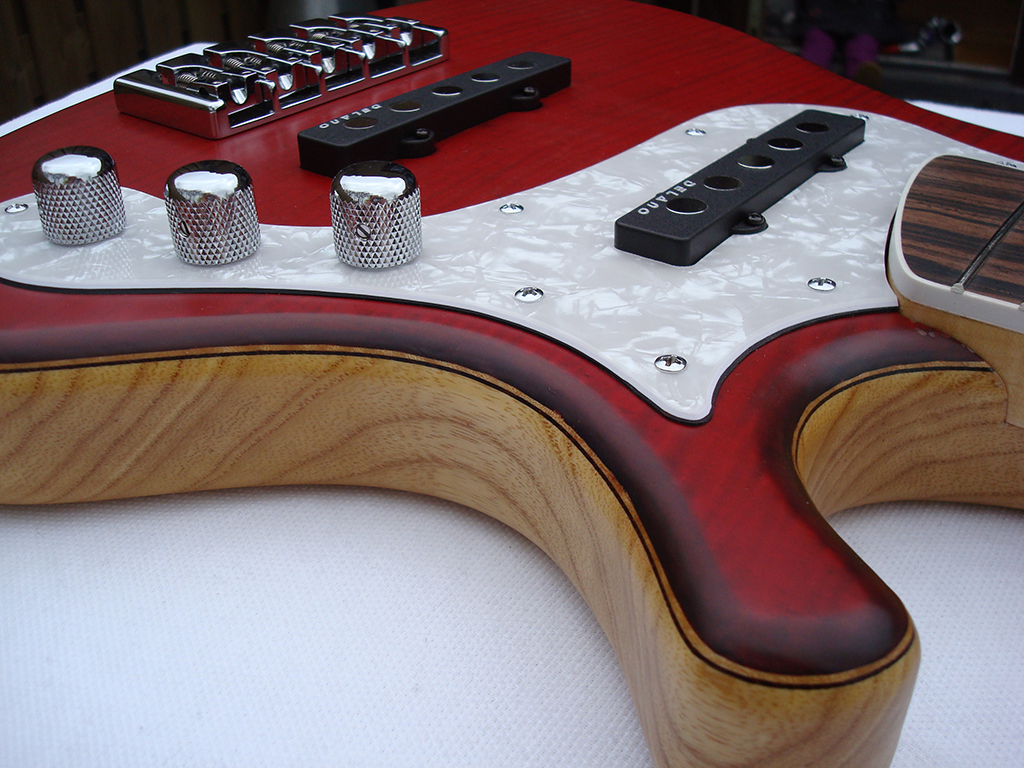
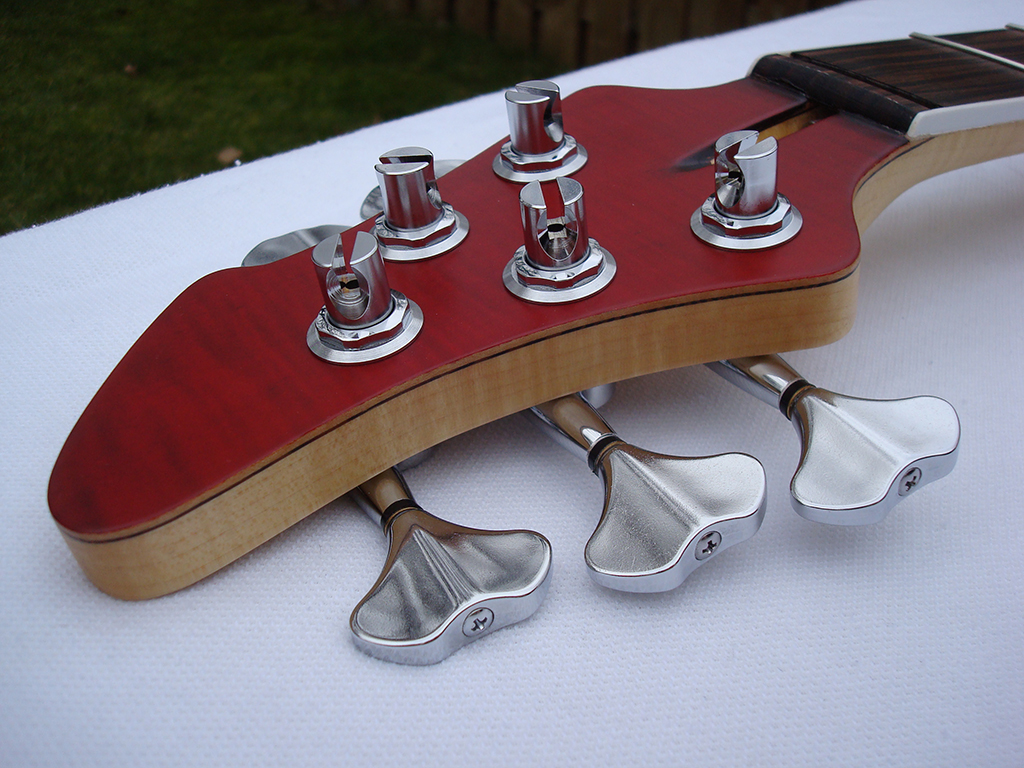
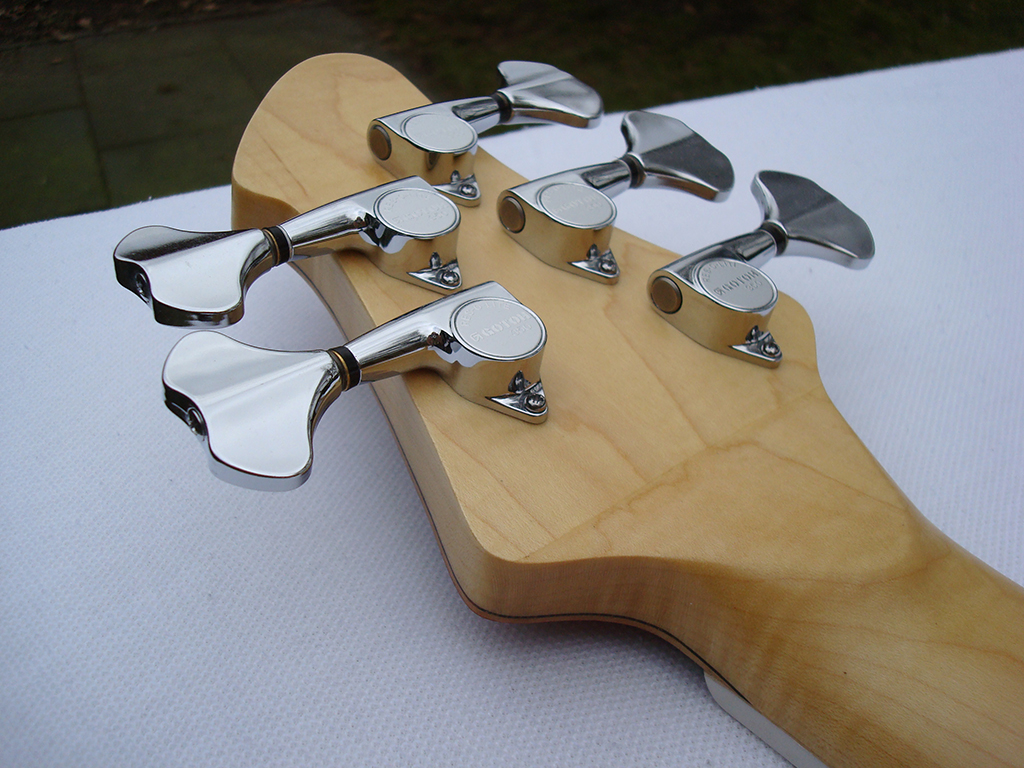
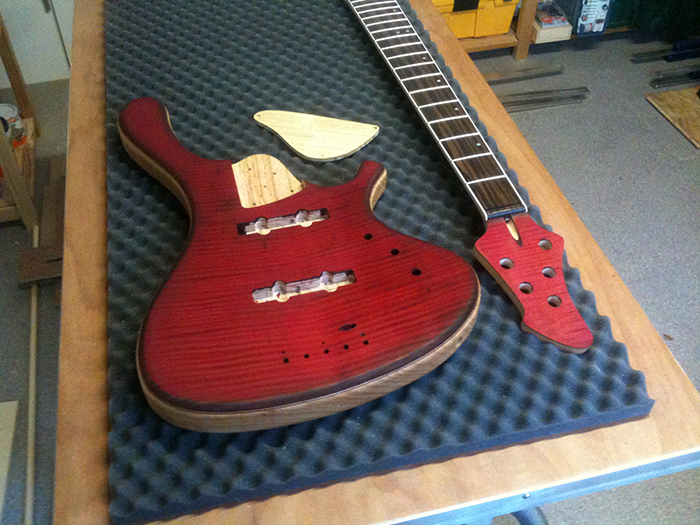
Things are going great this weekend. I installed all hardware and soldered the passive circuit. Still want to dot some i’s, but all in all it came out superb!
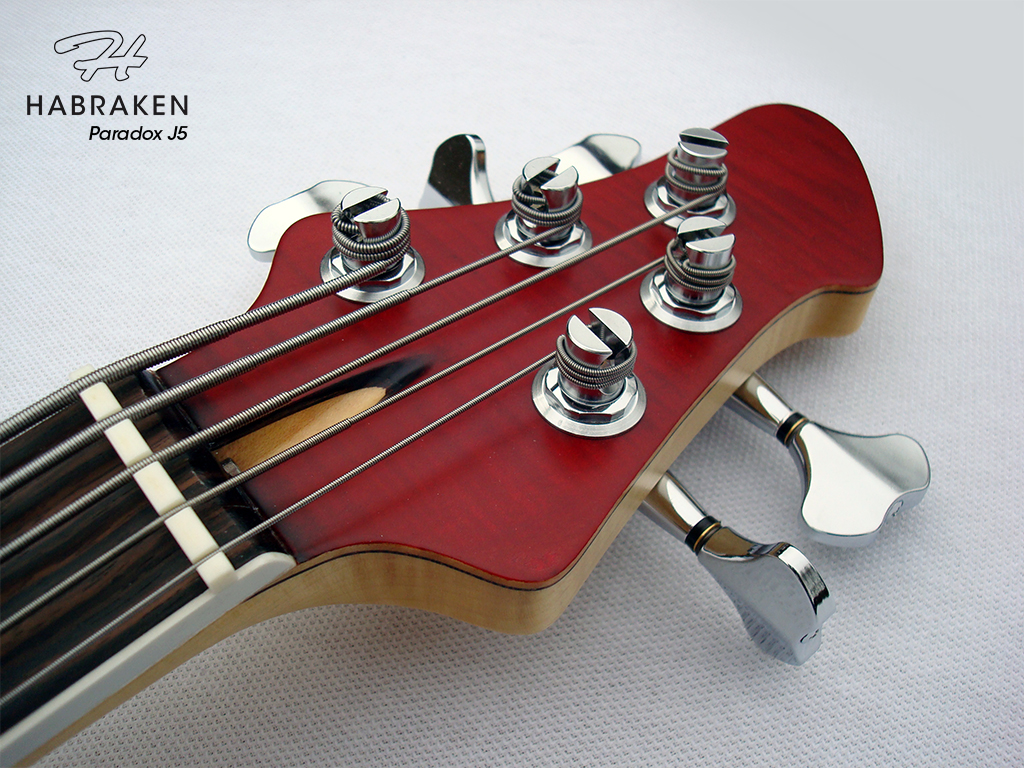
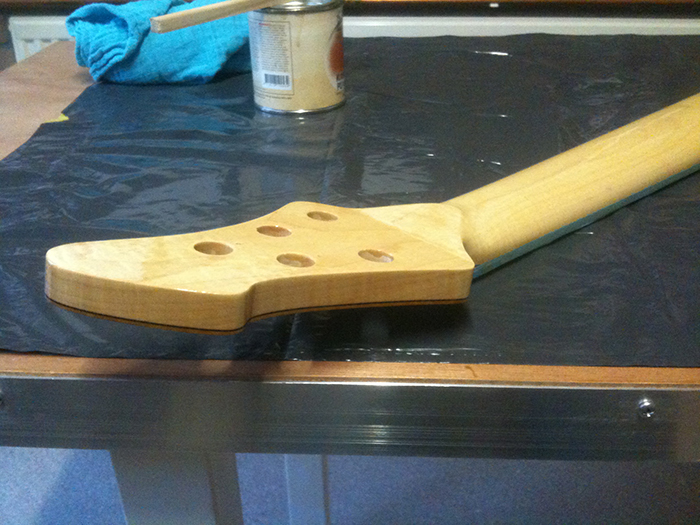
I weighed the bass and it came in at 3.9 kg (+/- 8.6 lbs), not that bad for a fiver I reckon. Yesterday I ordered a set of strings, the DR MM5-45 (Fat Beams, Marcus Milller signature). When I receive them I ‘only’ have to finish the nut, do the fret dressing and plug it in, see if it works
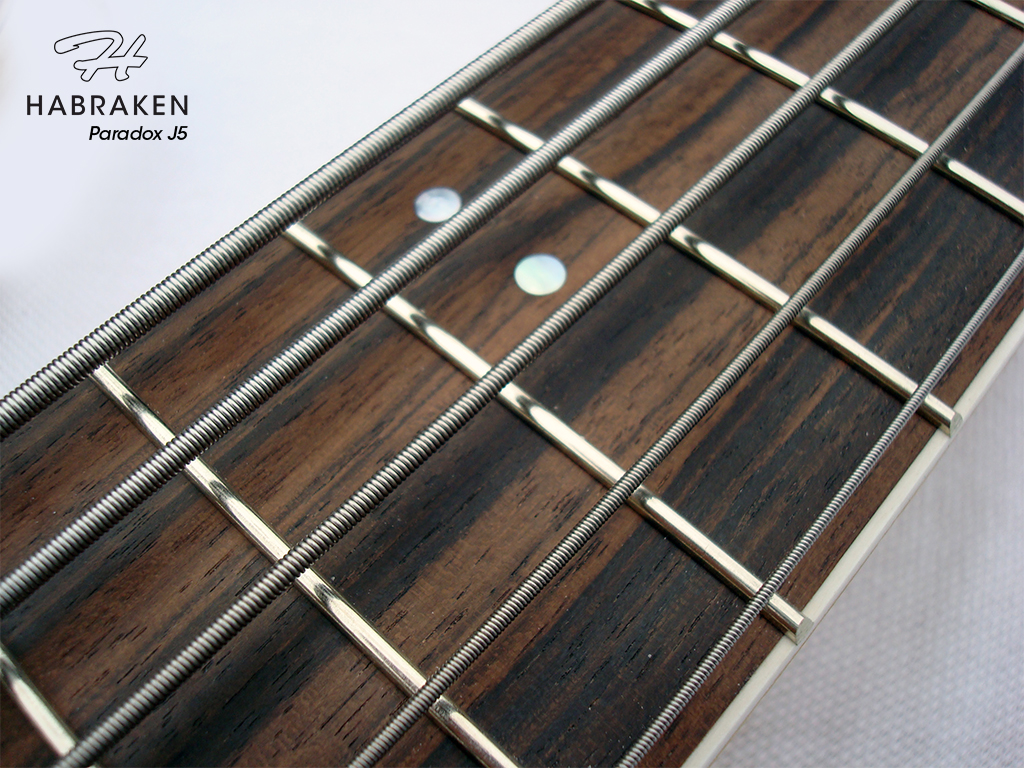
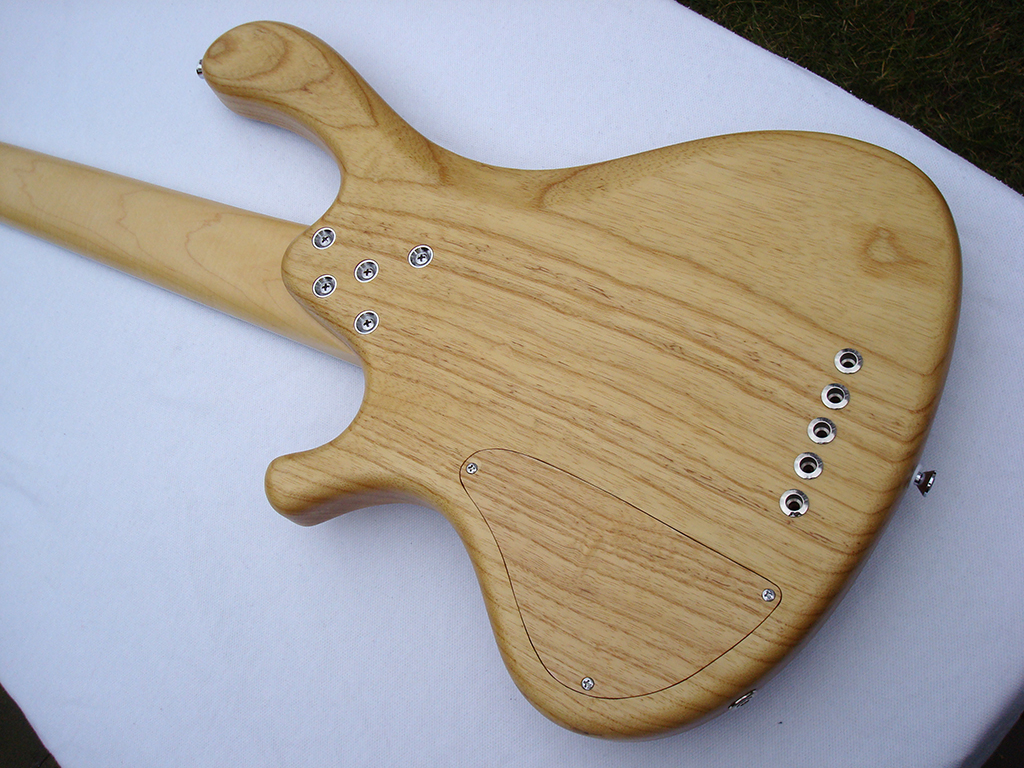
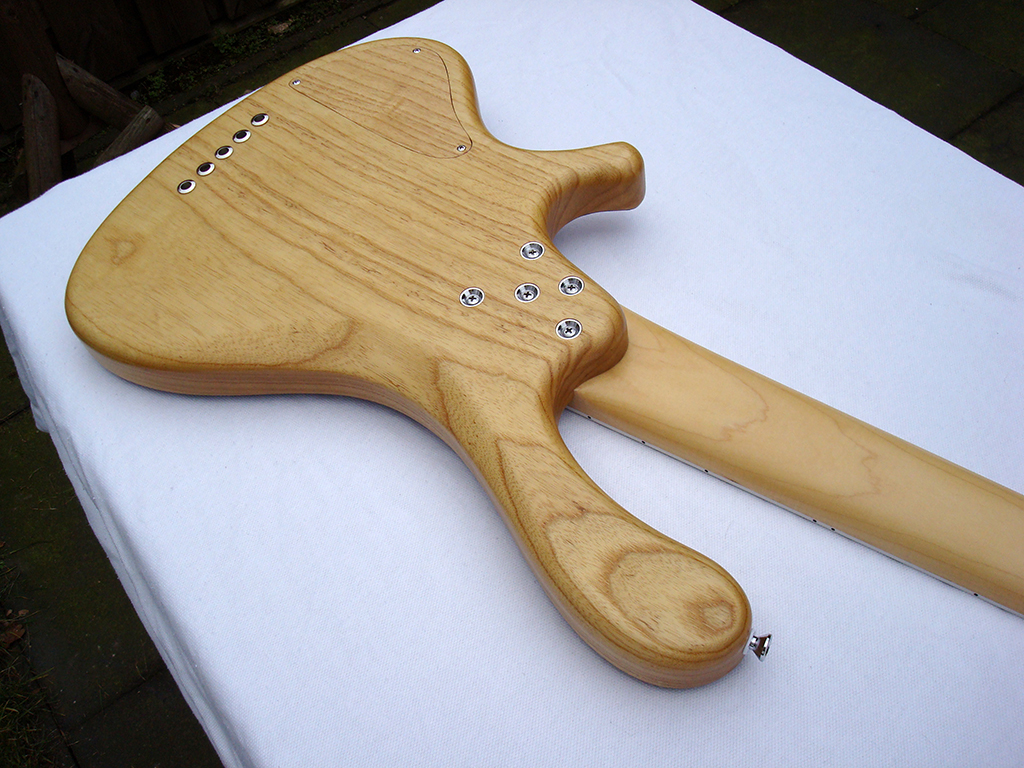
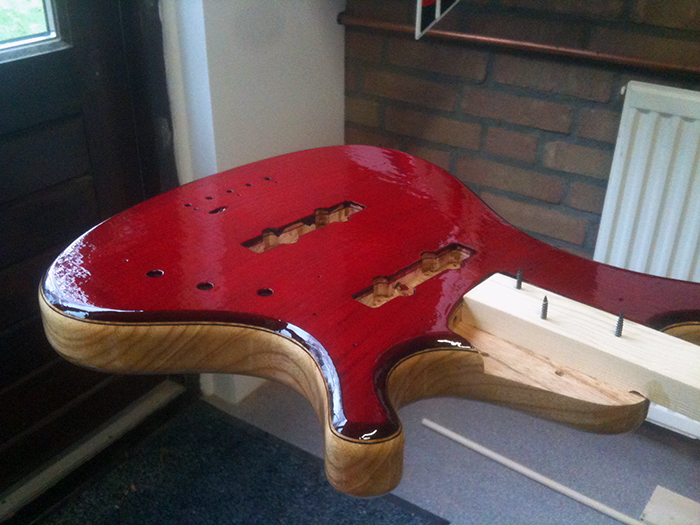
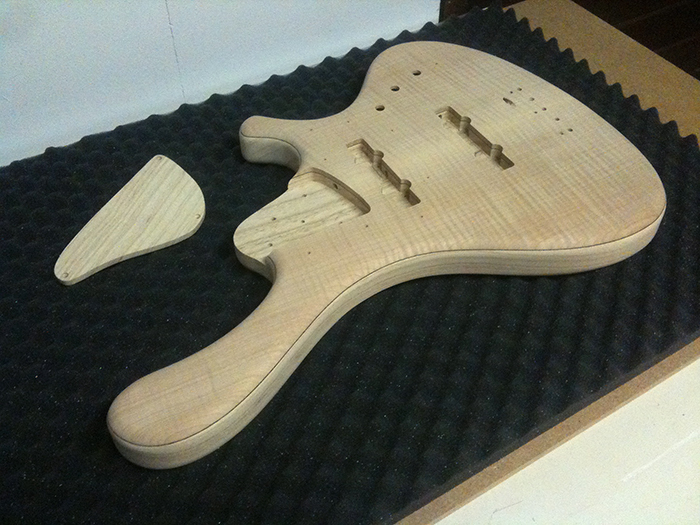
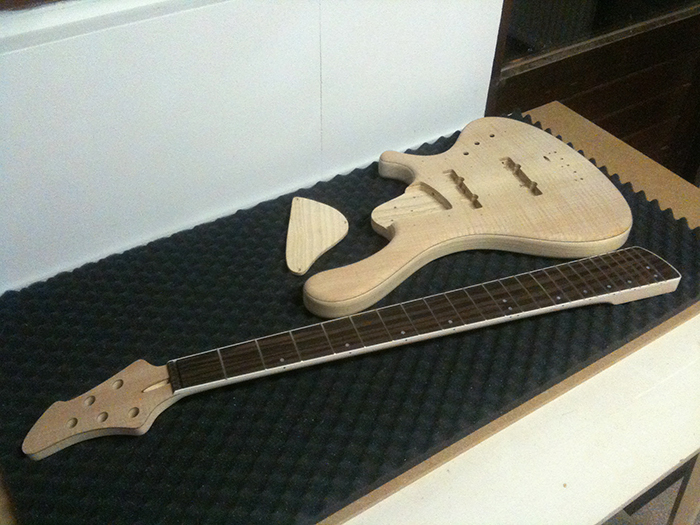
So it may not be playable yet, but it’s sure nice to look at:


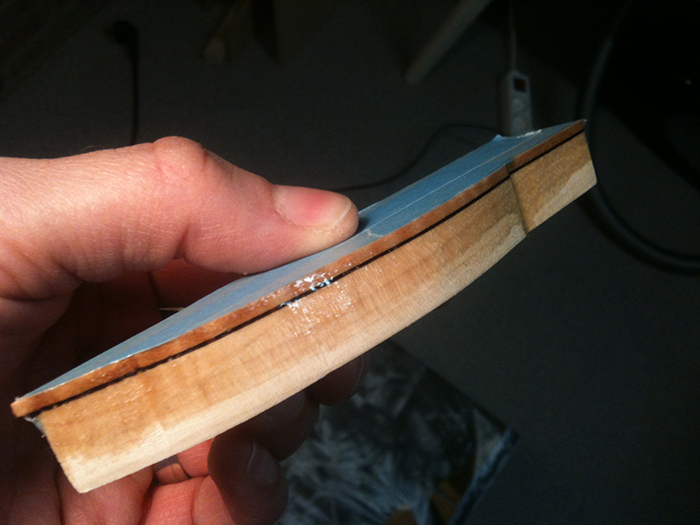
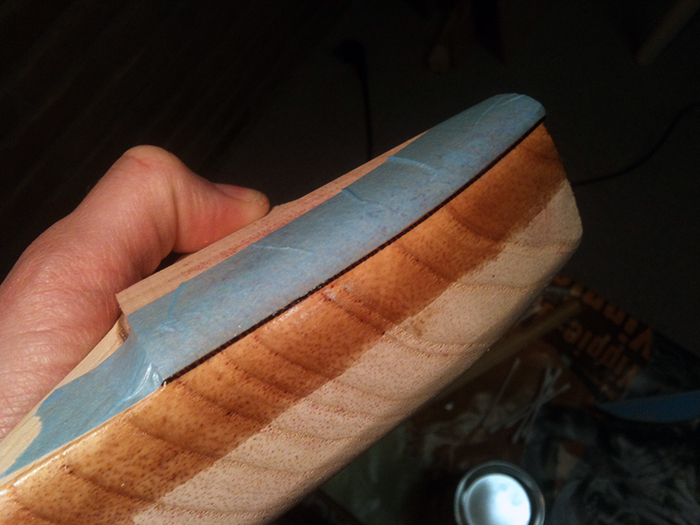
Finally, after a very long period of finishing, I am ready! Looking back, a nitro finish would have been a better choice than varnish, but I’m happy with the result nevertheless. Nitro is a rather common choice, but since I lack spraying experience, being afraid of drips and an irregular result, I opted for a brush applied varnish. While applying the finish, I learned a lot though, and with that knowledge I would’ve decided otherwise. Why? Brushing can also produce drips, but I learned how to fix them, which seemed fairly easy: let dry, cut it of with a sharp knife and wet sand afterwards. More importantly, you do not have to produce a perfectly flat finish while spraying, because the final sanding and buffing stage will take care of that. Lastly, I never wet sanded before, but that proved to be very doable and I built up enough skill during the process to produce a perfectly flat finish. So, frankly, all things needed to do a nitro finish are also part of varnishing.
But.. one welcome feature of nitro is that every consecutive layer dissolves the last one, creating one thick coat of finish in the end. A varnished finish, on the contrary, consists of separate layers lying on top of each other. This complicates the whole finishing process, because if you sand through the top layer, you will create what’s called ‘witness lines’. You can clearly see the step from one layer onto the next. The other difficulty of varnish is that it dries too slow to prevent dust nibs gathering in your finish, but too quick to spread out completely. It requires a good amount of experience and skill to apply varnish in as many coats as I did without leaving brush marks in the finish.
I was surprised how smooth and flat one can make a finished surface with wet sanding to 1500 grit or higher. If it wasn’t for the witness lines, I would’ve been able to create a perfectly high gloss finish with the varnish too. This makes me believe I would equally well have been able to do a nitro finish. To still make this project a success, I decided to go for multiple gloss coats, wet sanding inbetween and finishing off with a coat of diluted satin varnish. The satin coat hides witness lines way better than gloss coat and diluting it makes it spread better to prevent brush marks. This way, I didn’t need to sand in the final stage, omitting the witness lines problem. Besides that, doing a satin coat over multiple gloss coats gives a much deeper and less dull effect than constantly using satin varnish.
Here are some pictures of the application of the gloss varnish. In total I got up to 18 coats.
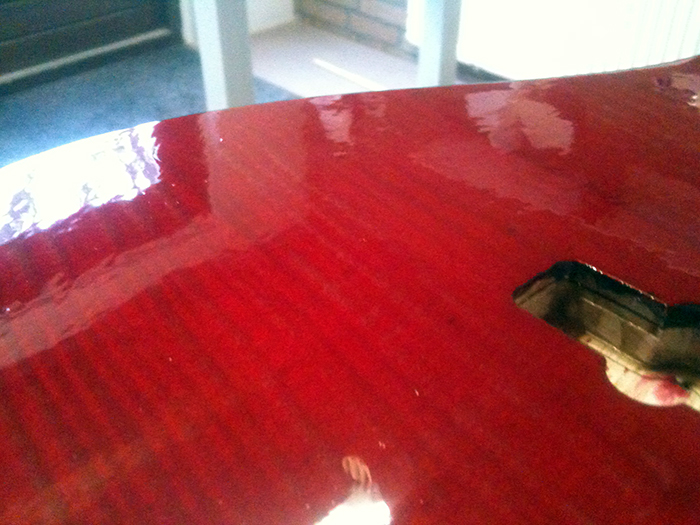
It’s a bit hard to see, but this is what I ended up with. It’s a very classy look. The gloss coat looks and feels really thick, but that immediately changes to a very thin and flat feel with the last coat of satin. I’m especially proud of the back of the neck, which looks and feels incredibly smooth.
I also made a HD video in daylight to show the feel and reflections of the finish. It’s not a great video cinematographically, so don’t mind my editing skills, camera angles and such ;)
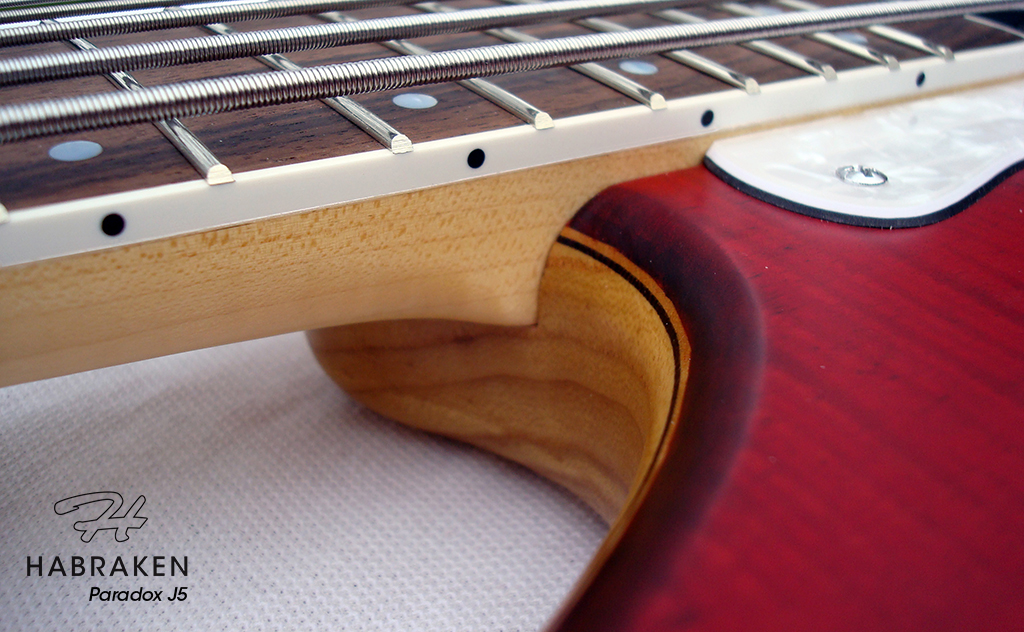
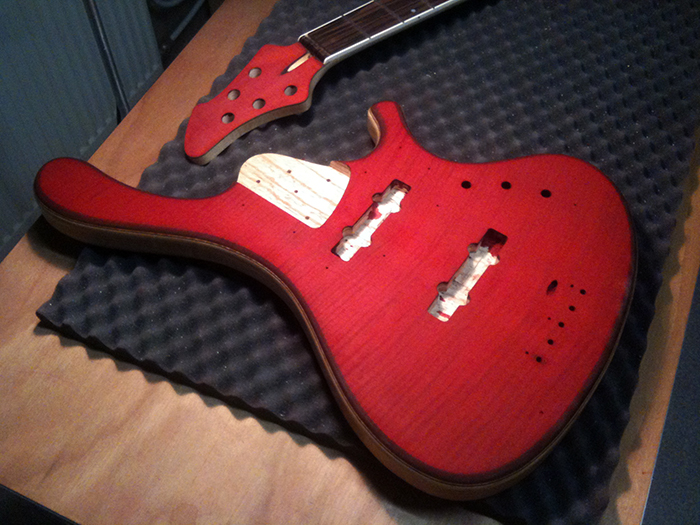
Now it’s time to put the bass together. Mounting the hardware is the easy part, soldering the electronic circuit a bit more labor-intensive, but the only real time consuming task left is that of doing the fret dressing and making a perfect bone nut.
Just a short message to fill the void. I’m currently applying multiple layers of varnish to build up a thick enough coat to rub out or polish. The eighth coat went on today, doing some wet sanding with 600 grit inbetween on the neck (the body didn’t need to be sanded yet). Depending on the results of the next upcoming coats I plan to stop around the tenth coat. If I’m there, and satisfied, I will do another blog post explaining the process, which’ll also include pictures to show the results of the third part of finishing this bass.
After the varnishing is completed, I will have to wait about a month before rubbing the finish out. Only then I can start assembling the bass; it’s a long wait, for me too, but a good finish takes some time to apply. Also, I’m learning a lot along the way, since this is the first time I’m doing a hard finish.
Another pic heavy post, to report about the second part of the finishing adventure of the Paradox… Where the first part went smooth as planned, the second one was one of trial and error. Unexpected things happened and, so it turned out, I had to fix the consequences of a deviation from my test piece in the first part of the finishing.
I started with sanding back the black dye. This step proved to be rather difficult, to get an even shade on the low and high spots of the figured maple. Also, because I applied a well concentrated layer of black stain, I had to sand considerably more and longer than with my test piece. But, the result, at least to me, looked promising:
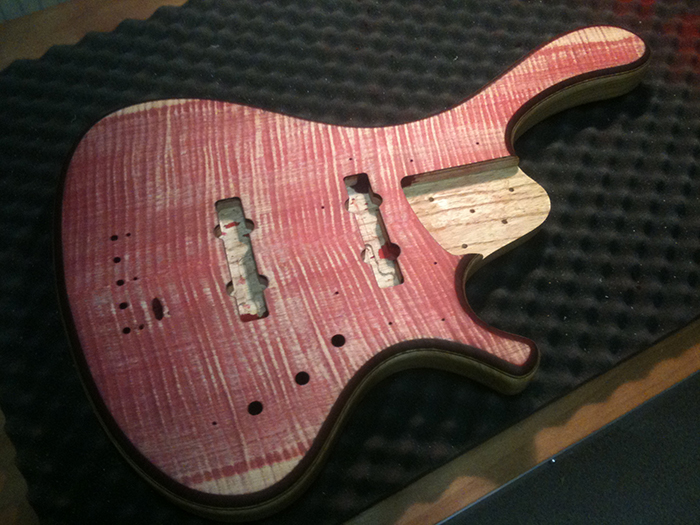
But while applying the red stain, it already became apparent that there was way too much black in the mix. It made the red a lot darker and when dry, it looked like this:
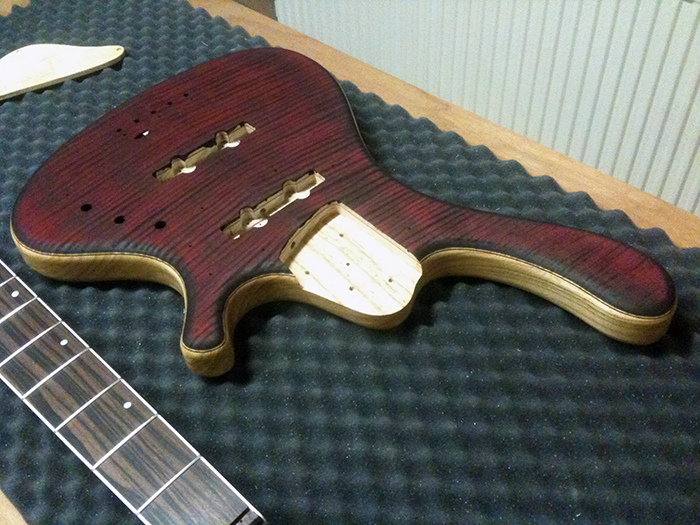
The edges look nice, the burst and flames too, but the colour is way too purple and dark compared to what I had in mind. Also, there are black patches on the top where the concentration of black is somewhat higher, making the finish irregular. This lead me to the conclusion that I used a too high concentration of black staining powder when I made the black dye. This is where I deviated from my test piece, intentionally, because I wanted a more pronounced figure. I should have really tested this change before applying it to the bass, but I didn’t see a reason why it wouldn’t work. Now, I do.
So I decided to sand back the top, again. As you can see, I went further back than the first time, and the colour in the grain is more red than black:
Because I didn’t see much black in the sanded back top I thought this would be a far better starting point. I applied a new layer of red stain:
Right after applying the stain, everything looked great! But when the top started drying, the black pulled out, creating little black dots. I found out I could work them out by polishing the top some more with a stain cloth, but they kept coming back each time. Because I worked the top a lot more than intended, the black started mixing with the red again, so I ended up with a darker and more purple red than right after applying the red stain the second time. Anyhow, this second attempt came out way better than the first one:
But, on close inspection, you could see the black spots were still present:

It’s very hard for me to understand why this happens. A lot of people use this technique, also for the first time, and I never saw this issue mentioned before. After much analyzing I suspect that this is also the result of the rich black stain mixture. If black powder particles, still undissolved, reside in the lower areas of the grain, they will be activated when the wet red stain hits the wood. Not immediately, so right after applying the red stain everything looks great, but when the black particles slowly dissolve as the red stain dries, little puddles of black stain appear, creating these ugly blemishes. Remarkably, the black dots could only be seen at daylight.
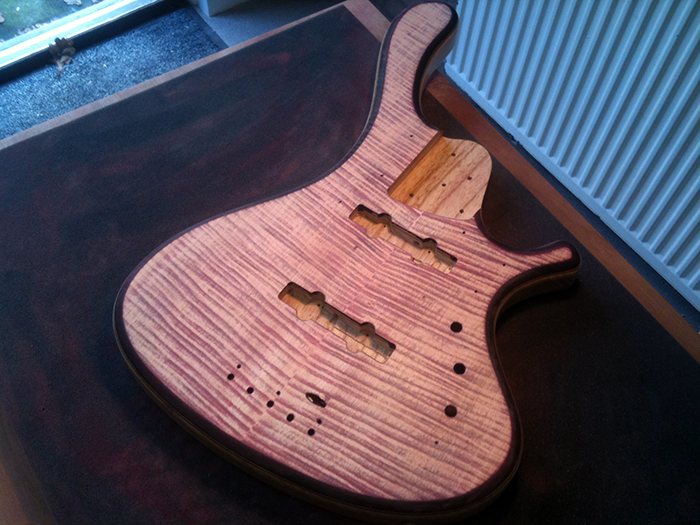
I thought about it for over a week and decided I couldn’t live with the result. So I took a deep breath and sanded the top back again:
As you can see, there was no need to go back as far as last time, because the amount of black already got to a minimum. Also, you can see plain maple streaks on the far ends of the top on both bass and treble side. This is a difference in flame and grain that’s part of the natural figure of the wood. I also saw this in the first passes and sanded those areas less to hide them, but I now discovered than the difference in height became too much and I also learned from the previous steps that this difference in figure didn’t really show after staining, so I decided to sand it flat this time.
To get it right this time I decided to change a few things: I used a smaller cloth to apply the stain, with less water, so the top dried quicker, not giving the potentionally left behind black powder particles to dissolve. Also, I made the red mix a lot more concentrated. This proved to be a good decision, as the top, once dried, looked far better than my earlier attempts:
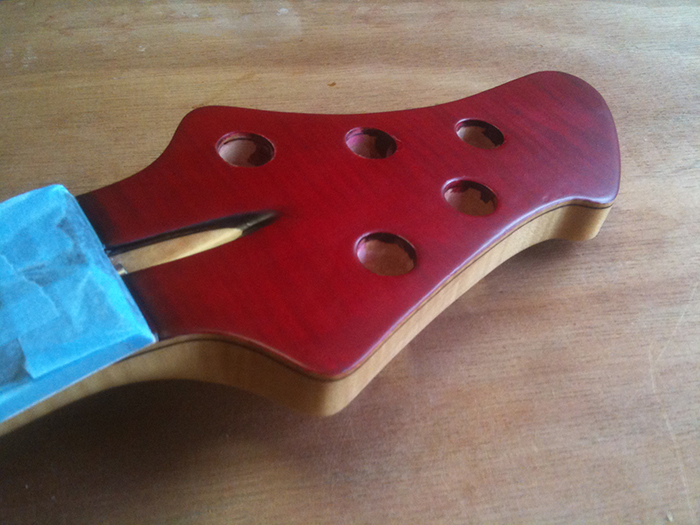
The figure is more subtle than planned, due to the black being removed along the way, but I actually like it thus far and the varnish will make it pop some more in the end. As you can see, these close ups show that the black spots disappeared to the bare minimum and the high exposed shots do show a good enough result to proceed with:
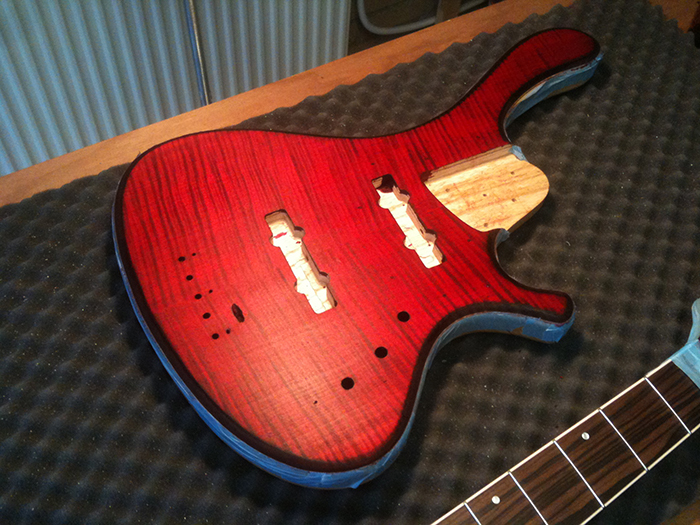
I am happy with the result, guess that third time lucky applies once again.. so I masked the bass partly to apply varnish to the top only this time:
And hit it with the a first coat of varnish:

Cool! This is going to look nice. Here are some close ups of the flames, which are more clear than I thought they would be, but more subtle than initially planned. Frankly, I like this better than my test piece after all:
Because I applied the varnish with a brush, you can see some streaks in the wet varnish, but that’ll even out due to the fact it’s oil based. The shine it has now, when wet, will also disappear partly when drying, but that does come back mostly by applying consecutive layers of varnish.
This is how it looks after a few hours, you can see it dried to a more satin finish, but very evenly. I’m happy so far!
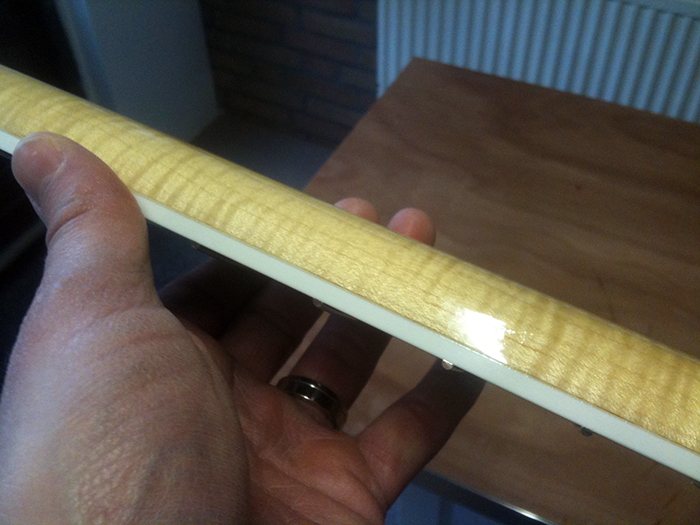
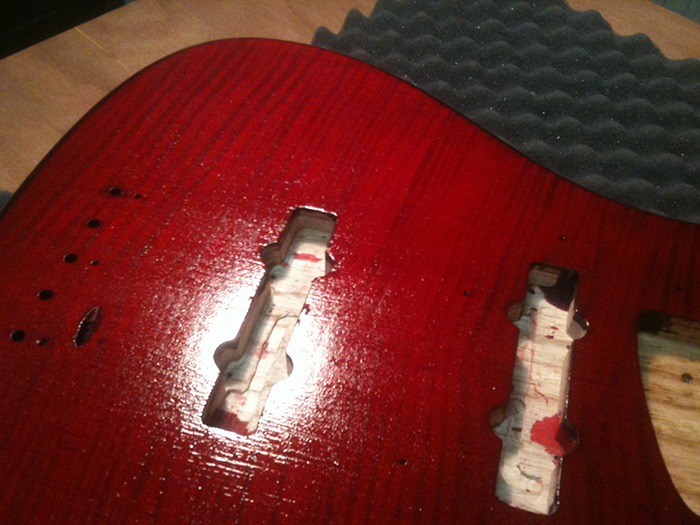
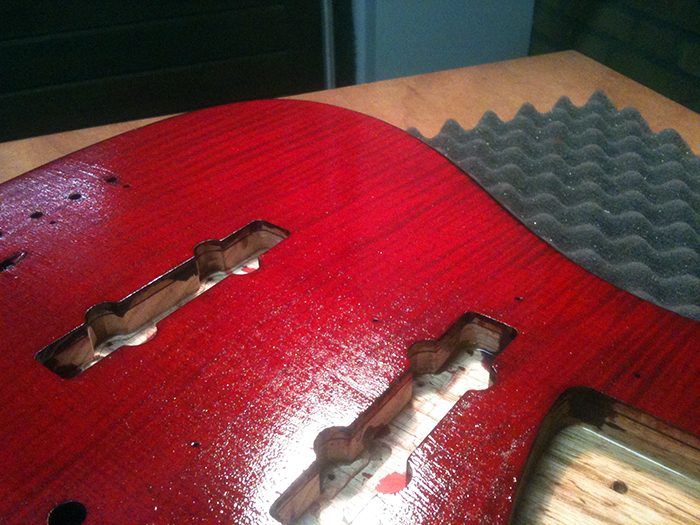
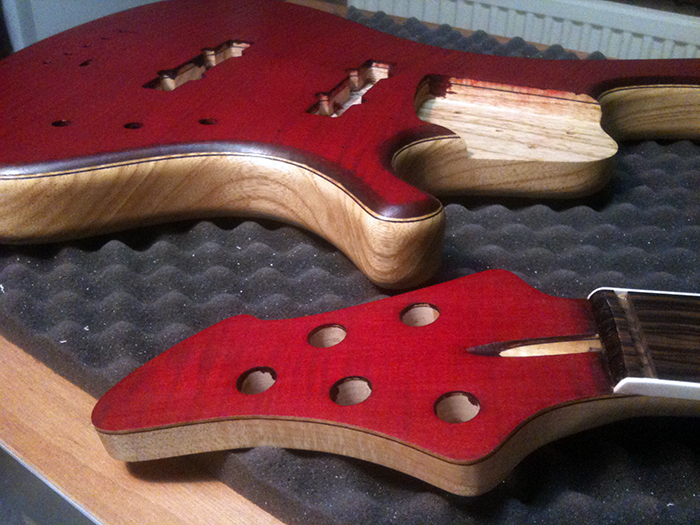
And a close up of all the laminate details both on body and headstock:
Next up will be the application of more layers of varnish, light sanding and buffing.
This is going to be a pic heavy post: part one of finishing the Paradox!
First, I masked the top of the body and the headstock, to varnish the other half of the bass, protecting it from the stain:

I do have the Wenge accent layer to disguise little mistakes, gives me some tolerance for the line between stained and clear finish. But it did bother me that the Wenge accent layer disappeared in the process. And it didn’t match the headstock, where due to only staining the top and not the sides, the Wenge is still visible.
So I decided to take the plunge and go for… faux binding!

The top of the headstock got masked right up to the edge:
Time to apply the PU varnish with a brush:

After two layers and a few hours I removed the tape. I was surprised to see that it approached clear lacquer a lot closer than I would’ve thought, although it coloured the wood slighty, but not in a bad way. The edges came out great:
Look at the flames, and that shine!
I did however learn a lesson while varnishing… I should’ve waited longer before applying the second layer, because the first one wasn’t dry enough. This made the second layer spread much less than the first one did. The first layer created a very smooth (but satin) surface. The second one made it shiny and of good thickness, but there are two areas that are a bit lumpy. So I need to sand those back until they’re smooth again before applying the next layer of varnish.
The next step in the finishing process is to mask the varnish, makes cleaning after staining unnecessary.

And.. on with the black stain! Staining went much, much better than with my test pieces. Apart from the fact that I got a bit of experience and improved a lot of small things, it’s just easier to stain a larger area that’s well prepared and sanded. The black looks heavy, kind of scary actually, but it also looks very good, surprisingly good.
After some drying time, it struck me that the flames already popped out, just with the black on it, wow!

And then, remove the tape, simply wipe off one or two small spots of black on the varnish that still crept under the tape.. et voila:

Doesn’t that look the part? So far, so good! Coming out wonderfully if I must say so myself. Makes the next steps even more scary, but there’s no way back and all is going well, so let’s enjoy the process .
Oh.. and one more thing: I will probably leave some black on on the edges, as it is next to impossible to sand back the black stain exactly to the edge without damaging the varnished edge (still need that for the red stain!). This will created a very small but strong burst around the edges. Curious if that’ll be as nice as I imagine.
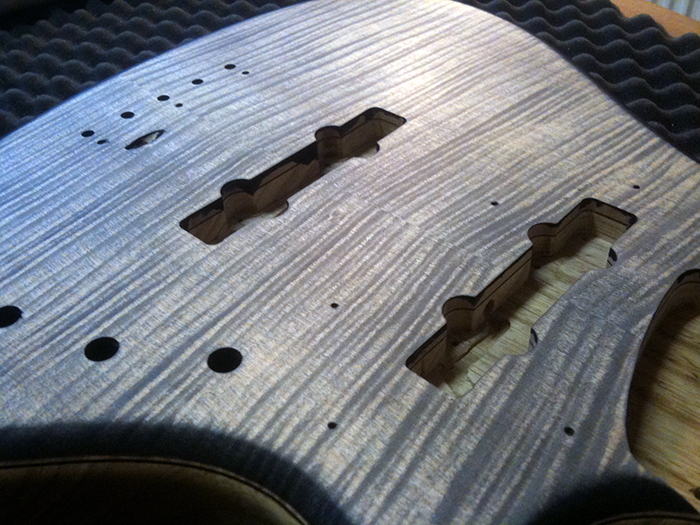
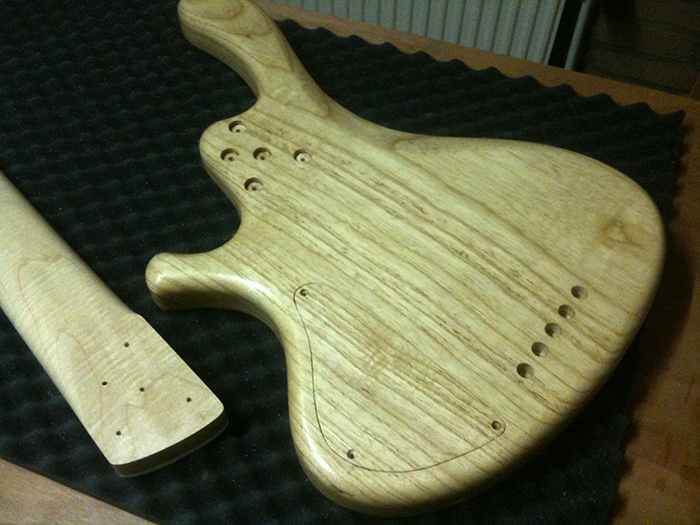
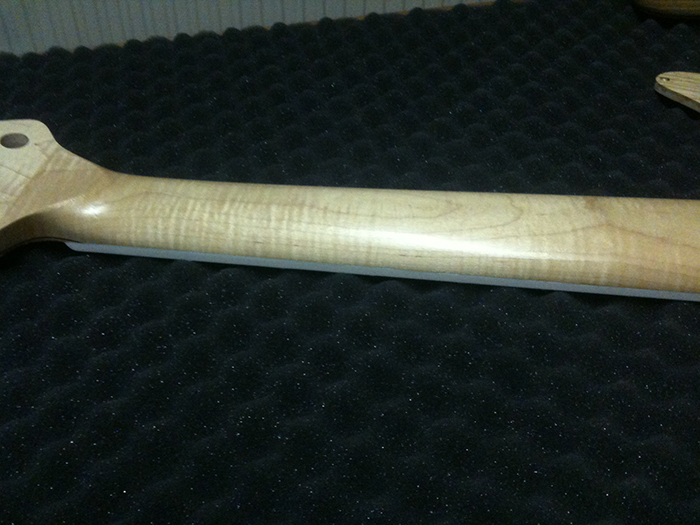
First, I checked the neck profile, decided I didn’t like it and started carving again! I concentrated almost completely on the treble side of the neck and carved it in a much tighter curve. It’s not really slim now, but about average I guess. The bass side was left almost untouched, because I felt it’s nice the way it was and I like the asymmetrical shape that emerged while doing so. This way, the neck is still of a regular thickness, not being too thin for a fiver, but it also has a more slim feel; it’s mainly the treble side that determines the playability of the neck.
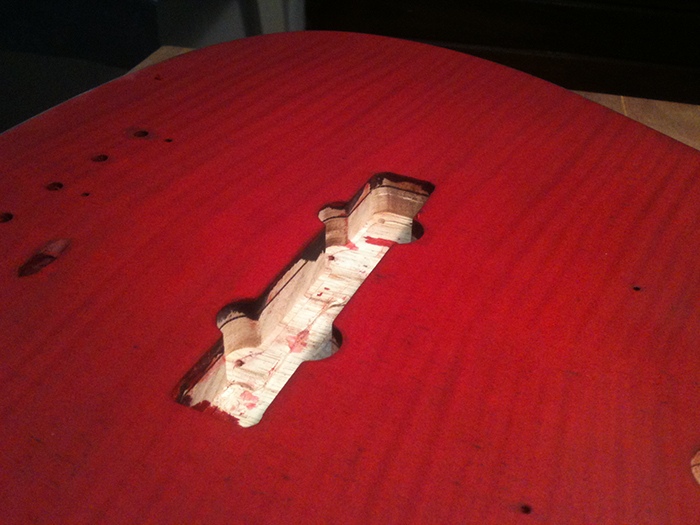
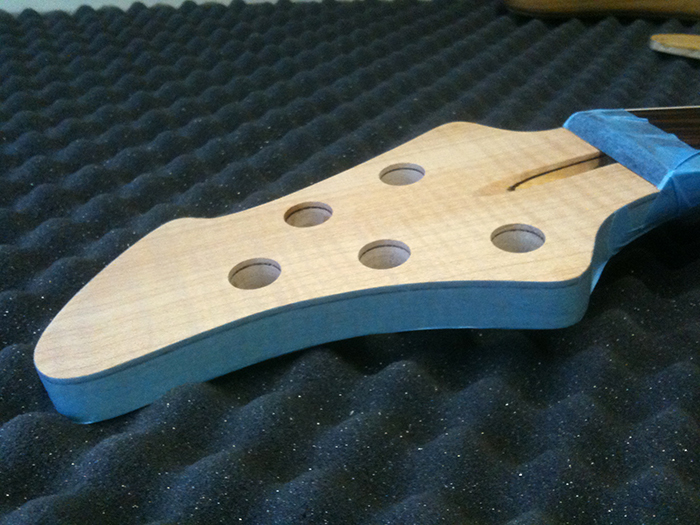
Secondly I routed some small channels within the pickup cavities for the wiring to go in. They’re not very deep and the wires are rather thick (it’s shielded wiring the Delano pickups come with), so it didn’t help all that much, but it’s a small improvement anyhow.
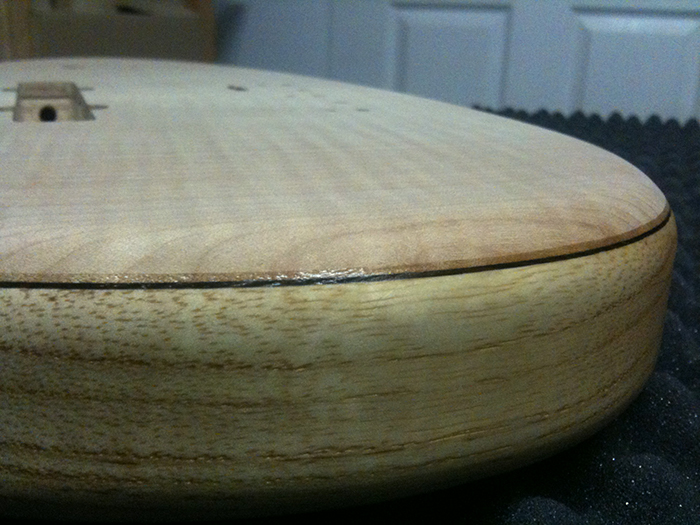
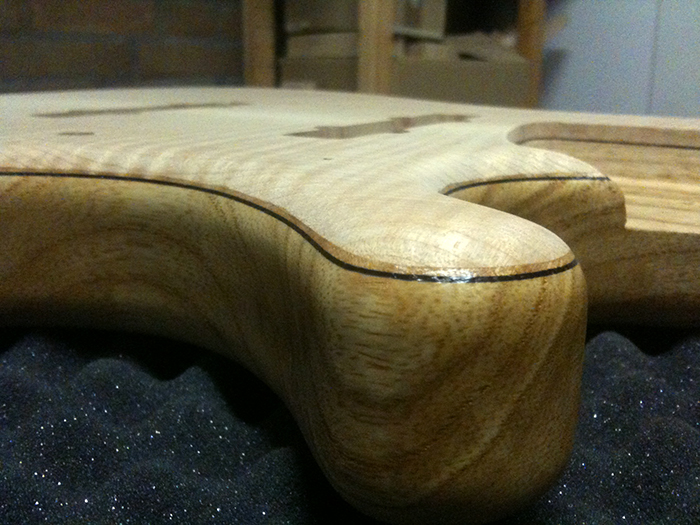
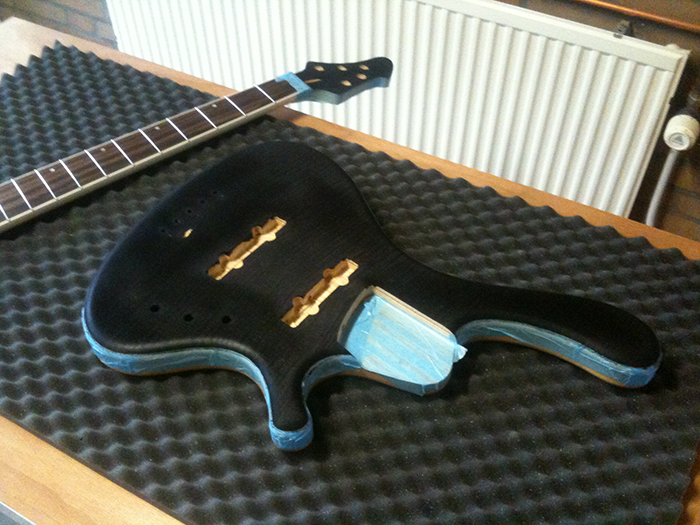
Then, I started sanding the entire bass. Because the body was sanded quite a while ago, the wood darkened and the local spots that were sanded while working on some details later on created an uneven tint. So I started with 120 grit again and worked my way up to 240 for the body and 320 for the neck. The hard rock maple of the neck already feels silky smooothhh after some tender love and care with the 320 grit sandpaper. The body and headstock face need to be sanded again rather drastically after the black stain, so I do not see any reason to go any further than 240 grit right now.
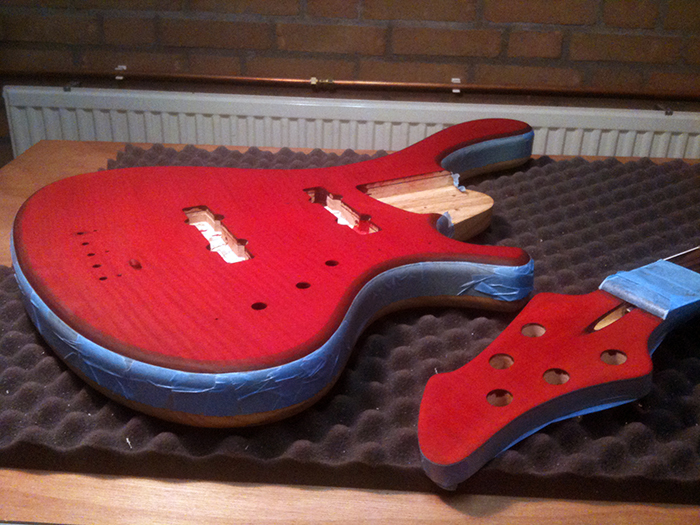
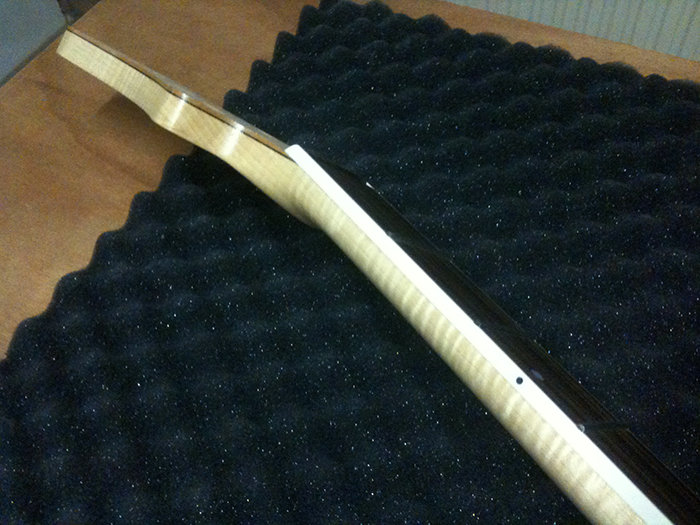
After sanding and dusting the bass off I placed the parts on convoluted foam to prevent the parts from scratching / damaging while waiting for their finish to go on.
Time for another staining test! I learned a lot from the first one and needed to test my new ideas. So I sanded back my first test piece completely, removing all red and black stain. Besides the fact that this was easier than making a new body sandwich test piece, I also wanted to see how deep the stain went into the wood.
First I sealed the headstock and body test piece sides with PU Varnish. I also bought higher quality tape (thinner, more flexible to shape around the body curves, sticks better and less paper-like but the surface feels more like plastic, repelling water). I really rubbed the tape tightly against the wood and used Q-tips to seal the wood I don’t want to stain:
Then, after the varnish dried, I removed the tape and placed new tape over the varnish. I wet the wood with water so it accepts the stain better and stained the tops black. Really rubbed it in, also along the sides. I immediately saw a difference, the stain didn’t creep under the tape:
When this dried for about half an hour, I sanded it back. Then I made some red stain and stained the tops with bright red. I did not remove the black completely, to get a darker tint of red. I also left some more along the edges of the body, to get a very small burst effect along the sides:
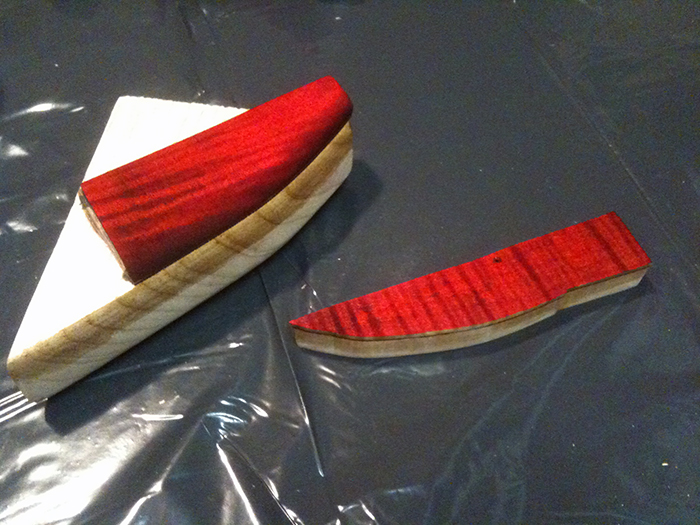
I waited as long as I could (about 5 minutes) and removed the tape. I must say it’s a major improvement opposed to the first test. Didn’t expect it to be this nice after a second attempt! The only drawback of this colour scheme is that it pretty much hides the wenge accent line:
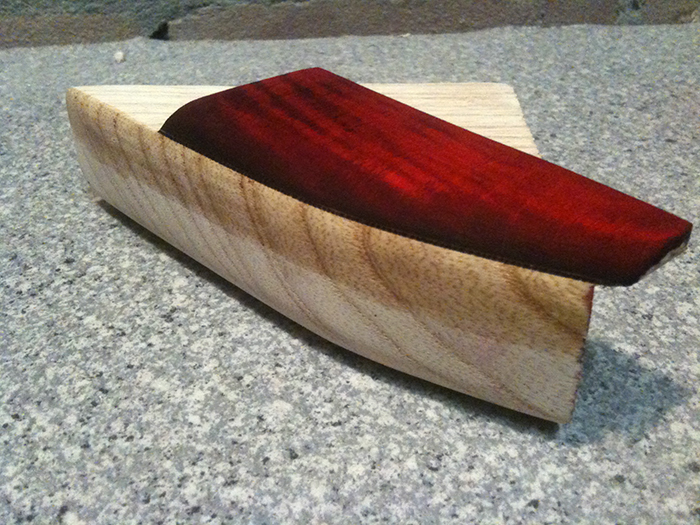
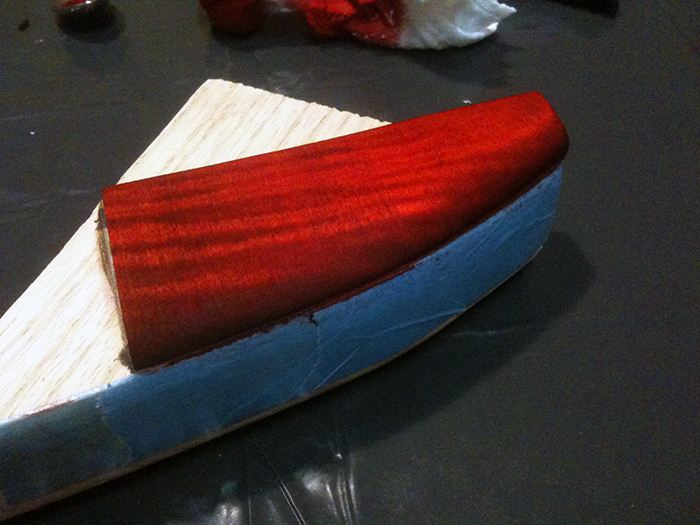
And the headstock test piece, exactly how I planned it – red top, natural maple side, wenge veneer and maple again. Cool!
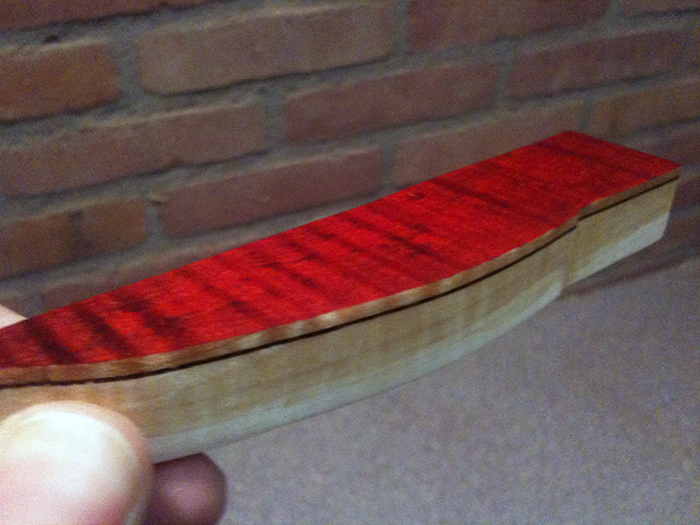
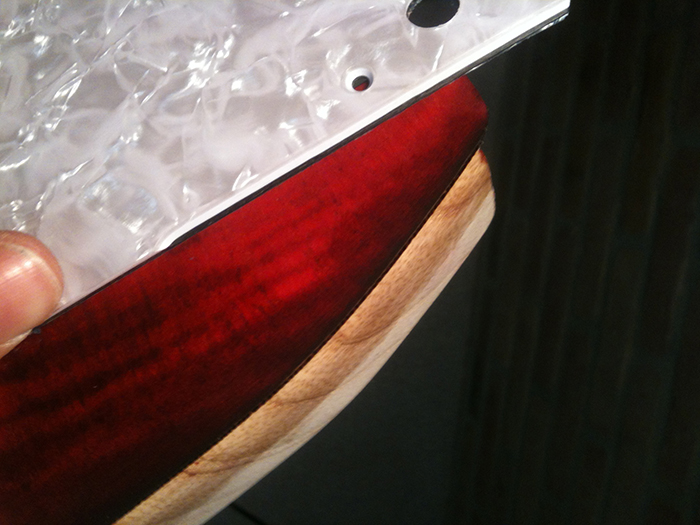
And here you can see the difference between the varnished side and the unprepared side:
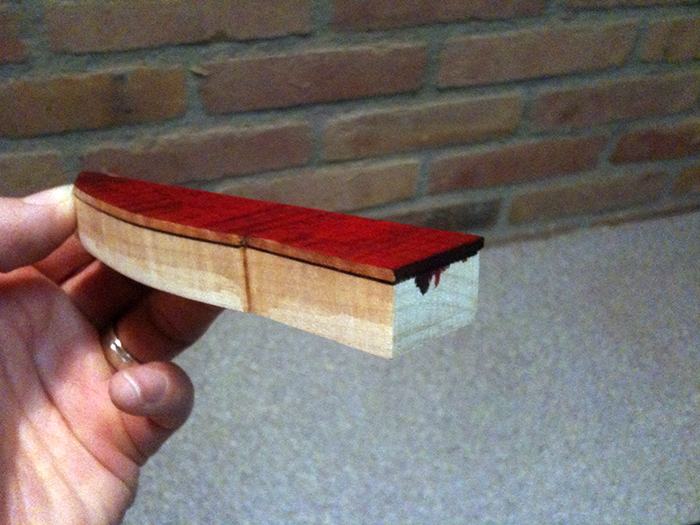
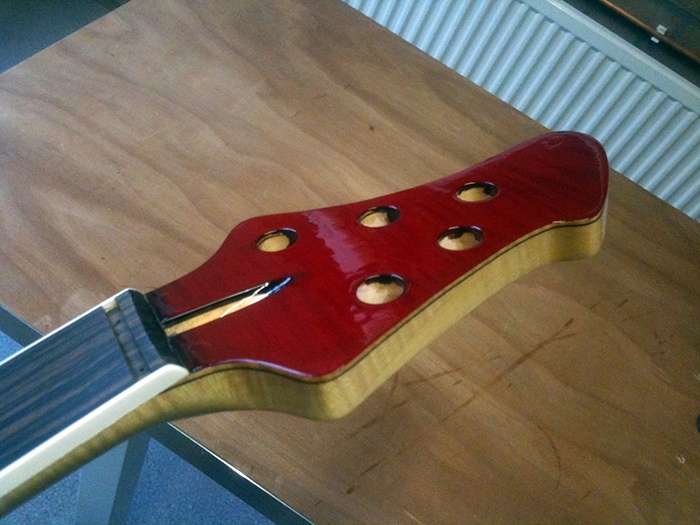
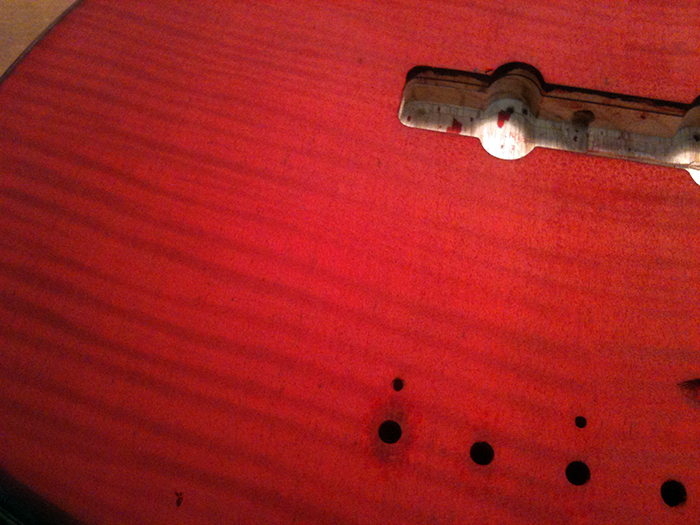
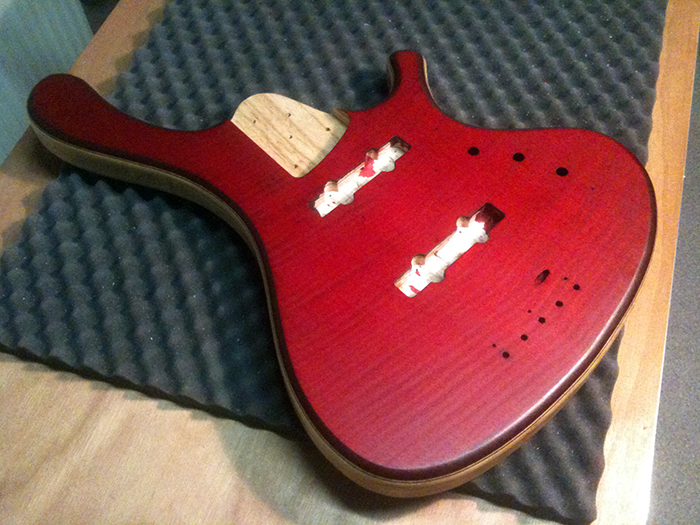
This photo shows the flames and gradient best (although the colour isn’t as bright as this, but (when dry) more towards a deeper maroon):
And one more thing I couldn’t resist, a shot with the pickguard material on the body test piece. This is going to rock:
There’s only one thing that needs to be sorted out before I can move to the real thing: