
Small break from building the rudder, back to building the custom muffler.
First, we’ve bent the front exhaust elbow in a sharper inward angle, so it will fit into the top chamber of the muffler. Being chromed copper, it was quite easy to bend by hand without deforming the original bend:
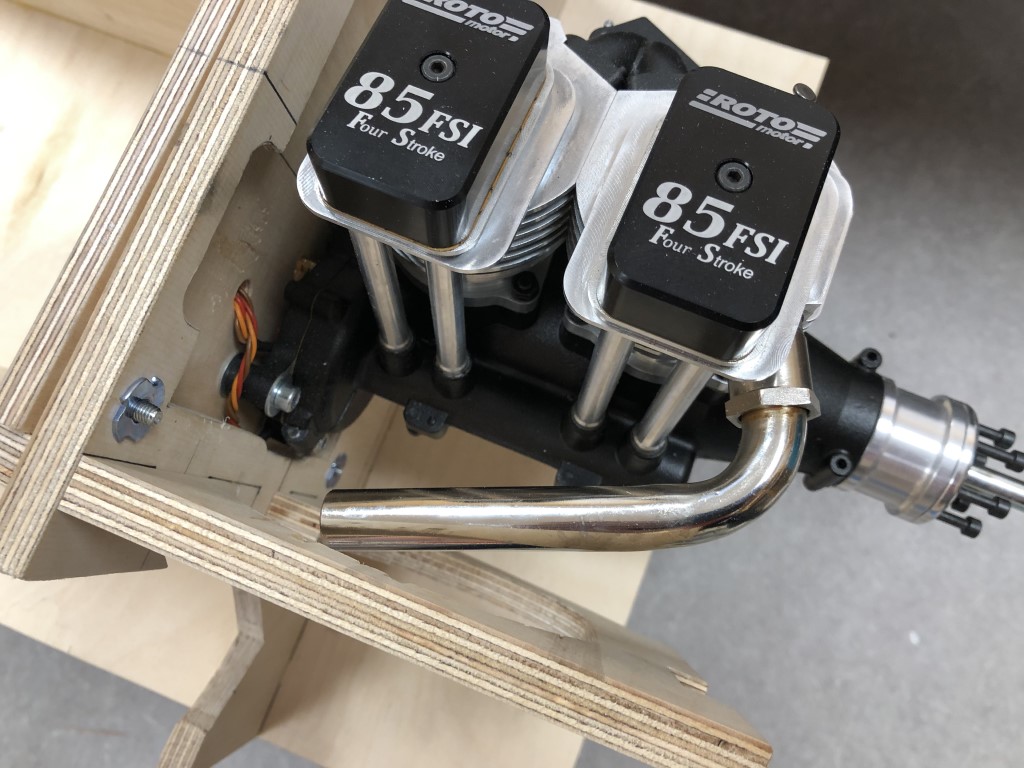
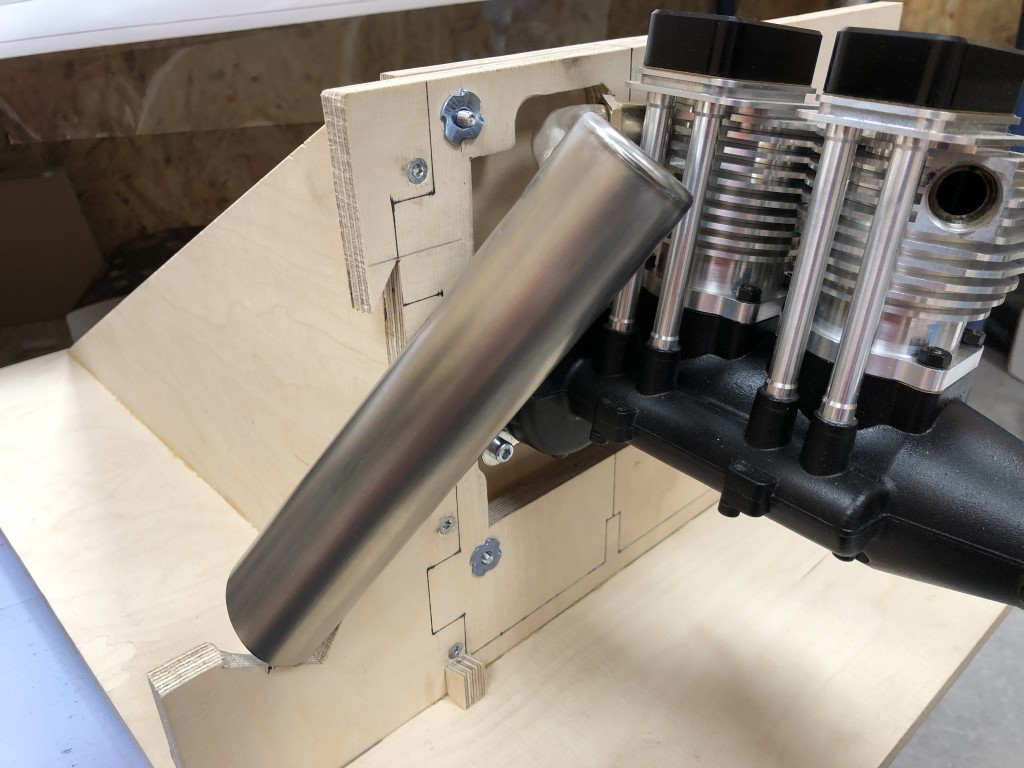
Next challenge was silver soldering the muffler to the rear exhaust elbow, that was already shaped to exactly fit the muffler housing. The muffler was inserted in the extended firewall containing the guide or template for the exhaust, the engine protected with some thick sheet metal, and we double checked the angles and position of the exhaust. Ready for soldering:
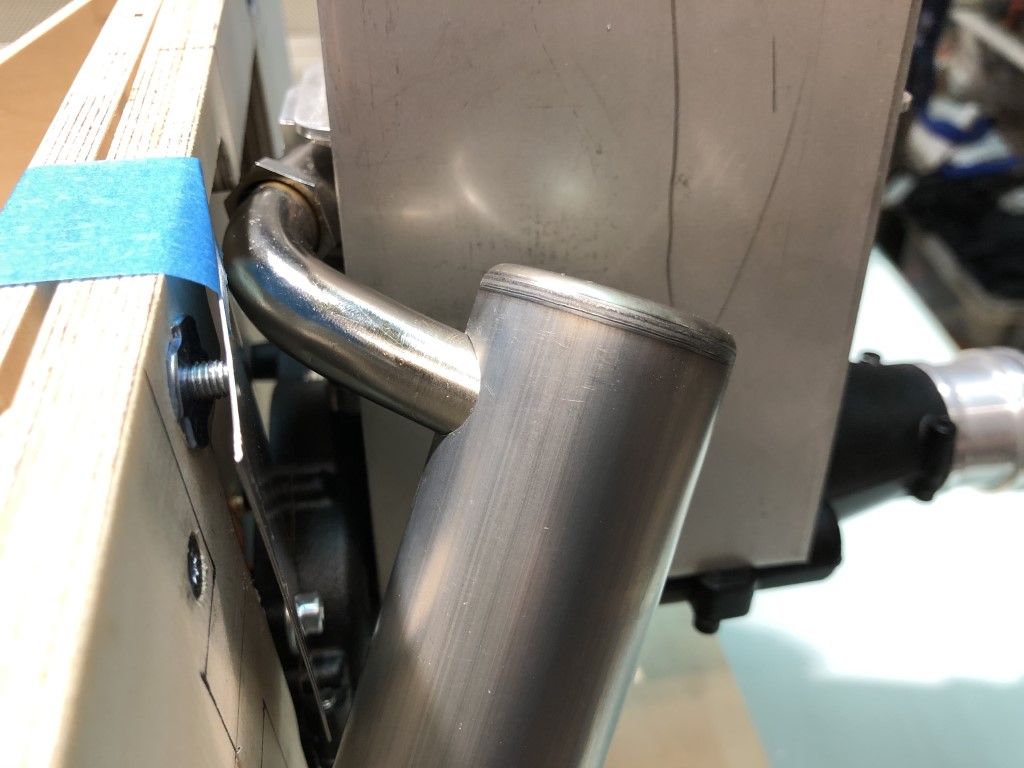
That turned out to be quite a challenge though… we didn’t want to heat up the whole assembly to let the solder flow all around the seam while it was still attached to the engine. So the idea was to only tack it in place, remove the piece from the test stand, and do the rest of the soldering on the bench. This didn’t work at first, as the tack desoldered and the geometry changed. The second attempt was successful because we clamped everything in place very firmly after moving it from the test stand and template to the workbench.
Another challenge was the fact that the materials were different. Mostly in regard to the thickness of both pieces: 1 mm thick copper and 0.32 mm thin stainless steel. It was very hard to heat up both pieces equally, which made it difficult for the solder to flow properly. It took a few more attempts before everything was water-tight, but we got there!
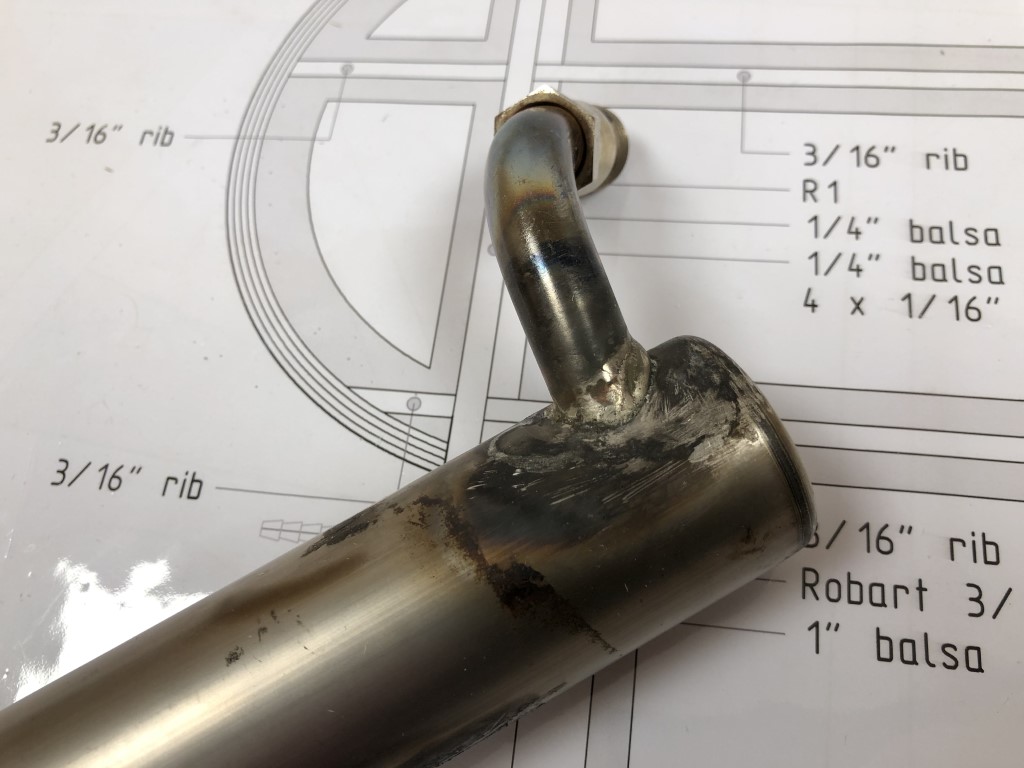
Due to the tape residue, burnt tape remnants and the excess flux the shine is gone, but the result is very rigid, water-tight and the geometry is perfect:
And after cleaning the piece and treating it nicely with some 320 and 600 grit sandpaper, a wire brush and a polishing disk it looks the part again:

And I am very pleased with the result, I think it looks awesome already:
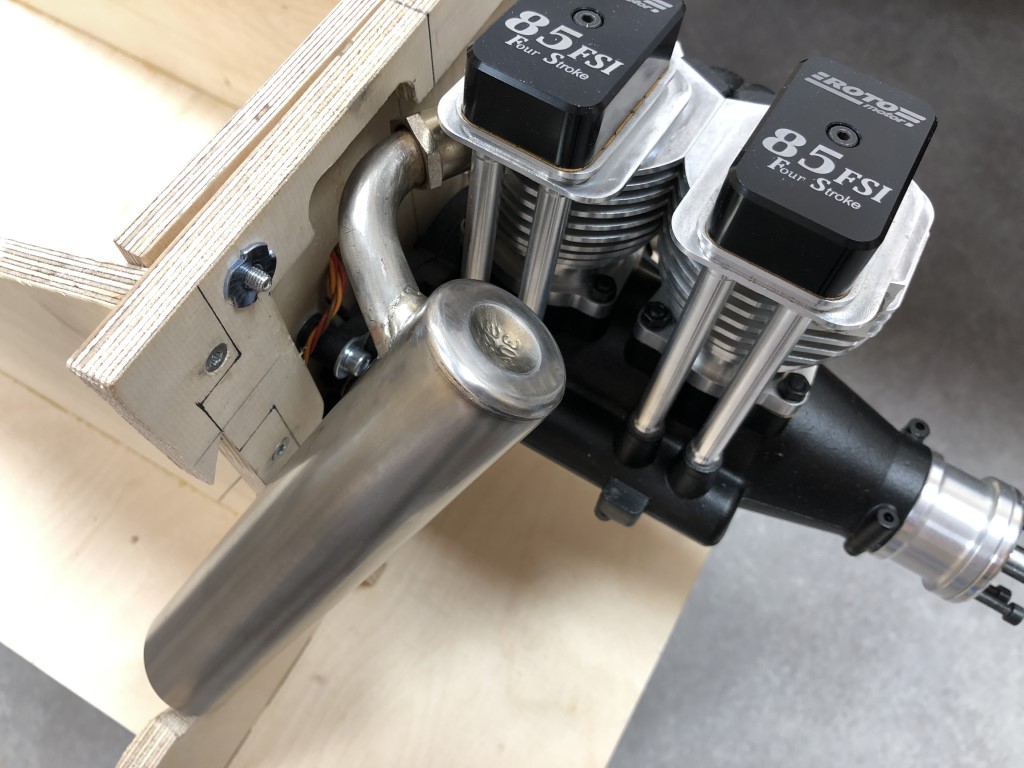
As you can see, I’ve cut away the exhaust template from the firewall, because since the assembly is attached, I needed more space to assemble the piece. And it already served its purpose, since the geometry now is stable. When the exhaust is finished completely, I will cut away the rest of the firewall extension too, so the exhaust can move freely with the engine while breaking it in:
And the angle is perfect as well! Time to move on to the next phase of the muffler build, attaching the front exhaust elbow as well:
