This is getting a slow build more and more, but I’ve got some progress to share again! What you’re seeing here is all work from the last two months, done bit by bit. The retracts required a lot of fiddling and fine tuning and for the rest I got distracted again…
The first stance test, got the landing gear in temporarily and put the recently glued wing halves on their ‘feet’ for the first time:
Here you can see the landing gear assembly in detail, it’s not very scale, but it looks way better than wire gear. And for my semi-scale Jug, they fit the bill:
Looking at the gear up position through the ribs from the top side of the wing. After a lot of fine adjustments, they fit nicely in the wing (but barely):
I then used this little fellas to make the landing gear units removable for maintenance, without wearing out the wood, which would’ve been the case with the suggested Philips screws:
And once mounted, it looks like this:
But the wing got a little surprise waiting for me when I fastened these bolts… apparently, one of the retract mounts (those ply rails) wasn’t in the same plane (geometry-wise) as the other ones and fastening these bolts actually warped the wing drastically on one side. The retracts pulled the rails straight, lifting up the wing tip. This cancelled out all my washout on one side. That’s bad! So first, I again adjusted these retract rails so the installation of the retracts didn’t change the position of the wing. Then, I literally glued the wing to the table. Or actually, I glued the wing tabs on the supplied supports, which I’ve attached to the building table with pins:
This way I am sure that the wing will be held in position during sheeting, with the correct amount of washout. And once the bottom sheeting is on, it won’t warp anymore. I can simply unpin it from my building table and break of the tabs, and I’m good to go! And since the mounting of the retracts didn’t change the wing shape anymore, I’m assured the result will be perfect.
Next step was to glue in some balsa scrap to fill up the empty areas around the retracts, for the balsa skin to rest on:
And finally, after a lot of puzzling and fine adjustments, this is how the finished gear mount looks like. It’s a drop in assembly from now on!
Time to start sheeting, starting with the bottom of the wing, of course. Each wing half is made out of four balsa sheets, butt glued together in pairs before fitting them on the wing. This places the only seam left right on the wing spar, which is an easy place to sand. Because the bend is very shallow, I didn’t use contact glue for these sheets, but my favorite aliphatic glue together with some pins and tape:
Two pairs done, two to go:
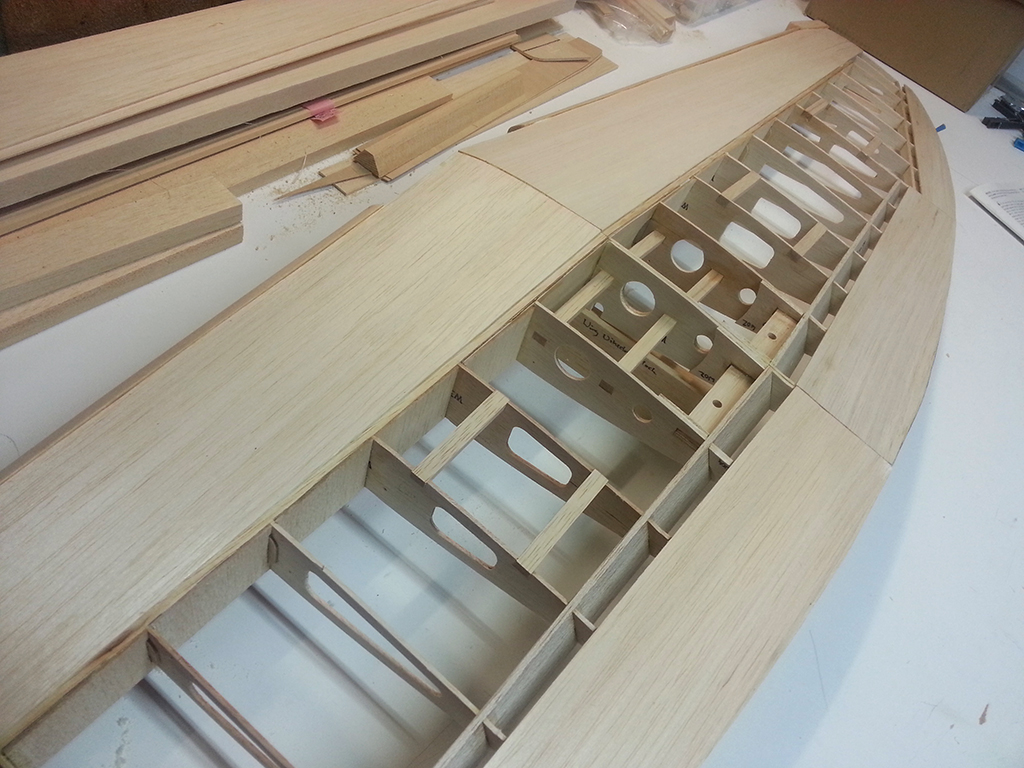
And after repeating the same procedure for the aft bottom of the wing, the underside of the wing is now fully sheeted!
I’m pleased with the result, no filler involved yet! With the wing tips on, the final span will be 63″ (~ 160 cm), and with this wing cord that’s quite a large area I must say. Definitely the largest and most complex wing I’ve built to date, but Top Flite really makes the process easy and fool proof. It not only has a dihedral and a round taper, it also has a second spar towards the tips, built-in washout, different airfoils towards the tips and it also tapers in thickness quite a bit. I wouldn’t get my head around this in a scratch build I guess..
Next time I am going to prepare the bottom side of the wing for the top sheeting, which means creating the servo hatches and the landing gear cutouts. After sheeting the top, it’s time to make those control surfaces operational. To be continued!


