
… and I’m back again!
Cleaned out the shop, made some space again and started working on the bass. It’s not so warm anymore outside and it’s dark right after dinner, so we’re having better building conditions I guess.
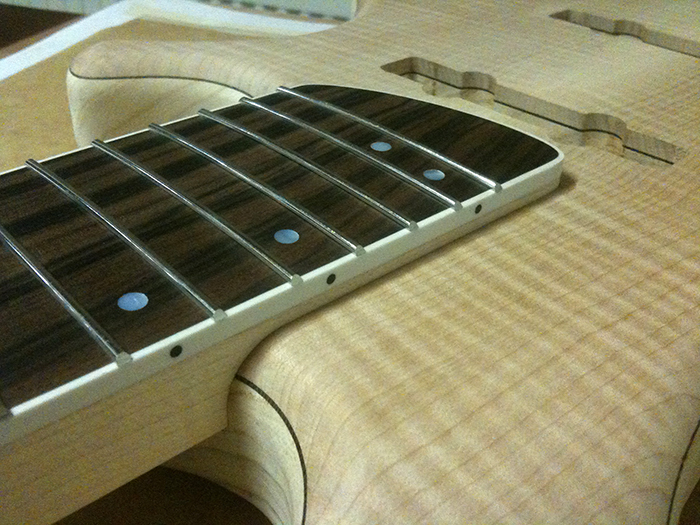
I needed some motivation to start with and tried the neck with fingerboard, position marker dots, binding and frets on for the first time in it’s future home. I found it a pleasure to look at, seeing the body laminates, neck woods binding, markers and such coming together (but still without the pickguard):
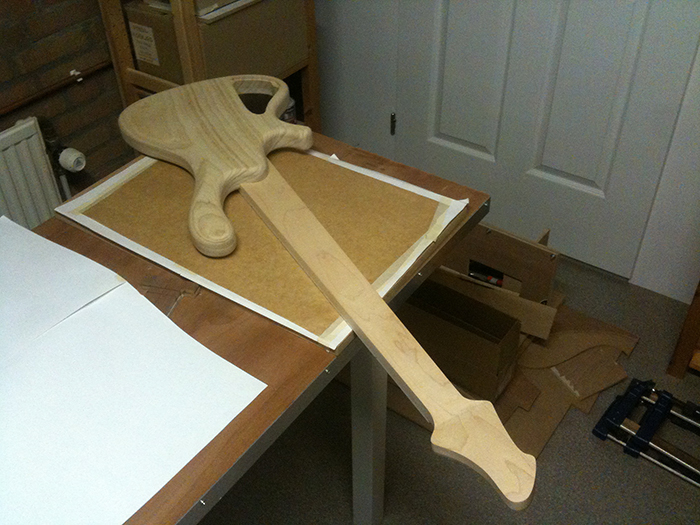
I also made this preview shot of the back for the first time. It’s cool and a bit understated opposed to the front (even more with the intended pickguard on it), but that’s a cool contrast I think:
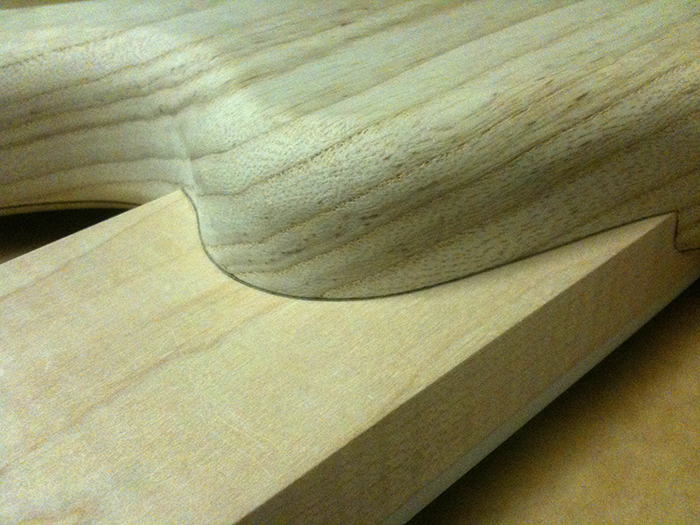
So, I marked the shape of the heel transition as a guidance for shaping the neck while it’s in there:
And the next step was to make a jig for routing the slope of the neck shape into the unshaped neck. I do not want to make this angle and straight line from the heel to the volute by hand, so I’ll route the correct angle in there before I start carving the neck. So tonight I made this:
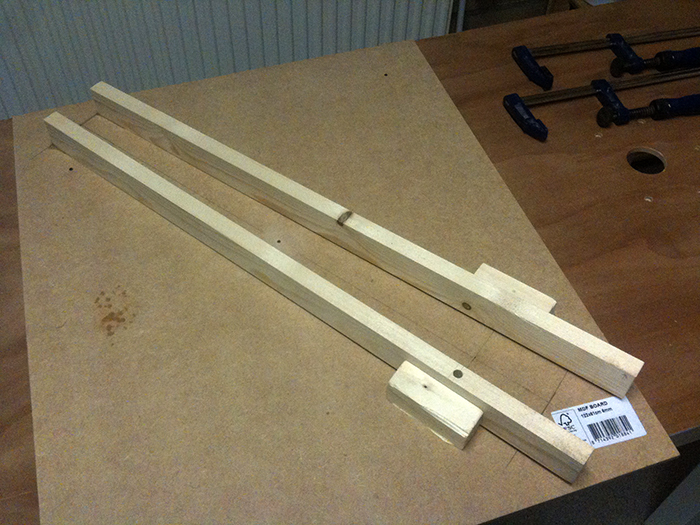
It’s a tight fit around the neck, one or two clamps should be enough to fix it while routing. I only need to build in some stops to prevent cutting into the heel or the volute. I made the angle by drilling a hole and putting a dowel in at one end, which I then adjusted until I got the right angle, securing it with thin CA afterwards. Then I glued some blocks I had lying around to the rails to fix them in place and make them sturdy enough (otherwise they would rock on the dowels). The other end of the rails is secured by thin CA too. Very quick and easy to make.
So, when this is fully cured and I’m feeling lucky, I’ll starting routing the neck. That would be the last routing job on this instrument. After that it’s only hand shaping, drilling and sanding what’s left…